Uploading Leads to Roistat
Why you need to upload the leads to Roistat
The leads must be uploaded to Roistat to use the information about them in Analytics.
There are two methods of uploading the leads to Roistat:
1. Leads are uploaded from CRM to Roistat. This method is suitable if your website is already configured to send leads to CRM. In this case, leads are uploaded to Roistat after connecting CRM to the Roistat project. The setup is simple: you only need to create an additional field in CRM and add a script to the site so that it is automatically filled in with a unique visit number.
Use this method if the automatic sending of leads from the website to CRM is already configured and you don't want to make any changes.
2. Leads are sent from Roistat to CRM. When using this method, leads from the website are first sent to Roistat (Integrations → integration settings → Sent leads), and then to CRM.
This method is more reliable. If CRM was not available at the time the lead was created, the lead will not be lost and will be created in CRM when access becomes available (attempts to send the lead will continue every 30 minutes for the next two days). At the same time, the new CRM will not receive the wrong leads, since the transfer of leads is configured individually for each CRM.
The setup is a little more complicated: you need to make changes to the data sending script that is already used on your website.
Use this method if the leads from the website are sent to email, and your managers create them in CRM manually.
Roistat refreshes the data about the leads that were changed in CRM at regular intervals. The date of creation of these leads does not matter.
You can see the frequency of refreshing the information about the leads on the Project status page.
By default, Roistat requests from CRM the data on the leads that were changed during the last 7 days. If you had no access to your CRM for more than 7 days, contact our customer service.
How to configure the upload of leads from CRM
Create an additional field
When a client visits your website, the information about the visit is saved in your browser. To bind the visits to the leads in CRM, Roistat utilizes the visit number. Visit number is the unique number of the visit that is written in the roistat_visit cookie. The containment of this cookie must be transmitted to CRM with the created lead. To do it, you must create additional field Roistat in CRM.
Configuring the script
Add the script that receives the value of roistat_visit cookie to your website before sending the data to CRM.
Example of the script:
$roistatVisitId = array_key_exists('roistat_visit', $_COOKIE) ? $_COOKIE['roistat_visit'] : 'nocookie'
How to configure the sending of leads to CRM
Create an additional field
Create an additional field named roistat that will contain the visit number.
Configuring the script
-
Open your website server and find a file that processes the form of the lead. For example, this file may be a script that sends the data from the form to to email.
-
The data in this file must be in UTF-8 encoding.
-
Add the Roistat script to this file. The script will collect the data from the lead and send it to Roistat. On the basis of this data, Roistat will create a lead in CRM.
Example of the script:
<?php
$roistatData = array(
    'roistat' => isset($_COOKIE['roistat_visit']) ? $_COOKIE['roistat_visit'] : 'nocookie',
    'key'     => 'value', //value is the integration key from your Roistat project
    'phone'   => 'value', //value is the client's phone number or variable that receives this number
    'email'   => 'value', //value is the client's email or variable that receives this email
    'fields'  => array(), //array that can be filled to receive the values of additional fields or can be left empty
);
file_get_contents("https://cloud.roistat.com/api/proxy/1.0/leads/add?" . http_build_query($roistatData));
Please note:
Client's phone number and email are mandatory fields. You have to transmit at least one of them, or lead will not be created.
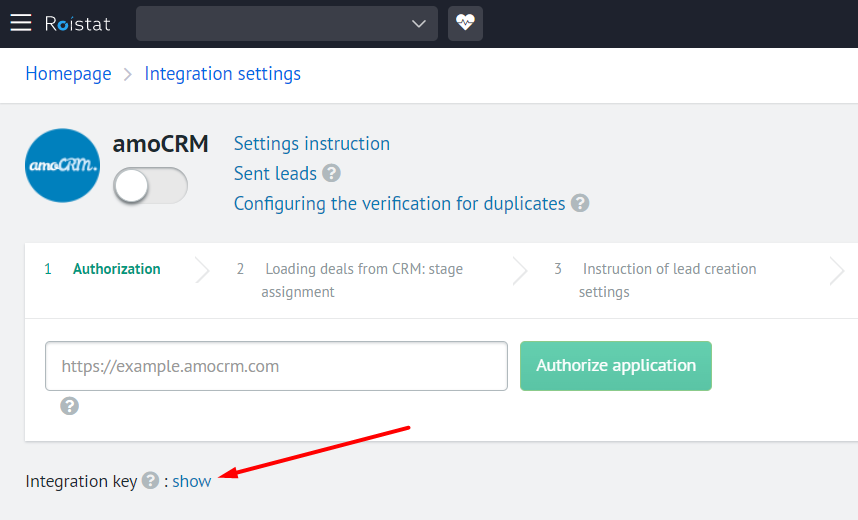
Integration key must also be entered. Without integration key, the upload of leads will not work. You can find the integration key in the integration settings:
Additional settings
These settings are useful, but not necessary. If you want only to transmit the standard fields of the lead to CRM and don't need to configure the callback and verification of incoming leads for duplicate, go to configuration testing phase.
Callback
If a client left their phone number in the form of the lead, you can automatically call them back. To do it, you need to activate the callback in the Lead Hunter settings and specify your manager's phone number for callback.
Transmission of additional fields
You can create the additional fields of leads in your CRM and automatically fill them using the Roistat service when a lead is created using the website form. For example, you can appoint a responsible manager by transmitting his ID to the field in CRM.
The formats and names of additional fields in each CRM are different. To transmit their value, you have to know their ID. If you don't know the ID of these fields, contact your CRM customer service.
Many CRM's have API. With the help of API-method, you can upload your leads and check out their fields and ID of these fields.
The usage of variables
You can use the variables to transmit the value of the visit to some fields of the lead. For example, you can transmit the name of the city to the additional field in CRM from which the client visited your website and made a lead.
You can use the variables in the following fields of the leads:
- title
- comment
- name
- additional fields
You can use the following variables:
| Variable | Value |
|---|---|
| {agent} | Visitor browser |
| {callee} | Dialed number (if leads are sent by Roistat Calltracking) |
| {caller} | Client phone number (if leads are sent by Roistat Calltracking) |
| {city} | Visitor city |
| {country} | Visitor country |
| {date} | Visit date |
| {domain} | Site domain |
| {email} | Email provided by the client |
| {facebookClientId} | The fbclid value assigned by the Facebook counter. Also, this variable can be used to record facebookClientID in email tracking and in sending requests from site forms. |
| {firstVisit} | First visit number |
| {googleClientId} | The ClientId value assigned by the Google Analytics counter. Also, this variable can be used to record googleClientID in email tracking and in sending applications from site forms. |
| {ip} | Visitor IP address |
| {landingPage} | Landing page |
| {markerSource} | First source level |
| {metrikaClientId} | The ym_uid value assigned by the Yandex.Metrica counter. Also, this variable can be used to record metricaClientID in email tracking and in sending requests from site forms. |
| {name} | Name provided by the client |
| {orderCreationMethod} | Lead creation method (Calltracking, Lead Hunter, etc.) |
| {orderPage} | The page from which the lead was sent. Works for leads created using Leads from the website forms |
| {os} | Visitor OS |
| {phone} | Phone number provided by the client |
| {referrer} | The page the visitor came from |
| {region} | Visitor region |
| {roistatParam1} | roistat_param1 tag value |
| {roistatParam2} | roistat_param2 tag value |
| {roistatParam3} | roistat_param3 tag value |
| {roistatParam4} | roistat_param4 tag value |
| {roistatParam5} | roistat_param5 tag value |
| {source} | Source (marker) |
| {sourceAliasLevel1} | Human readable level 1 source (marker) name |
| {sourceAliasLevel2} | Human readable level 2 source (marker) name |
| {sourceAliasLevel3} | Human readable level 3 source (marker) name |
| {sourceAliasLevel4} | Human readable level 4 source (marker) name |
| {sourceAliasLevel5} | Human readable level 5 source (marker) name |
| {sourceAliasLevel6} | Human readable level 6 source (marker) name |
| {sourceAliasLevel7} | Human readable level 7 source (marker) name |
| {sourceLevel1} | Level 1 source (marker) value |
| {sourceLevel2} | Значение источника (маркера) уровня 2 |
| {sourceLevel3} | Level 2 source (marker) value |
| {sourceLevel4} | Level 3 source (marker) value |
| {sourceLevel5} | Level 4 source (marker) value |
| {sourceLevel6} | Level 5 source (marker) value |
| {sourceLevel7} | Level 6 source (marker) value |
| {utmCampaign} | Visitor's utm_campaign tag value |
| {utmContent} | Visitor's utm_content tag value |
| {utmMedium} | Visitor's utm_medium tag value |
| {utmSource} | Visitor's utm_source tag value |
| {utmTerm} | Visitor's utm_term tag value |
| {visit} | Visit number |
| {visitor_uid} | User ID value in amoCRM |
Example of using the variables
$roistatData = array(
    'title' => 'New deal {visit}', //Add the visit number to the title of the deal
    'name' => 'Client's name {visit}', //Add the visit number to the client's name
    'comment' => 'utm_source: {utmSource}, utm_medium: {utmMedium}, utm_campaign: {utmCampaign}', //Transmit the utm-tags to the comment of the deal
    'fields' => array(
        '1276733' => '{city}', // Save the city of the visitor in the additional field 1276733
        'tags' => 'Тег1, {utmSource}, {utmMedium}, {utmCampaign}', // Save the values of utm-tags in tags
    ),
);
file_get_contents("https://cloud.roistat.com/api/proxy/1.0/leads/add?" . http_build_query($roistatData));
Checking for duplicates
Checking for duplicates allows you to filter out duplicate leads. Thanks to this, unnecessary data is not stored in CRM, and you can also create accurate statistical reports.
More about checking for duplicates
Approval of deal creation in CRM
Use the 'sync' => '1' parameter if you want to receive the approval of deal creation from CRM after sending a lead from the website to Roistat. If the deal is created successfully, the script will return its ID. It may be useful to show a client the number of order after the creation of the deal. If the deal cannot be created, you will see the error message instead of ID.
Example of using
$roistatData = array(
    'roistat' => isset($_COOKIE['roistat_visit']) ? $_COOKIE['roistat_visit'] : 'nocookie',
    'key'     => 'SECRET_KEY'
    'title'   => 'Title of the deal',
    'name'    => 'Client's',
    'phone'   => '11231234567',
    'sync' => '1',
);
Performance testing
Create the lead from the website. If everything is configured well:
- the new deal will appear in Sent leads;
- the visit number will appear in the Promo code field;
- the successful status of lead will appear in the Sent field;
- the new lead will appear in CRM.
You can export the list of leads to Excel. To do it, select the period and click the Download button:

Troubleshooting
Lead from the website does not exist in Sent leads
It means that the lead is not sent from the website to Roistat or cannot be received by Roistat. Possible causes:
- Problems with your website server.
- Error in the script.
How to solve:
-
Change the last line of the script from this:
file_get_contents("https://cloud.roistat.com/api/proxy/1.0/leads/add?" . http_build_query($roistatData));to this:
file_get_contents("http://cloud-reserved.roistat.com/api/proxy/1.0/leads/add?" . http_build_query($roistatData));Save the changes and try to create the lead on the website once again. If it does not appear in the Sent leads, ask your provider why the data is not sent to the following addresses:
-
Check out the script for errors with the help of code checker.
Lead from the website exists in Sent leads, but does not exist in CRM
If the lead is not sent to CRM, it is marked with the cross icon. Possible causes:
- Integration with CRM is not configured or you don't have the access to CRM.
- You do not have enough rights to create deals in CRM.
- CRM does not have mandatory fields that are filled while sending the lead.
What to do:
- Check out if the data is specified correctly in the integrations settings page.
- Check out if your CRM account has rights to create deals.
- If CRM has mandatory fields that must be transmitted in the script, make these fields optional.
- If these fields must always be filled, add them to script and set them the value.
If something does not work, contact our customer service.