Quick Start
This guide will help you start using Roistat.
Step 1. Signing Up
You have to sign up to start using Roistat.
You can use Roistat free for 14 days. When the trial period is over, Roistat automatically sets the appropriate rate plan depending on the number of projects and visits. To change the rate plan, go to the Profile → Balance and Plan page.
Rate plans list
More about balance and plan
After you sign up, you’ll see the Roistat interface and built-in instructions on how to set up the analytics system. If you want to explore Roistat features for yourself, click Skip. You can go back to the step-by-step setup later: just open the menu in the upper-left corner and click Settings.
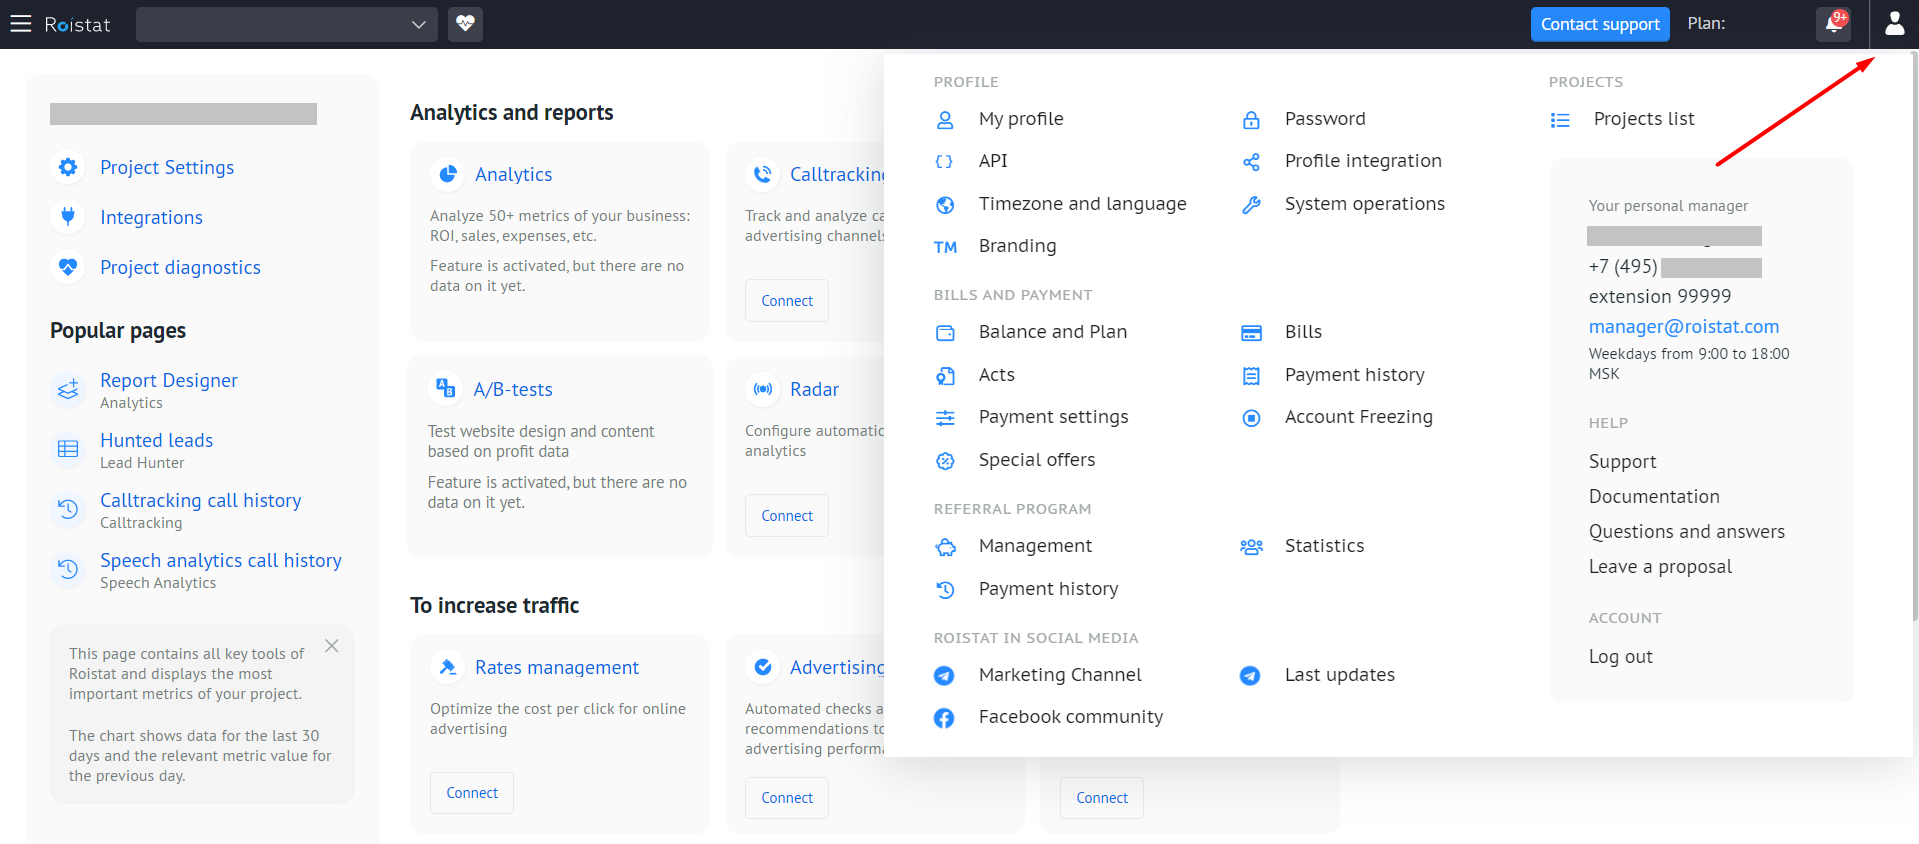
To change your password, name, language, time zone, and other profile settings, open the profile menu:
Step 2. Exploring Roistat
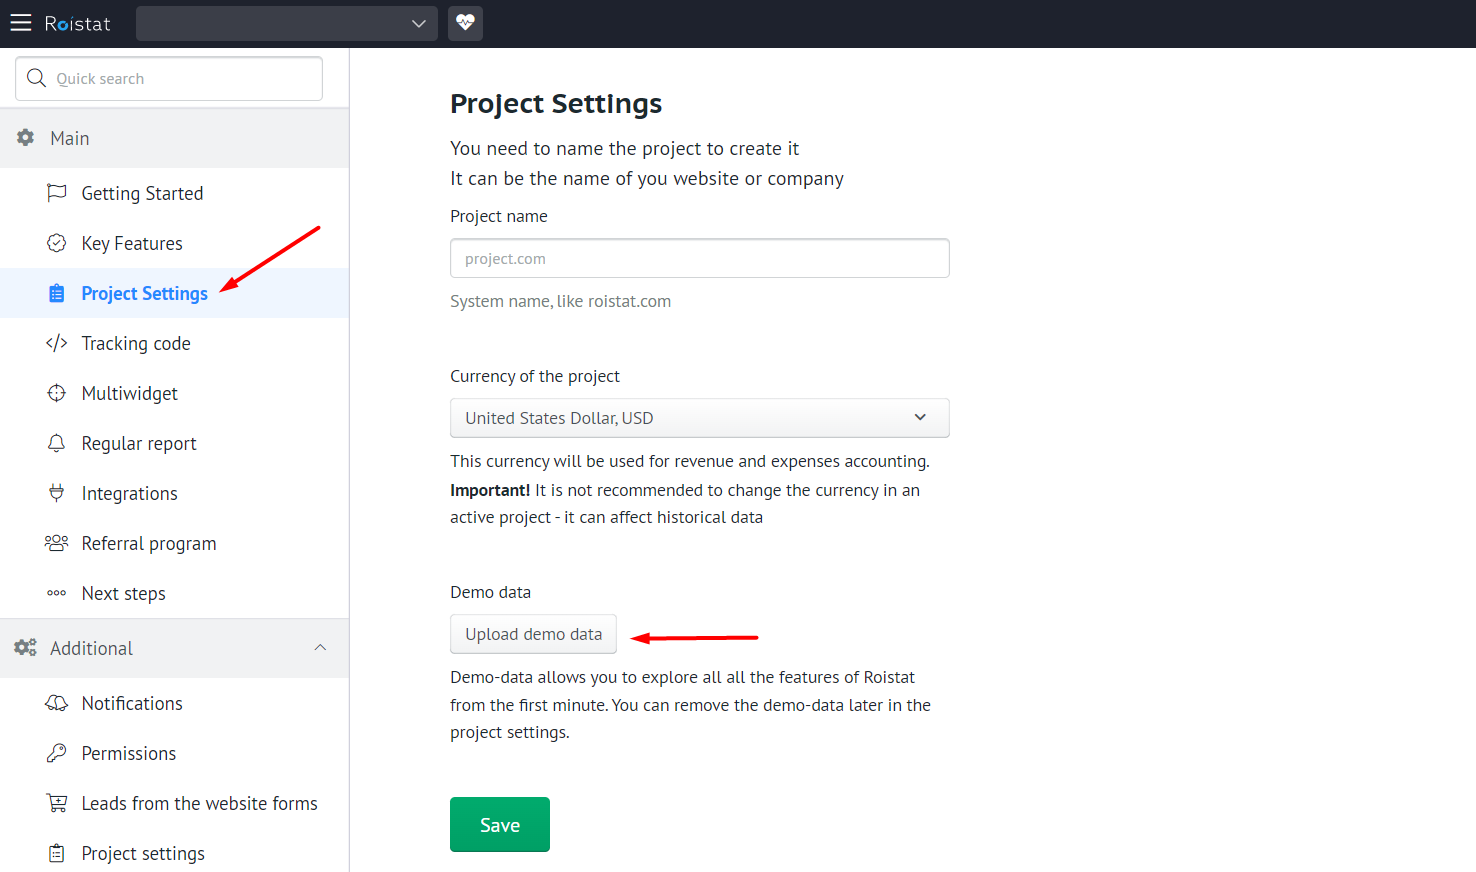
We recommend creating a demo project to explore Roistat features: Project Settings → Upload demo data. A project with demo data is not counted as a real project in your rate plan, so you don’t have to delete it.
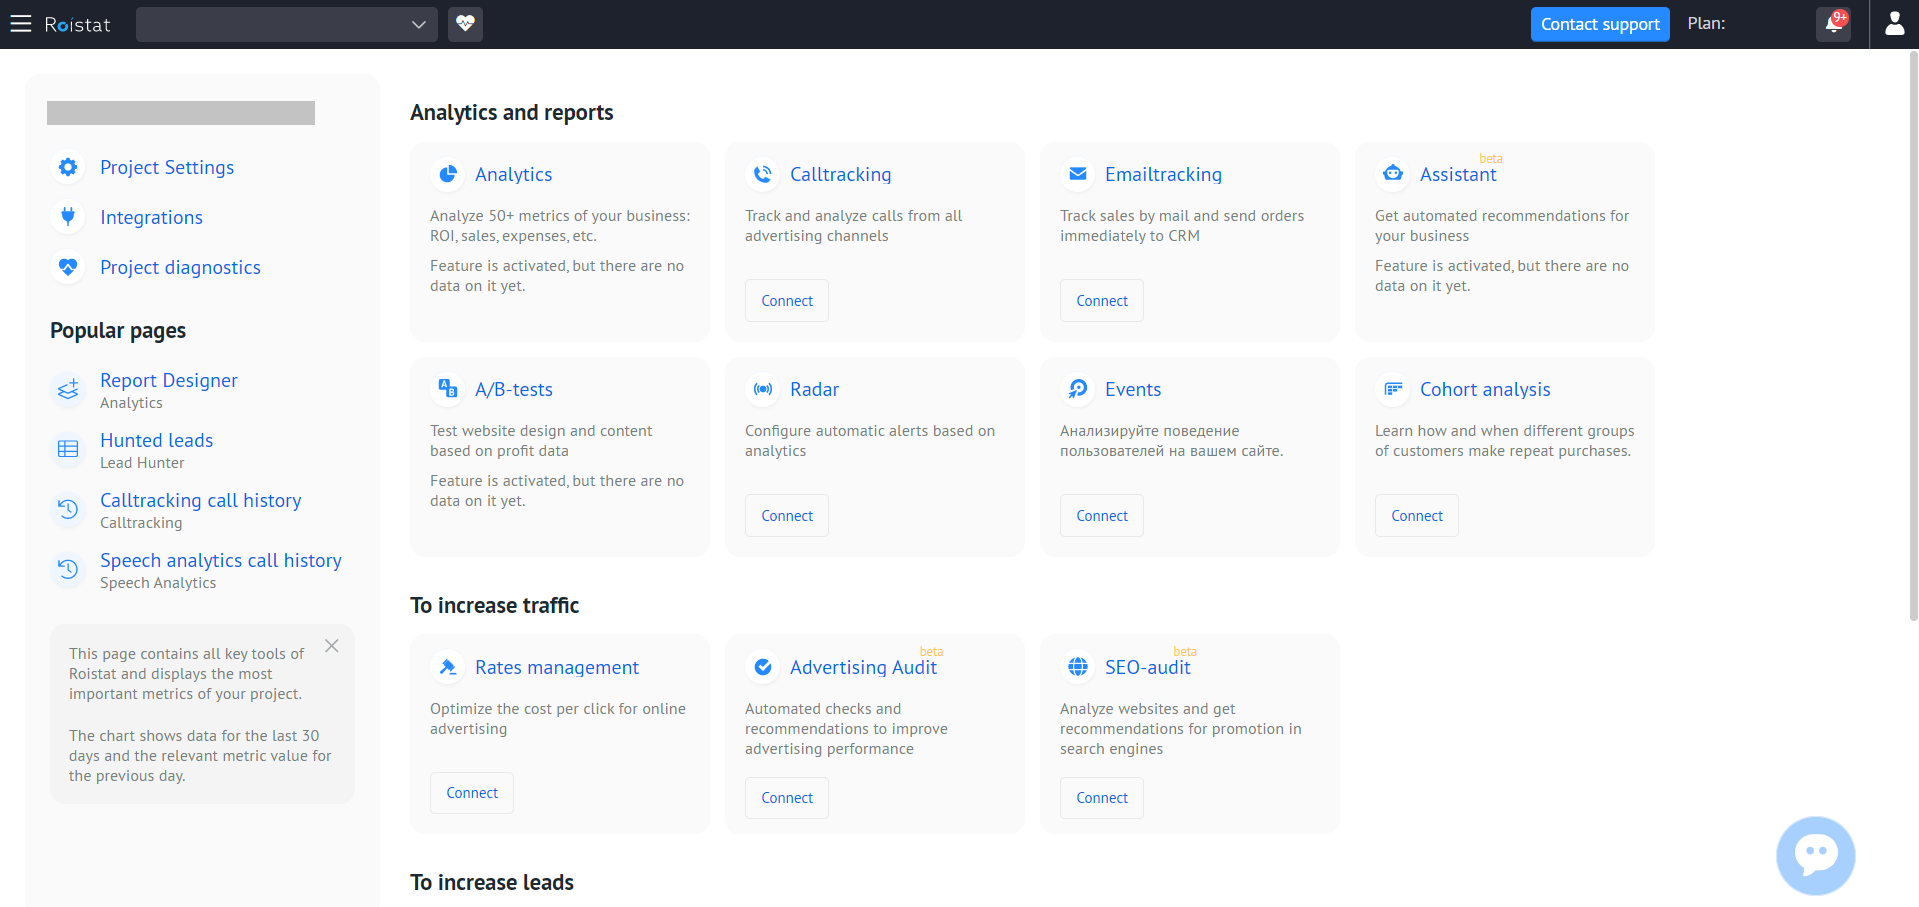
Open the main menu in the upper-left corner and click Project Home. You’ll see all available tools and settings.
In a demo project, you can get familiar with the interfaces of different features. However, to set up an integration and see how features work, you need to create a real project (see Step 3).
Step 3. Creating a Project
-
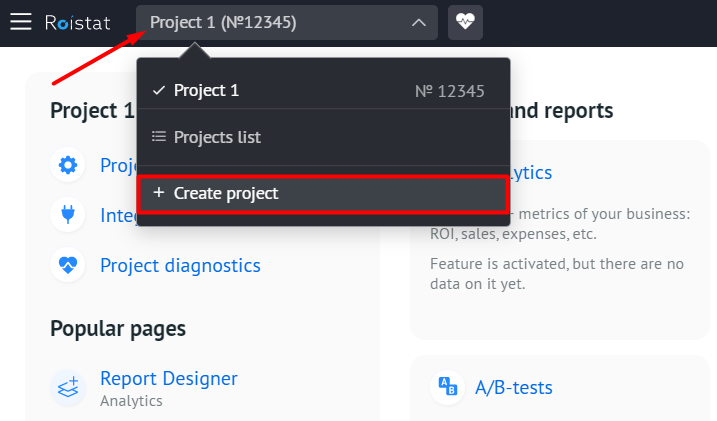
Open the project menu at the top bar and select Create project:
To create a new project based on a demo project, click Delete demo and go to Settings → Project Settings. After that, the current project is not considered a demo project anymore.
-
Set the project name and currency and save changes. The new project starts to be counted in your rate plan as soon as the first visit is recorded.
Please note:
If you want to set up a CRM integration, you have to use the same currency in the Roistat project and CRM.
-
Add the Roistat tracking code to all the pages you want to get data from. You can find the tracking code in the Settings → Tracking code section:
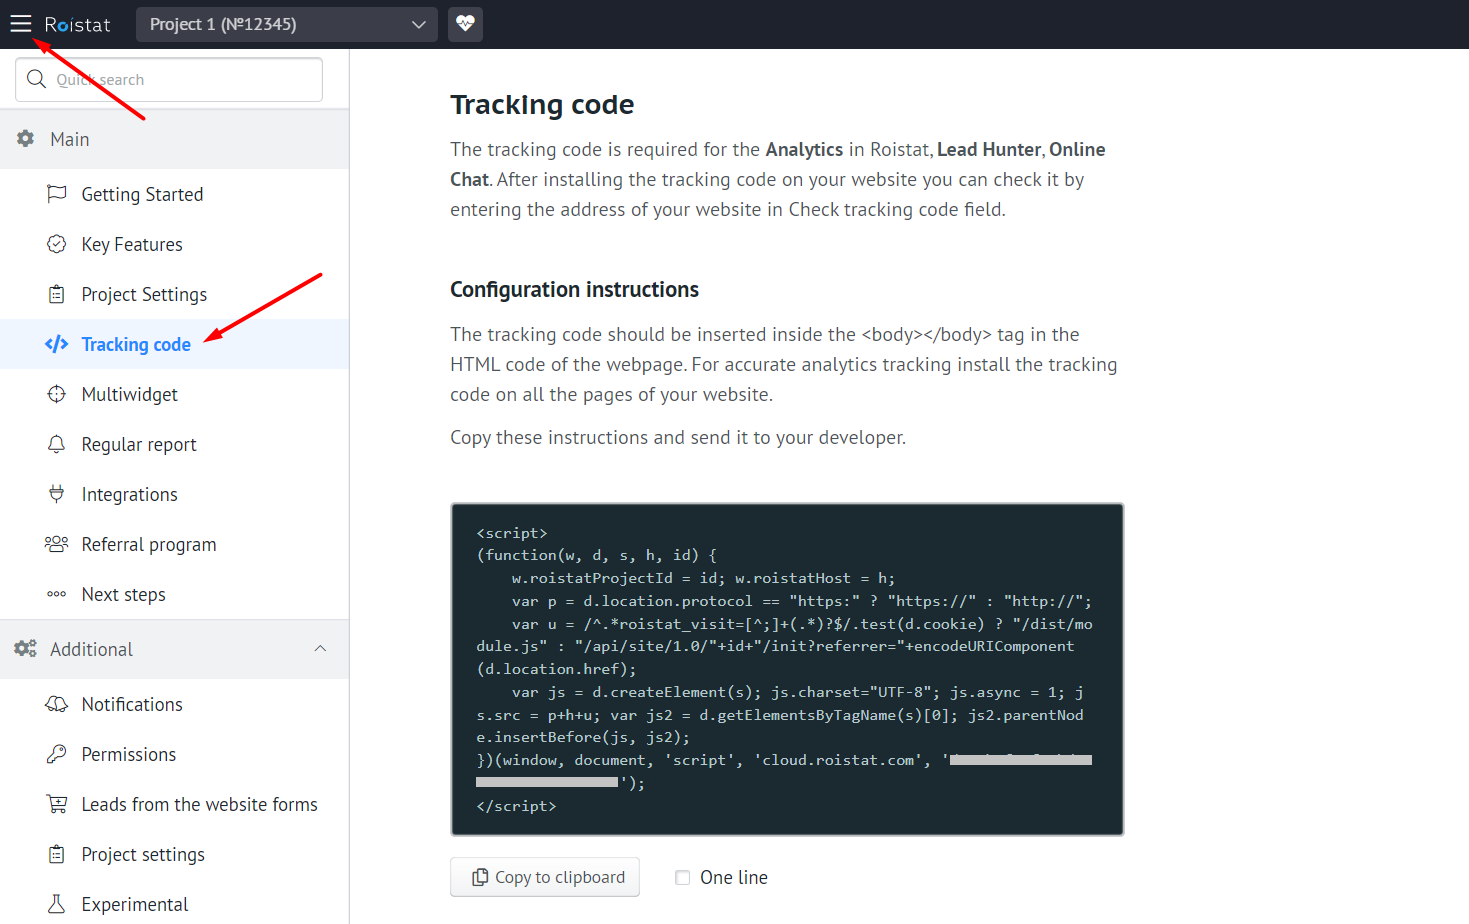
More about adding the tracking code
Step 4. Setting Up Integrations
Roistat can be integrated with your CRM, advertising channels, website builders, online chats, and other services. To open the integrations list, click Integrations on the project home page:
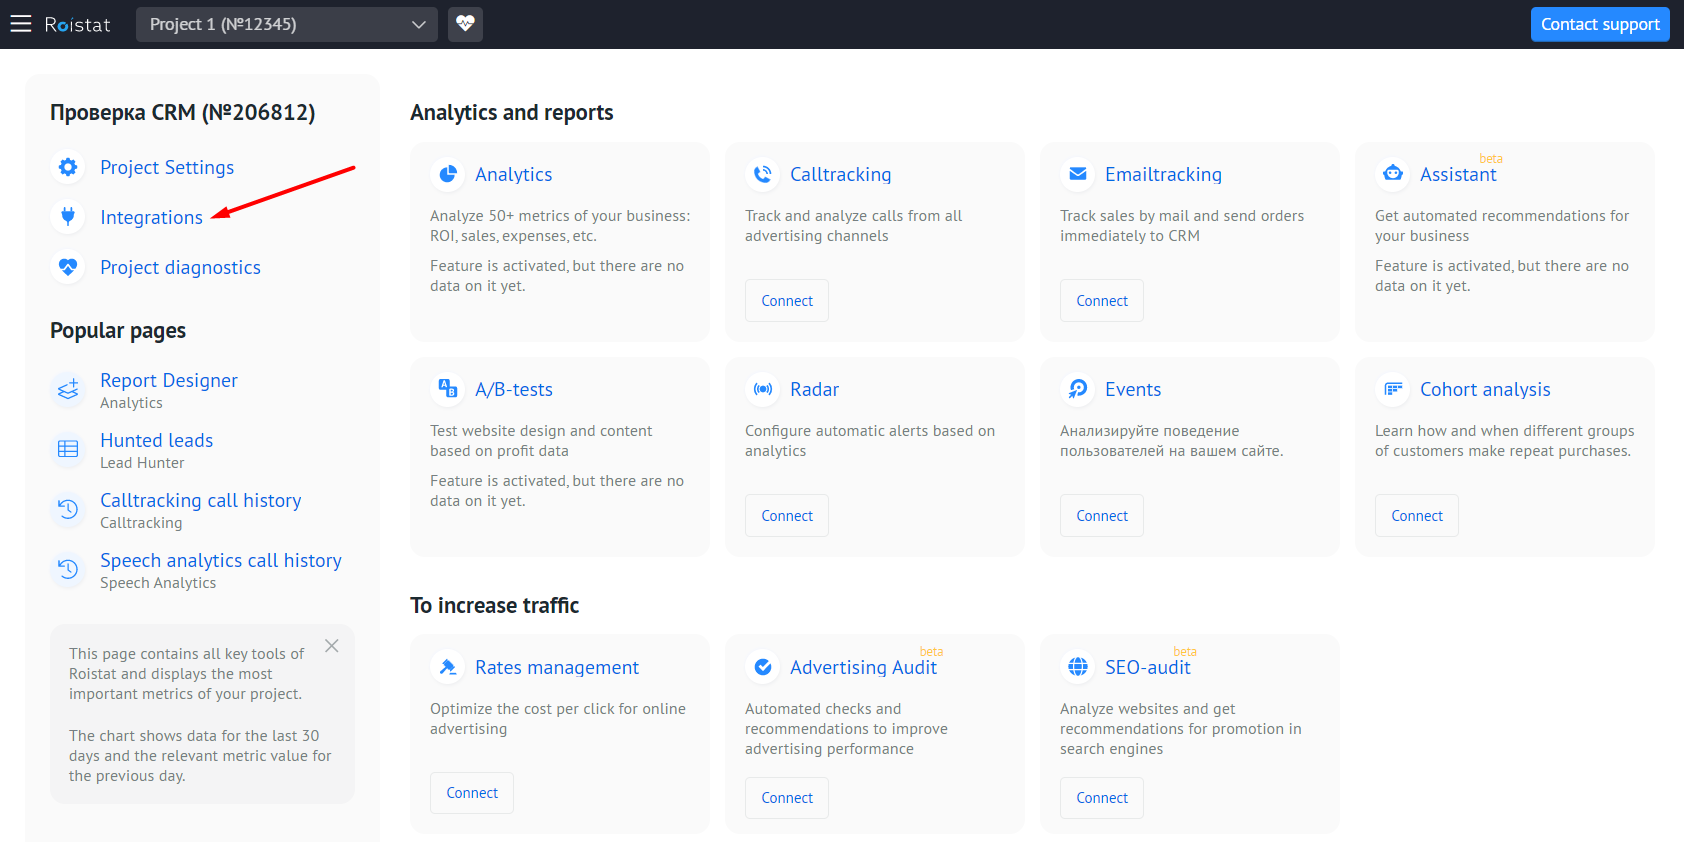
Step-by-step guides on integrating Roistat with different services
Step 5. Connecting Features to a Project
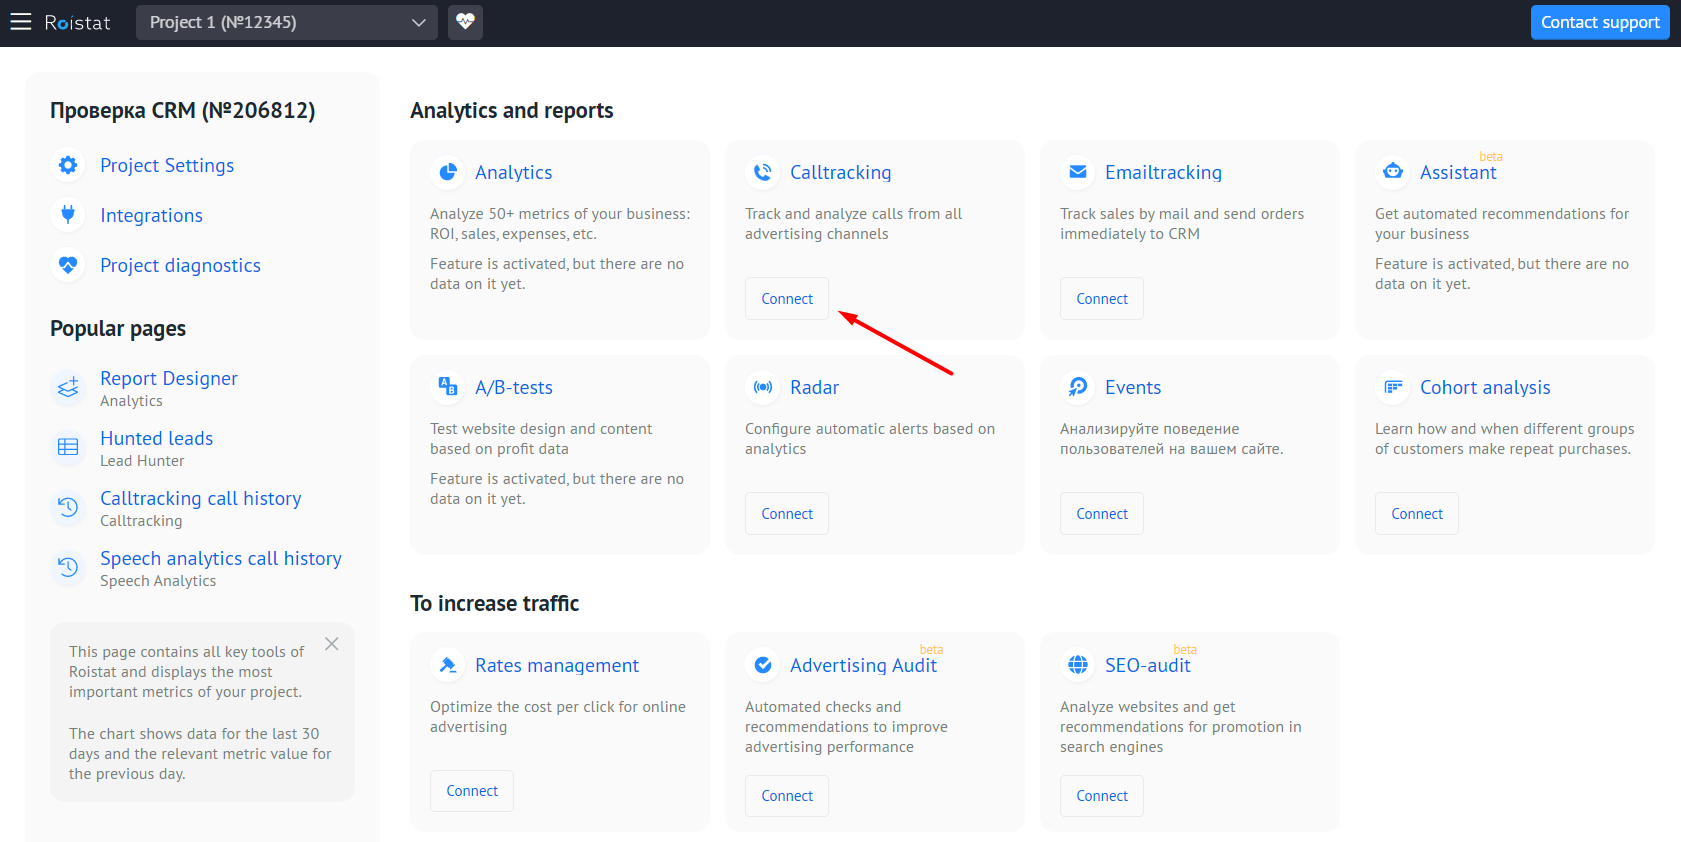
On the project home page, you can find all Roistat features. The Analytics feature is added automatically when you create a project. To add another feature, click Connect. Roistat features can be used together or independently.
- Setting up analytics
- Setting up Calltracking
- Detailed instructions for working with Roistat features