Integration with SugarCRM
How It Works
The tracking code serves to collect and send visitors' data to Roistat from a website.
Firstly, the tracking code should be placed on each web page you wish to track. Having added the tracking code will set the roistat_visit variable containing a visit ID into the cookie. Once you have successfully installed the tracking code on your website, the Promo Code functionality will be available.
Secondly, it's necessary to customize deal export from Roistat to SugarCRM by adding the value of the roistat_visit cookie to the deal. We developed an easy-to-manage module for data export. It won't take you a lot to set it up.
In summary, when a visitor completes the target action on the web page, a new deal is created in your CRM and characterized among others by the visit ID (the roistat_visit variable) contained in the roistat field. Otherwise, if a client is calling, a manager asks him/her for a promotional code and puts it down to a deal card.
Step 1. Set Up Tracking Code
To view the Roistat tracking code, navigate to Settings → Tracking Code:
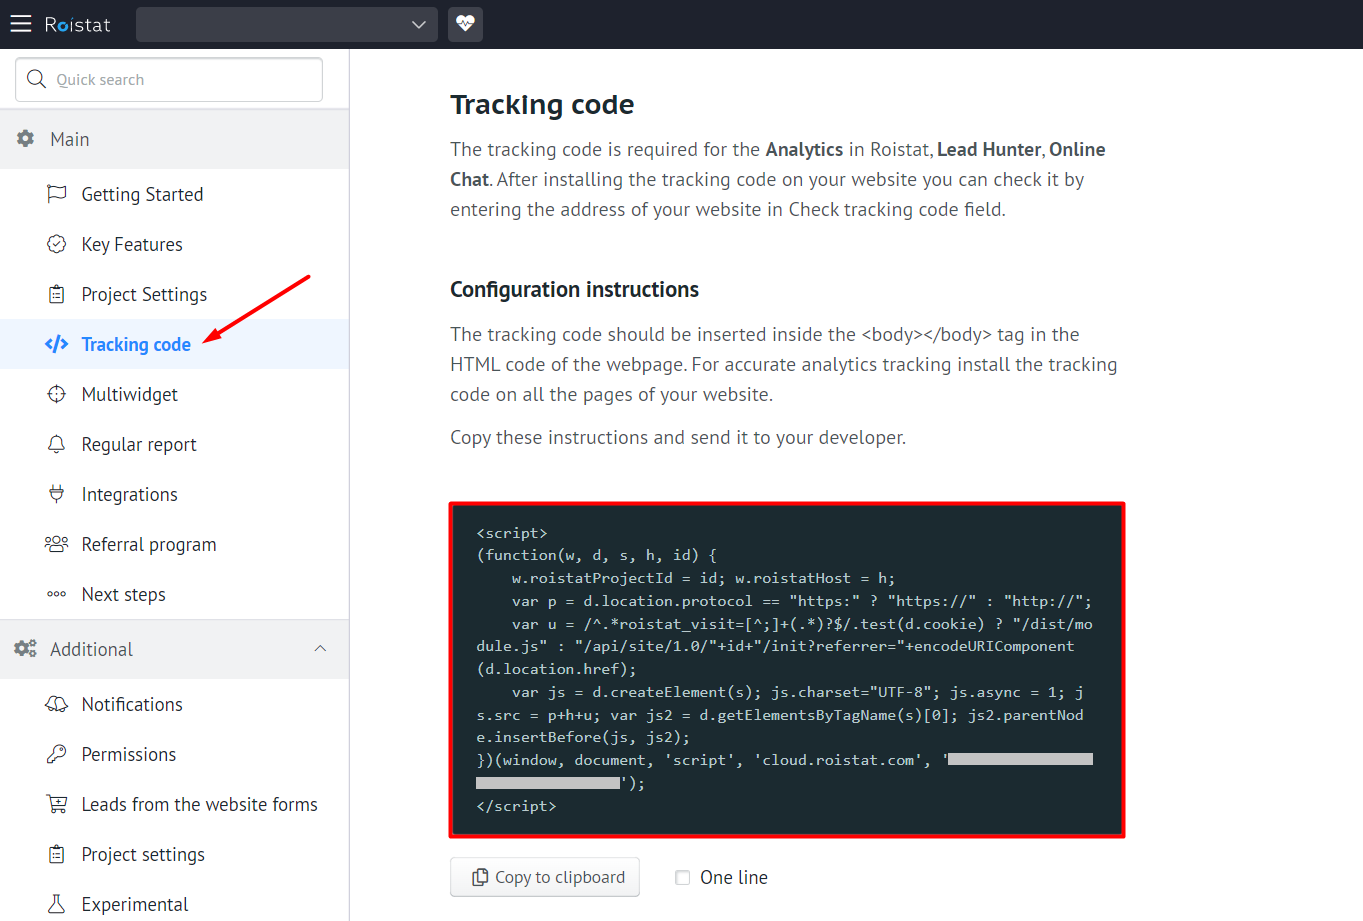
Insert the code between the <body></body> tag of your web pages. It can be placed next to the Google Analytics counter or any others.
The tracking code must be placed into the HTML code of every page of your website.
Consequently, all visits will be counted and analyzed in Analytics.
Do not place more than one counter in a page to prevent inaccurate data entry.
Step 2. Add Roistat Field in SugarCRM
It's necessary to add the roistat field in SugarCRM.
Create the field
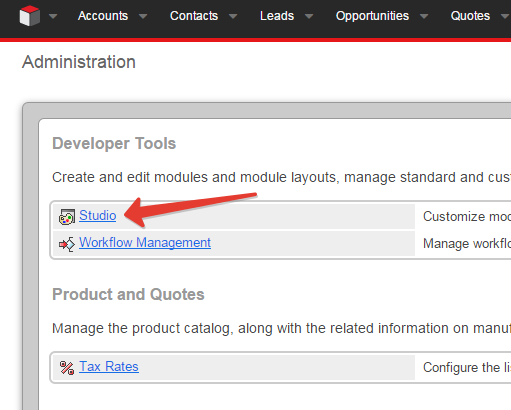
In SugarCRM, open the Control Panel by clicking on the avatar image and choosing Admin from the drop-down menu:

Open the Studio developer tool by clicking the corresponding link:
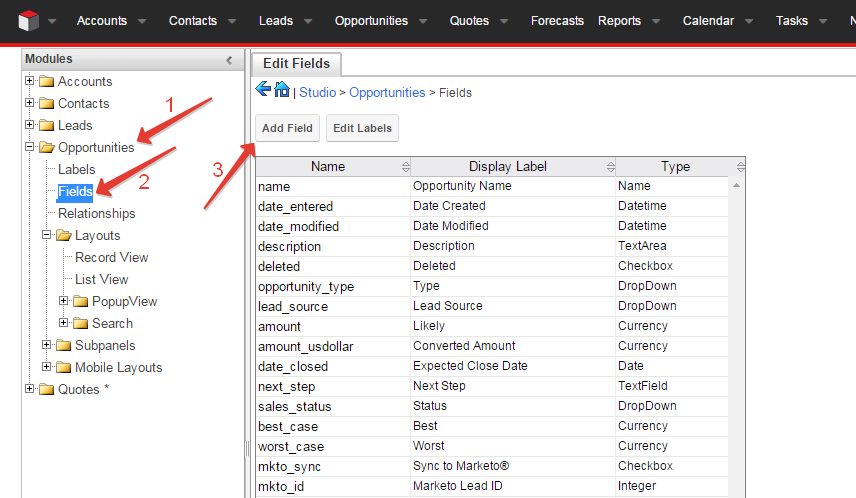
Then, go to Opportunities → Fields → Add Field:
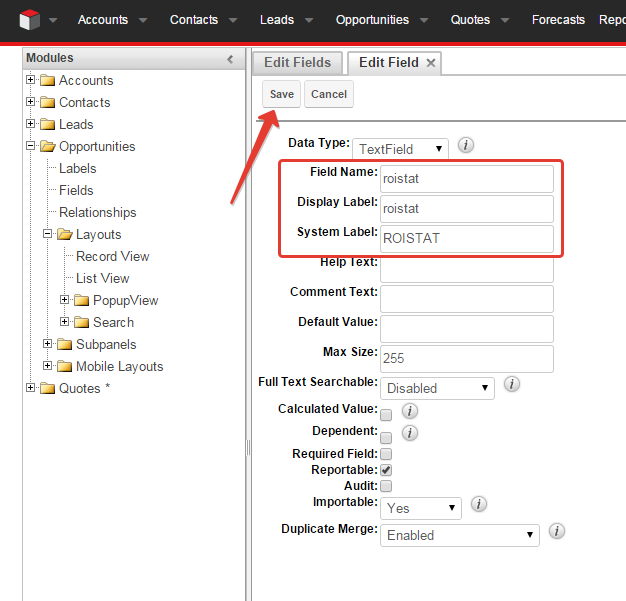
Fill in the fields and click Save:
- Field Name: roistat
- Display Label: roistat
- System Label: roistat
Add the field to the Lead Overview
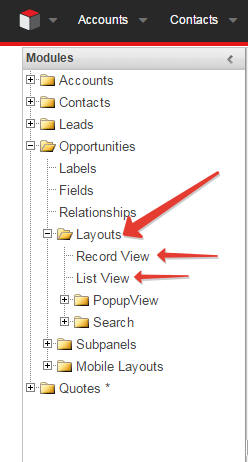
Once you have created the roistat field, you should add it to the Lead Overview.
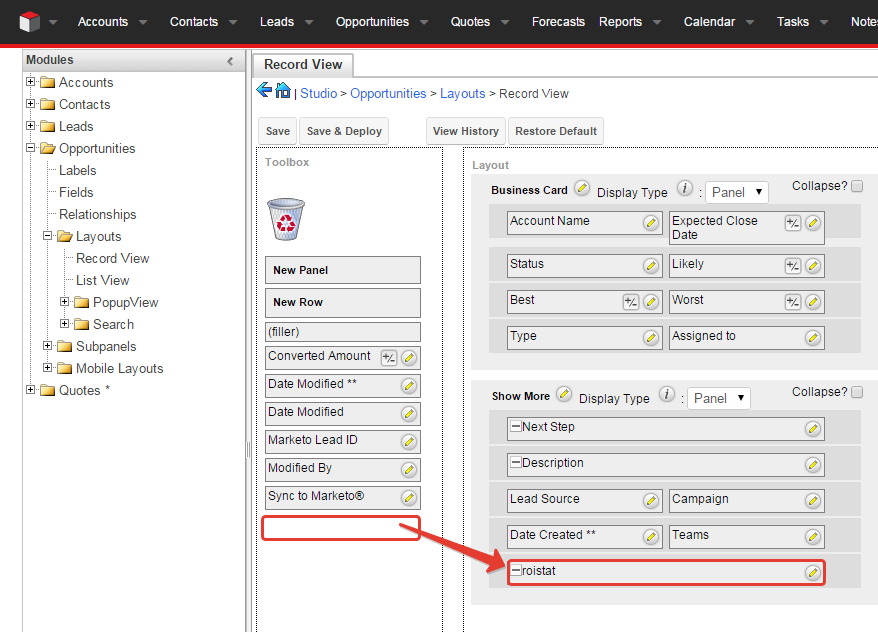
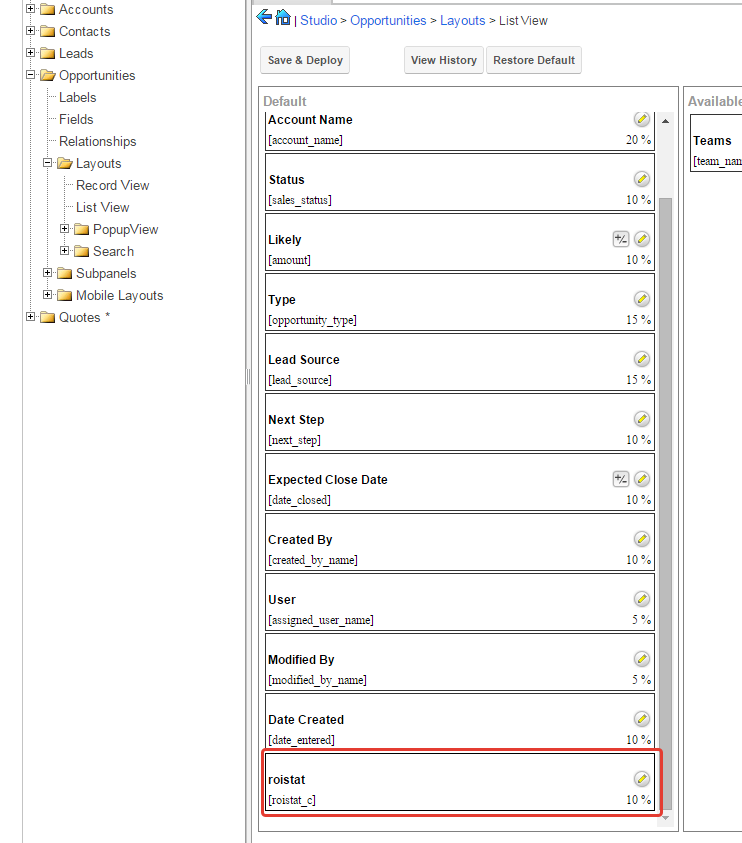
To do this, open Layouts and add the field to the Record View and the List View:
Record View:
List View:
Step 3. Configure Roistat Access to SugarCRM
Navigate to Integrations, click Add integration, and choose SugarCRM. Click Set up integration. The integration settings page will then open.
Enter your SugarCRM project URL into the corresponding field; the URL usually looks like http://<project>.sugarcrm.eu.
Enter your SugarCRM username and password into the corresponding fields.
Please note:
The user account you integrate with Roistat should have the right to create deals.
Once you have specified all the information needed and saved it by clicking Save, SugarCM deal statuses will be imported to Roistat.
Step 4. Arrange Statuses
After Roistat access to SugarCRM have been configured, you'll need to arrange the statuses uploaded:
- Not registered: waste leads or duplicate deals. Do not delete such deals to provide reliable statistics. You can gather them all in one status, e.g. Waste.
- Processing: deals being in process, not completed, e.g. negotiations or product packaging.
- Paid: deals that are paid or very likely to be paid.
- Rejected: when a client rejects the purchase or requests a refund.
Just drag and drop a status to the box you wish.
Step 5. Automatic Deals Export
If deals are already created automatically
In this case, the roistat field should contain the value of the roistat_visit cookie.
Below is an example of the string that contains the value of this cookie:
$roistatVisitId = array_key_exists('roistat_visit', $_COOKIE) ? $_COOKIE['roistat_visit'] : "unknown"
When created deals should be automatically exported from your website to SugarCRM. For this to happen, we offer you a complete solution: deal proxying.
When a deal is created on your website, it is automatically created in SugarCRM as well, and a backup copy of this deal data is stored in your Roistat account. Keeping this in mind, you will not have to worry that SugarCRM can be off-line sometimes. In any case, all the data is stored and then re-exported to SugarCRM some time later.
To set up deal proxying, insert the following code snippet into the file that process deal forms on your website (e.g. send data to some e-mail):
<?php

// Data should be encoded in UTF-8
// If Windows-1251 is used, you can convert all variables through $value = iconv("Windows-1251", "UTF-8", $value);

// ...
// the current lead creation function, e.g. mail(), is called somewhere here
// ...

$roistatData = array(
    'roistat' => isset($_COOKIE['roistat_visit']) ? $_COOKIE['roistat_visit'] : null,
    'key'  => 'SECRET_KEY', // Instead of SECRET KEY insert the secret key itself which you can copy by clicking the Integration key: show link at the bottom of the page Settings -> Integrations -> SugarCRM
    'title'   => 'Deal title',
    'comment' => 'Deal commentary',
    'name' => 'Client's name',
    'email'   => 'client@email.com',
    'phone'   => '79111234567',
    'fields'  => array(
        'field_id' => 'field_value',
 ),
);

file_get_contents("https://cloud.roistat.com/api/proxy/1.0/leads/add?" . http_build_query($roistatData));
Verify the Integration
When a client completes some target action (completes application form, places an order etc.), a new deal is created in SugarCRM and characterized among others by the roistat field. The field must be non-empty.
You can view deals from Roistat as well going to the Project diagnostics → List of submitted leads section:
