Integration with Bitrix24 (Deals)
Please note:
From January 1, 2021, integration with Bitrix24 is available only for users of commercial Bitrix24 plans.
Bitrix24 (Deals) integration allows you to send information from the Deals section in Bitrix24 to Roistat. If you need to receive information from the Leads section, read the Bitrix24 (leads + deals) article. Roistat does not work with the Order entity.
How the Integration Works
When a client leaves a request on the site, a new deal is automatically created in Bitrix24. The visit number is passed to the deal from the roistat_visit browser cookie to an additional field named roistat.
If the value from the roistat field is accidentally deleted, Roistat will independently determine the source of the request when loading deals. This way, the deal will be assigned to the right advertising channel.
If the manager communicates with the client by phone, they can ask for a promo code and enter this code in the roistat field.
-
This integration is also available for Ukrainian version of Bitrix24.
-
For calls via Roistat Calltracking, the call recording will be sent to the deal, and you can listen to it.
Sending a deal to CRM
If the deal was not marked as a duplicate:
-
Roistat searches for this contact by phone number or email address among all contacts in CRM.
-
If the contact is found, a new deal is created and linked to this contact. If the contact is not found, a new contact and a new deal are created.
When sending a deal to CRM, Roistat checks for duplicates only one of the following entities: Contact or Company.
Setting Up the Integration
Step 1. Add a roistat additional field
To add a roistat custom field in the Deal entitiy:
-
In the project settings in Bitrix24, open CRM → Settings → CRM settings:
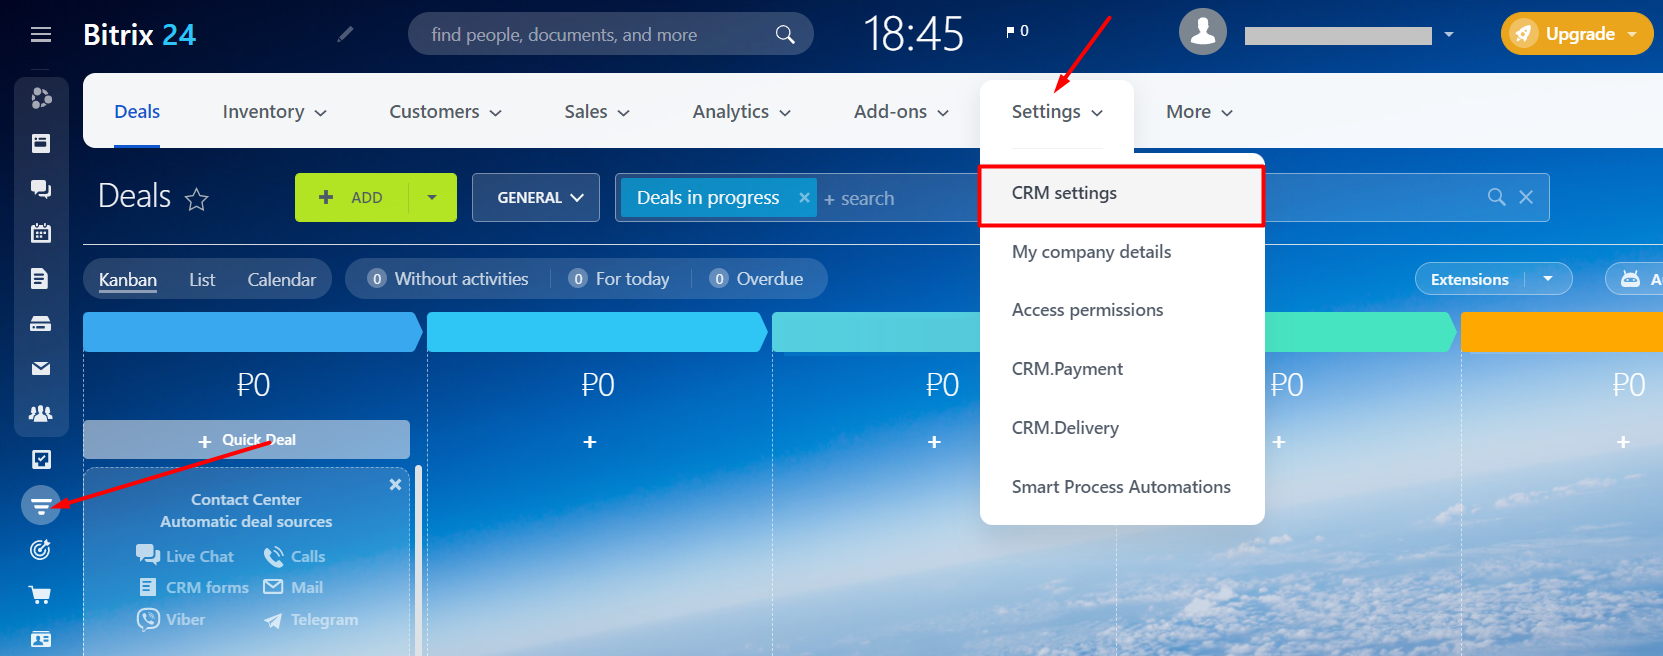
Select Form and report settings → Custom Fields:

-
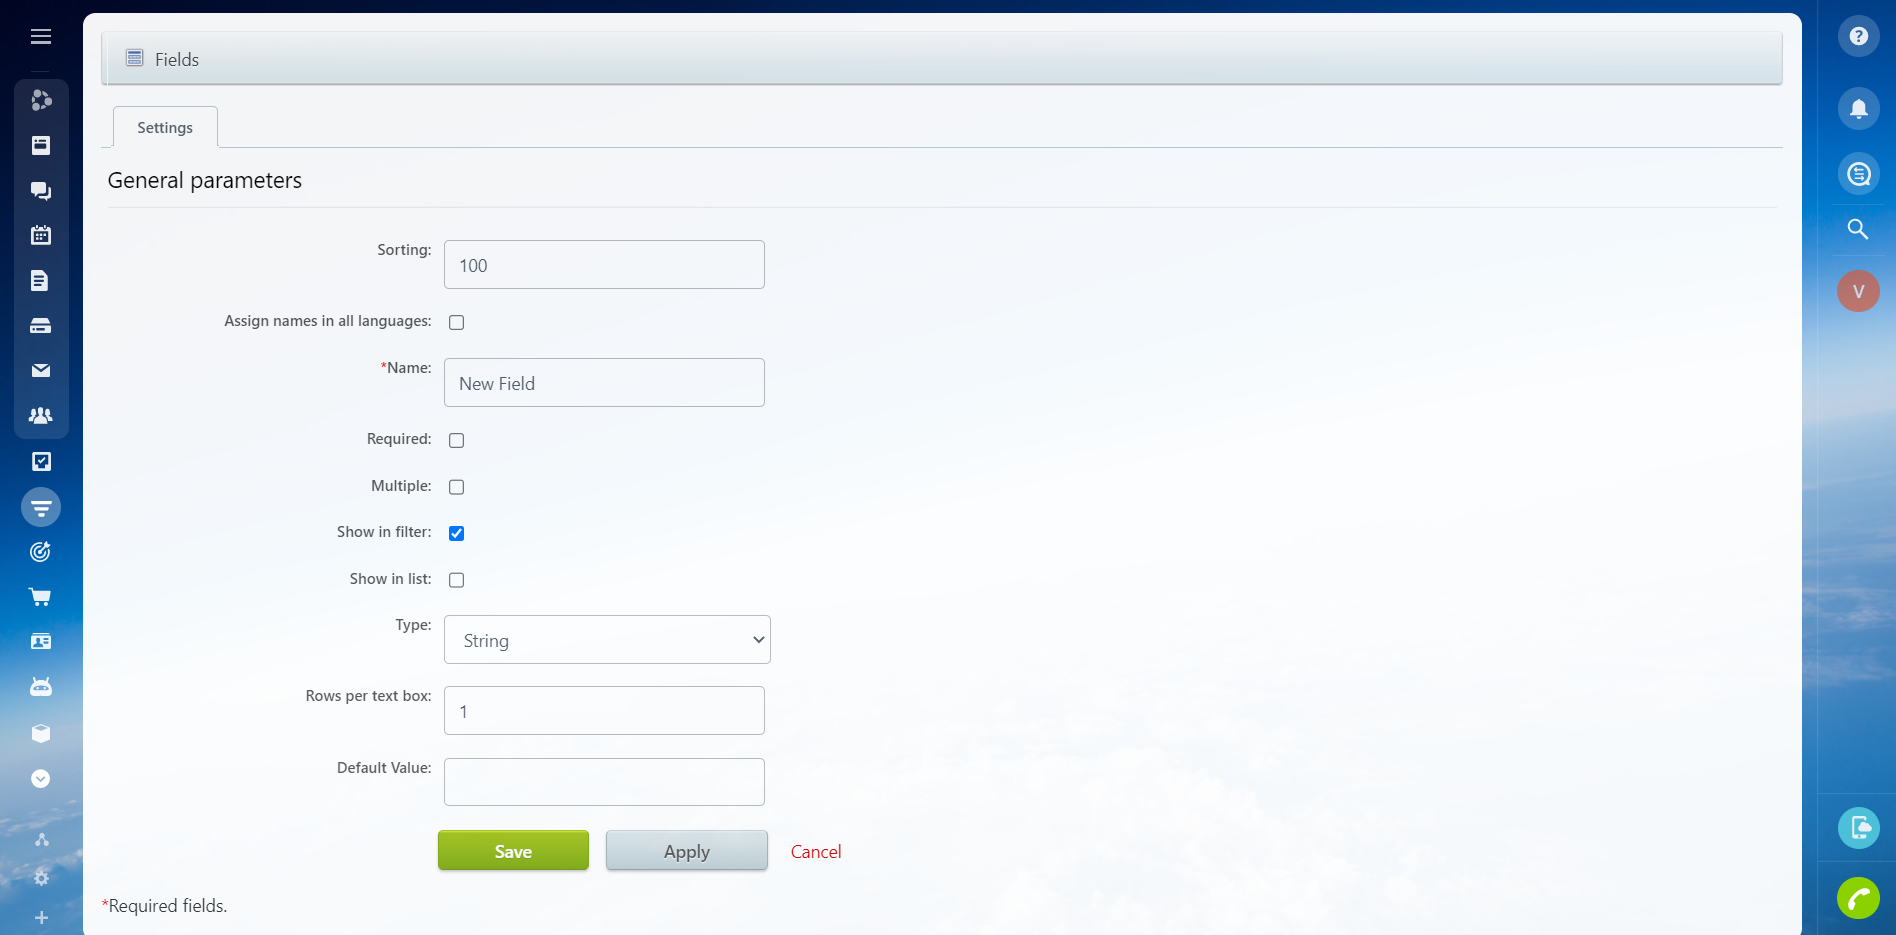
For the Deal entity, click Add Field. The General parameters page opens:
-
In the Name field, enter roistat.
-
In the Type drop-down list, select String.
-
Click Save.
If for some reason you create a deal manually (for example, for offline sources), you can fill in the roistat field with data about the deal source. Information about the source of the transaction will be displayed in Analytics.
To assign a deal to a specific advertising channel, enter the following markers in the roistat field:
- yamarket{ID} – if you want to assign the deal to the Yandex.Market channel. Hereinafter, ID is the advertising channel identifier. For example, yamarket1.
- direct{ID} – if you want to assign the deal to the Yandex.Direct channel. For example, direct2.
- google{ID} – if you want to assign the deal to a Google Ads channel. For example, google3.
- merchant{ID} – if you want to assign the deal to the Google Merchant Center channel. For example, merchant4.
- vk{ID} – if you want to assign the deal to the VK channel. For example, vk5.
- facebook{ID} – if you want to assign the deal to the Facebook channel*. For example, facebook6.
- mytarget{ID} – if you want to assign the deal to the myTarget channel.
- seo_yandex – if you want to assign the deal to the Yandex SEO channel.
- seo_google – if you want to assign the deal to the Google SEO channel.
Step 2. Set up integration with Bitrix24 in Roistat
Enabling integration in Roistat
-
Add the Roistat tracking code to all pages of your site using the instructions.
-
Open the Integrations section.
-
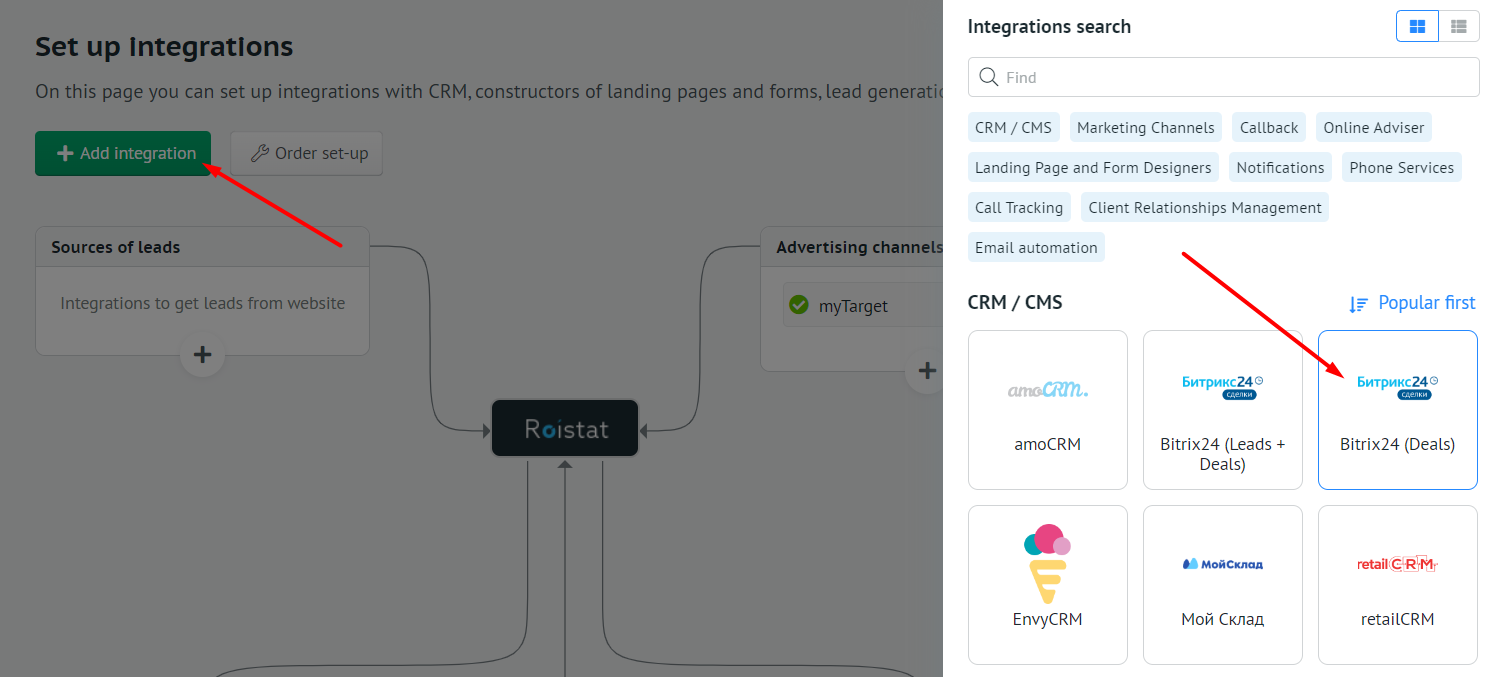
Click Add integration. In the CRM/CMS block, select the Bitrix24 (Deals) card and click Add:
-
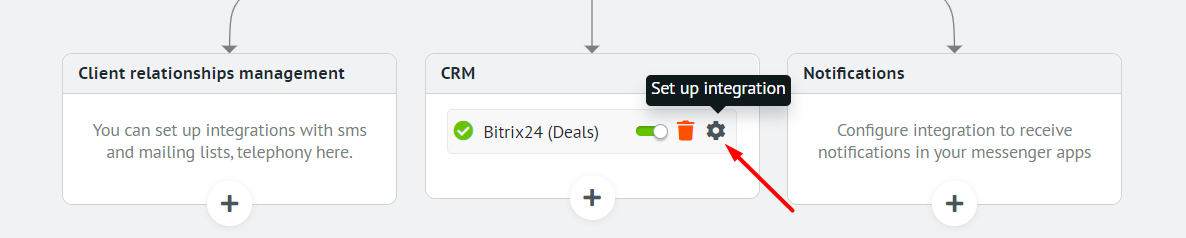
Click Set up integration (gear icon):
Setting up authorization in Bitrix24
-
In the field to the left of the Authorize application button, enter the URL of your project in Bitrix24. It usually looks like this: https://
.bitrix24 . -
Click Install application. A page with information about the Roistat integration app will open in your Bitrix24 profile.
If the Roistat integration app info window doesn't open and you can't find it in the Marketplace, contact us.
Click Install. Then check the boxes next to the required options and click Install again.
Please note:
To install the application, your Bitrix24 account must have administrator rights.
-
In Roistat, click Authorize application to save authorization parameters in Bitrix24.
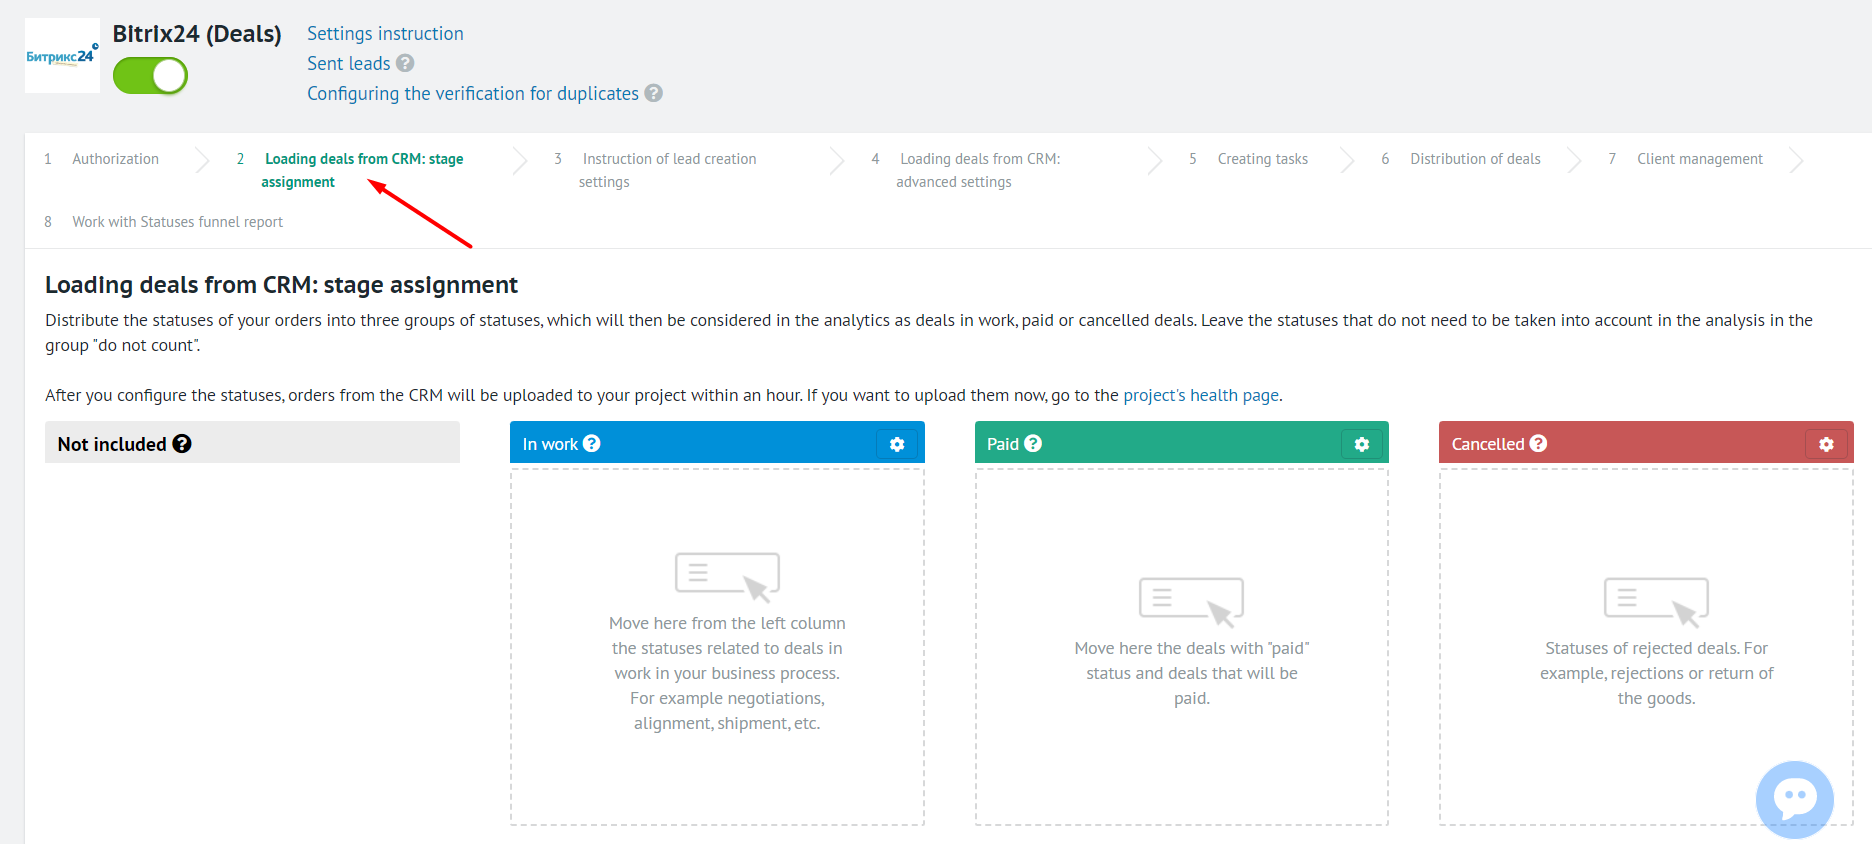
Distribution of statuses from Bitrix24
At the Loading leads and deals from CRM: stage assignment step, distribute deal statuses into groups by dragging them to the required blocks.
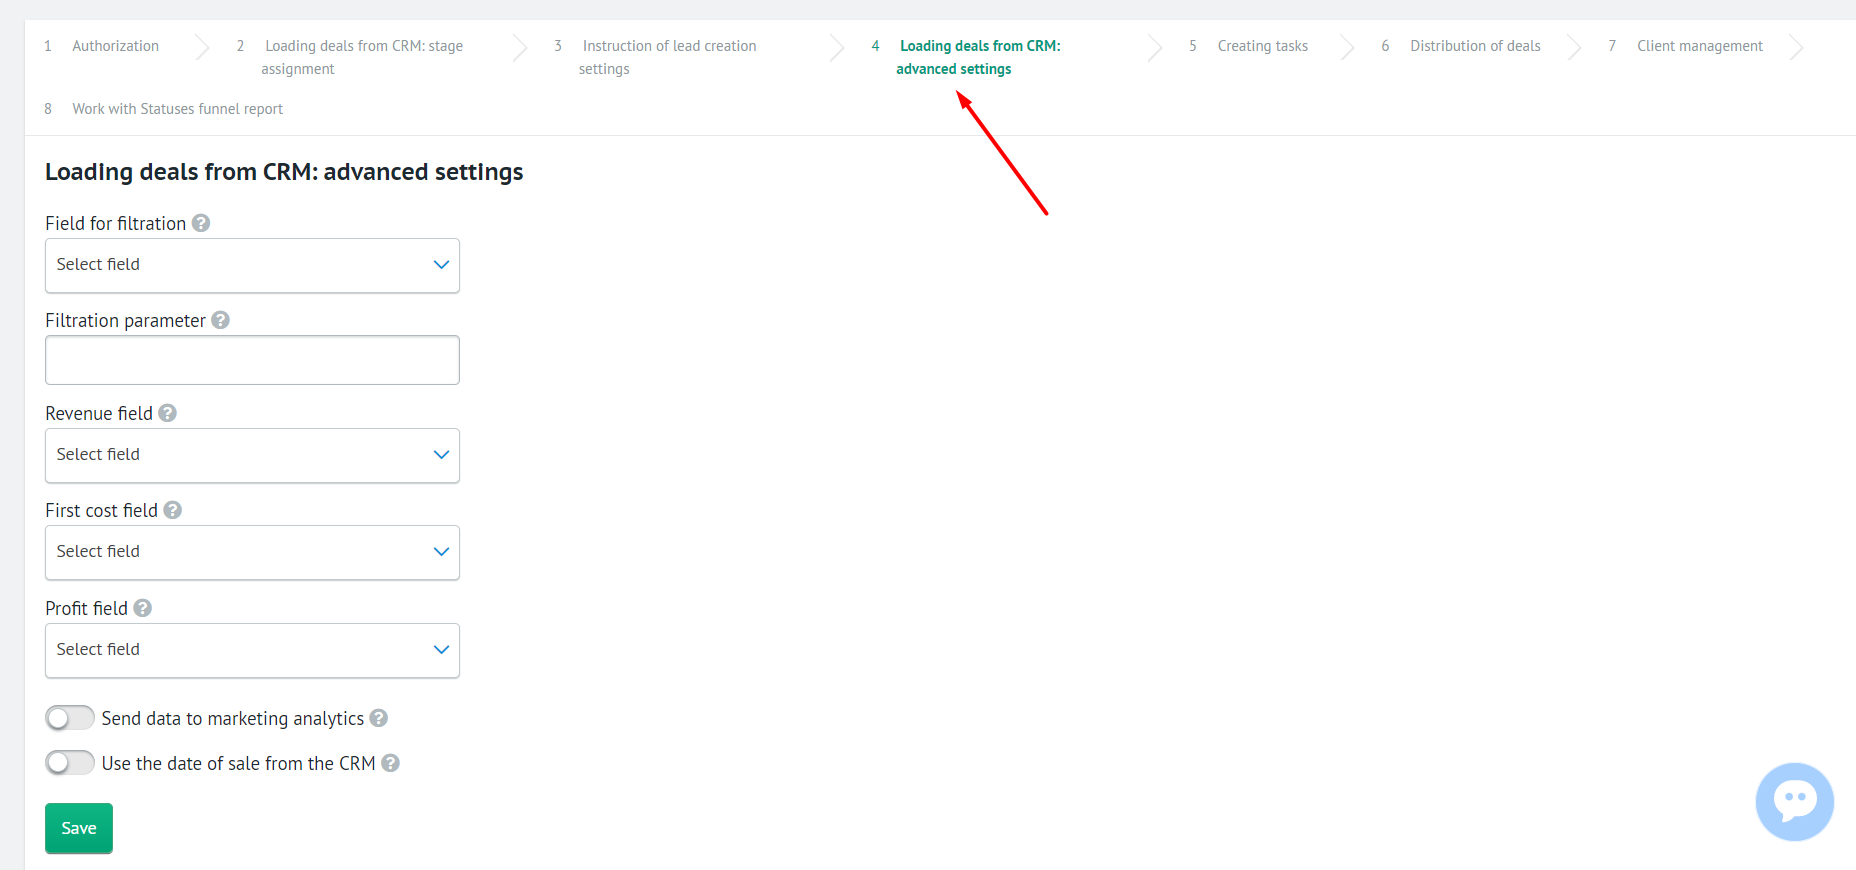
Advanced integration settings
At the Loading deals from CRM: advanced settings step, you can:
-
Specify parameters for filtering deals.
-
Specify the values for the business metric fields.
-
Set up the transfer of data about the source to the marketing analytics of Bitrix24. To do this, enable the Send data to marketing analytics option. The visit source, client device data, UTM tags, landing page URL, and visit date will be sent. Please note: Roistat does not load data from the Marketing analytics field.
-
Enable use of deal sale date from CRM. To do this, enable the Use the date of sale from the CRM option.
Click the Save button to apply the changes.
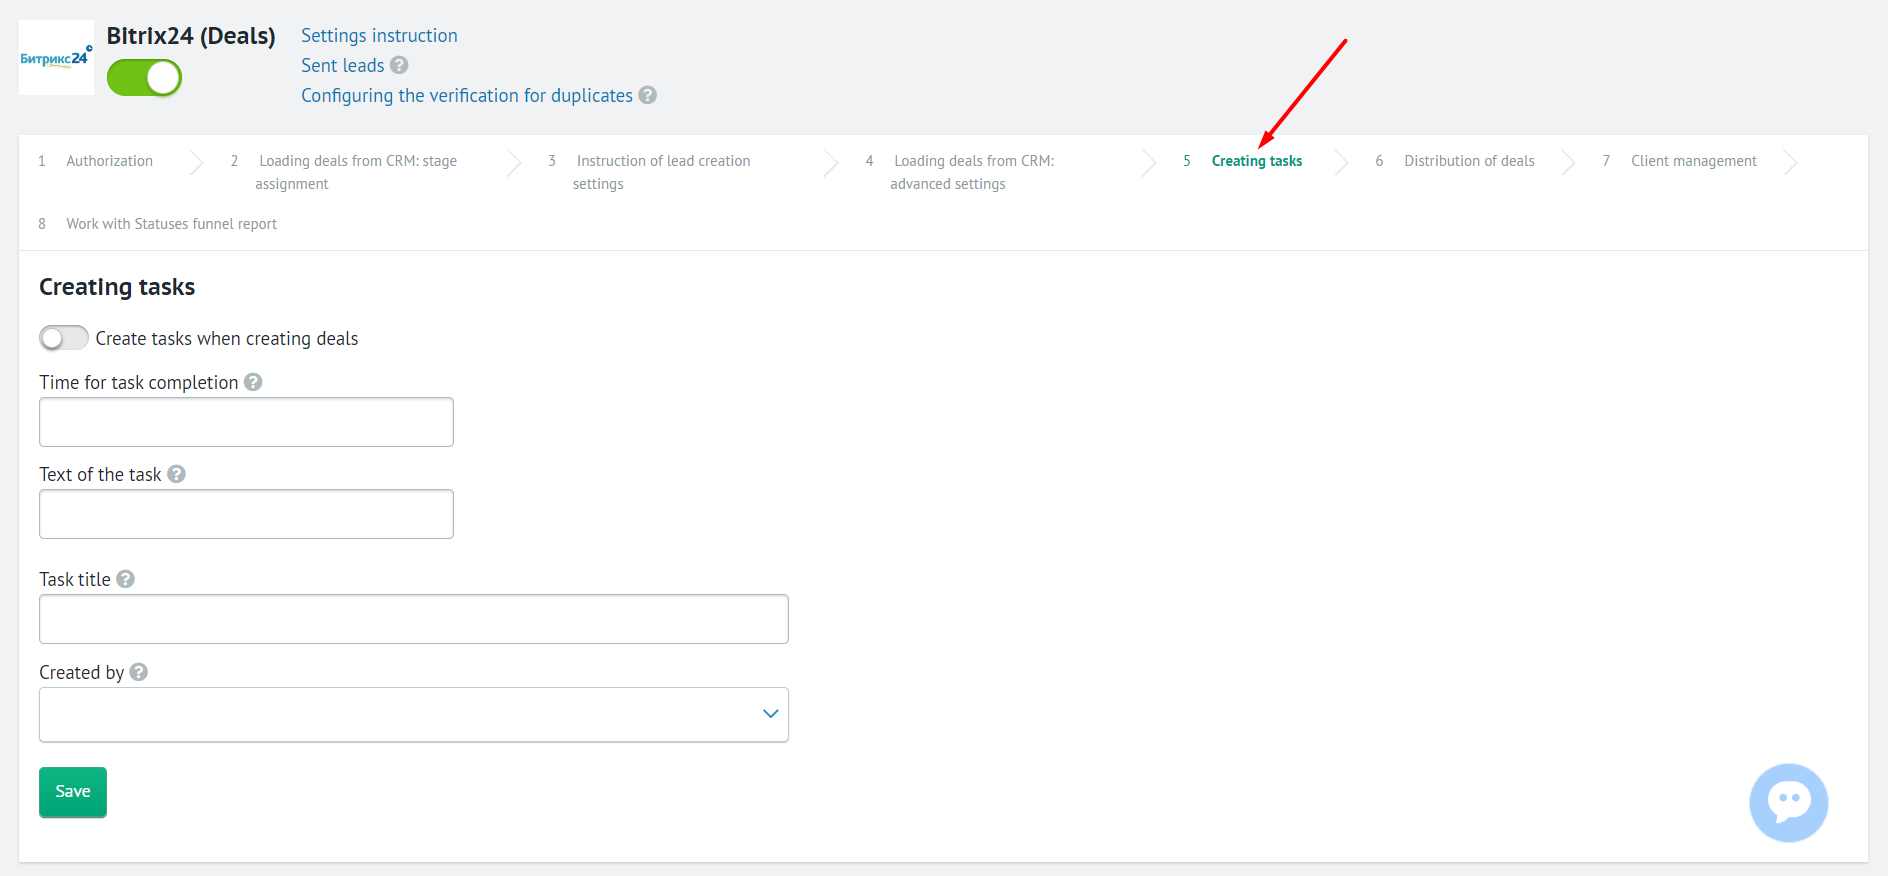
Creating tasks
At the Creating tasks step, you can set up automatic task creation when creating a deal:
-
Enable the Create tasks when creating deals option.
-
Fill in the fields:
-
Time for task completion – the number of minutes in which the task must be completed. If you leave the field blank, the value will automatically be set to 24 hours.
-
Text of the task – description to be automatically added to the task.
-
Task title – title to be automatically added to the task.
-
Created by – employee on whose behalf tasks should be created.
Click Save to apply the changes.
Distribution of deals
At the Distribution of deals step, you can specify which employees to assign new deals to in CRM.
In the Deals responsible managers field, select employees from the drop-down list and click Save:
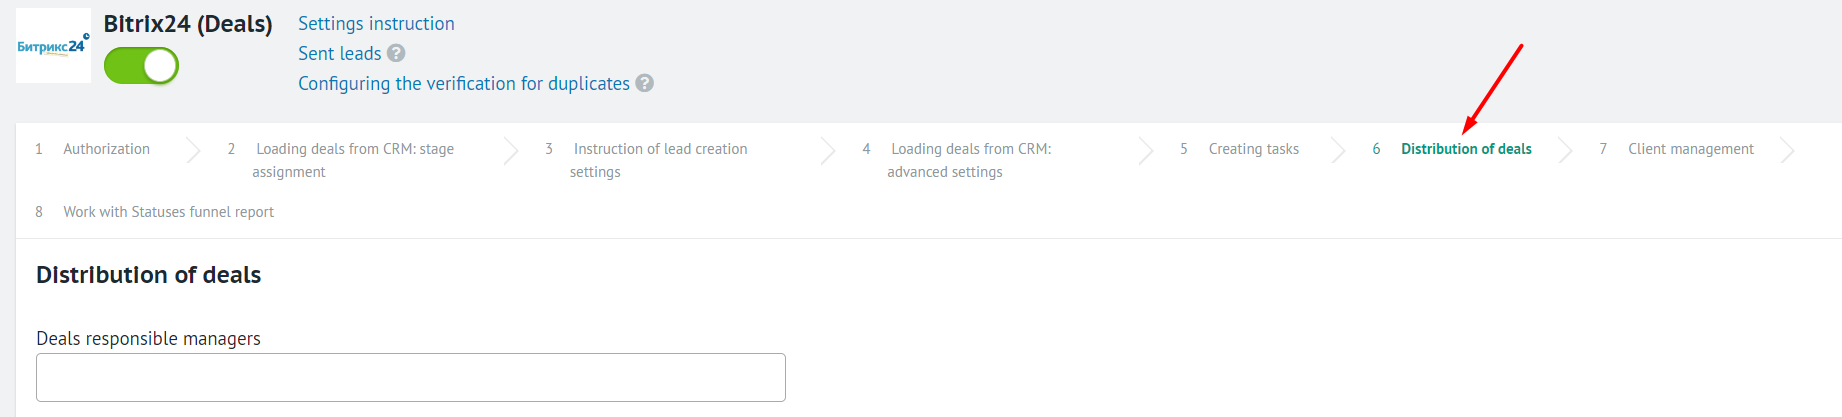
After that, Roistat will automatically distribute deals to the specified employees.
Client management
You can upload Contacts or Companies from CRM as clients.
Contacts are used by default. To load companies as clients, at the Client management step, enable the Use companies as clients in Roistat option.
Please note:
If the Use companies as clients in Roistat option is enabled, Roistat will only work with companies.
Step 3. Set up automatic uploading of leads to Bitrix24
We recommend configuring the transfer of leads to CRM via Roistat. In this case, leads are sent to Roistat first, and then Roistat sends them to CRM. To learn more about this mechanism, read this article.
If sending leads from the site to CRM is already configured using your own code, in order to exchange data with Roistat, you need to configure the transfer of the roistat_visit cookie value to CRM. To do this, open the PHP file that is configured to send requests to your CRM. Above the code for sending leads to CRM, paste the following script:
$roistatVisitId = array_key_exists('roistat_visit', $_COOKIE) ? $_COOKIE['roistat_visit'] : 'nocookie'
After that, add the received roistatVisitId value to the data sent to CRM. If necessary, contact a web developer for help.
Setting Up Product Sales Analytics
Please note:
Before setting up Product sales analytics, reinstall the Roistat integration app (see the Setting up authorization in Bitrix24 section). During installation, allow the application access to the product catalog.
Integration of Roistat with Bitrix24 allows using Product sales analytics – a tool that lets you analyze the effectiveness of sales of individual products and product groups (brands, categories). Products are uploaded to Roistat both from CRM → Inventory → Product catalog.
To set up Product sales analytics:
-
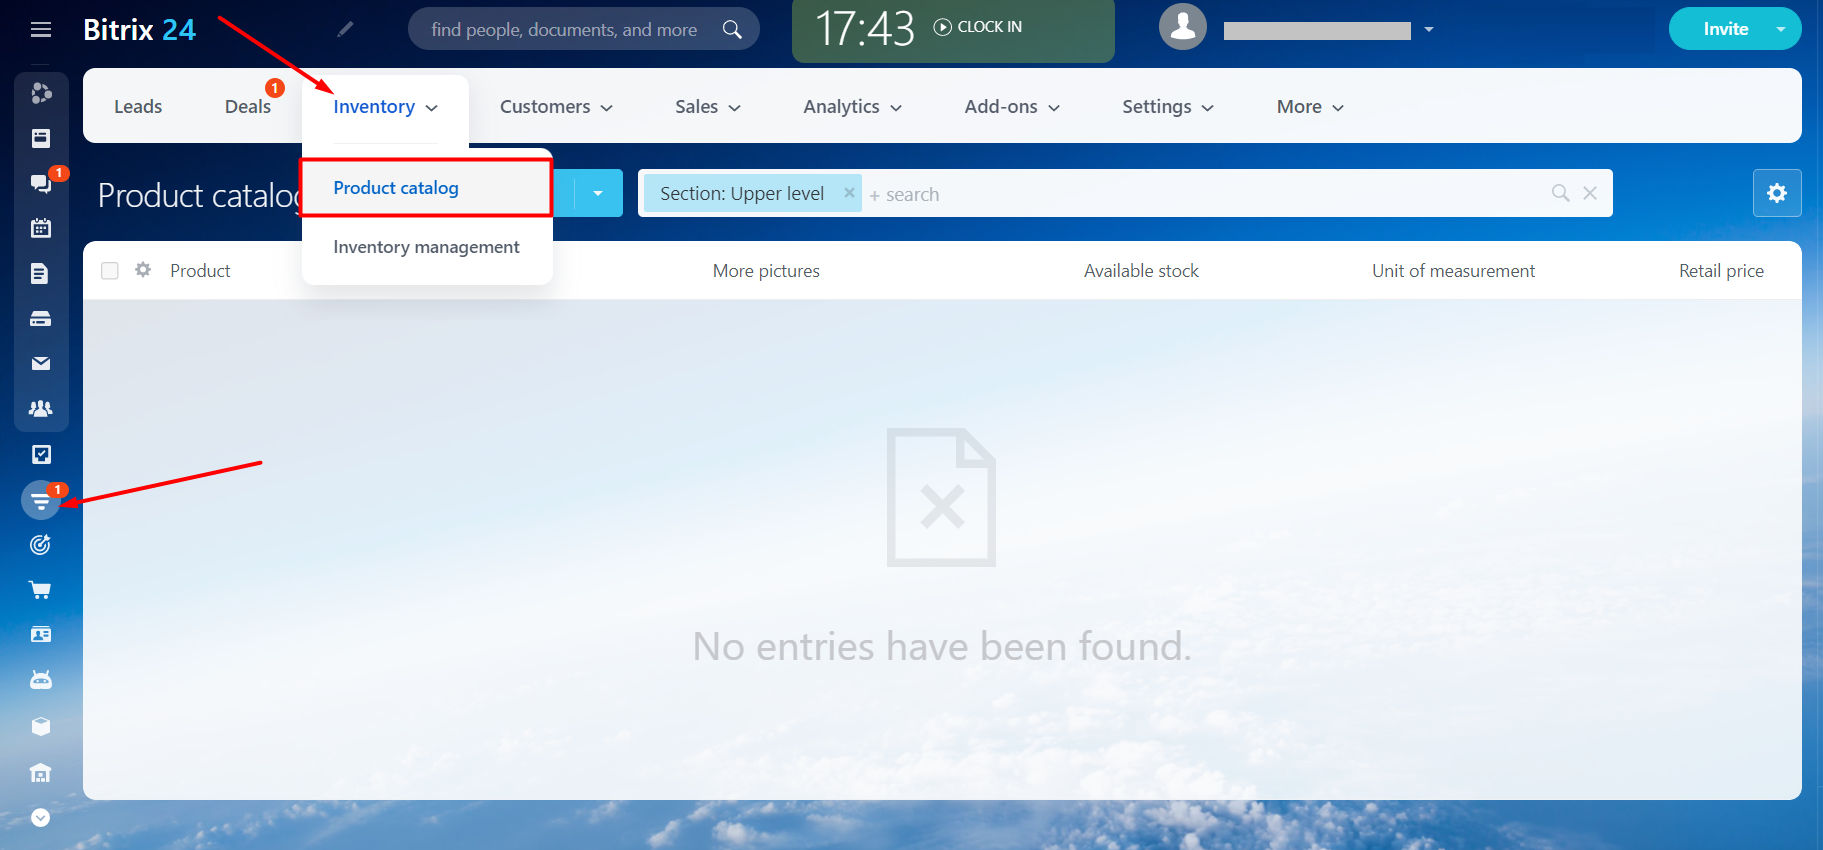
Make sure that products are created in Bitrix24. To do this, open the CRM → Inventory → Product catalog section in the Bitrix24 project:
To create a product, click on the Create Product button:
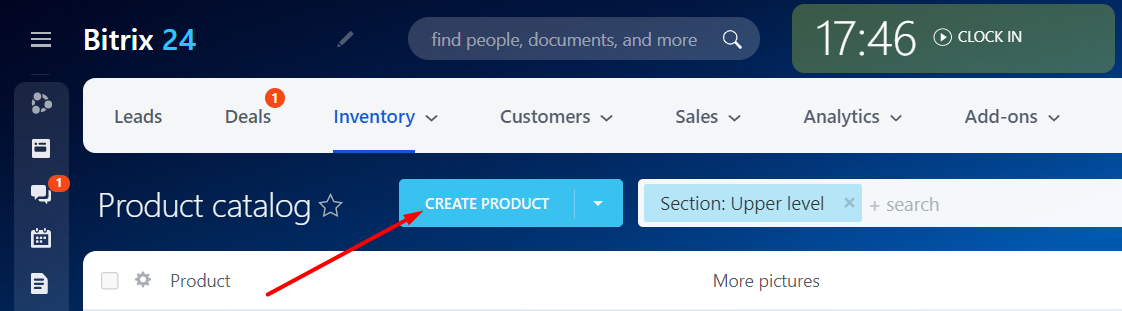
The product can be located both in the Product catalog section and in any subcategory.
-
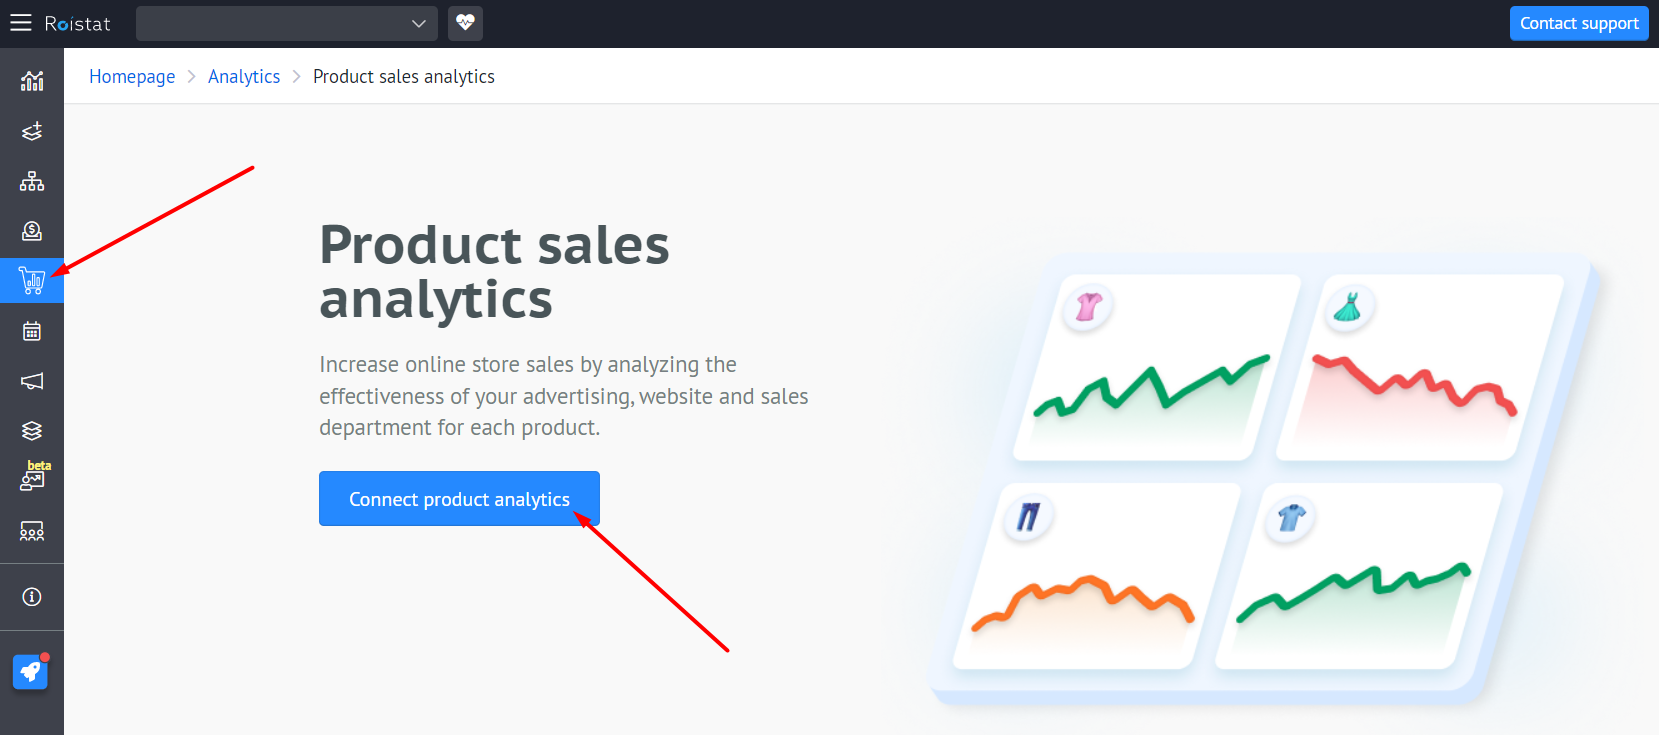
In the Roistat project, open the Analytics section, go to the Product sales analytics tab and click Connect product analytics:
-
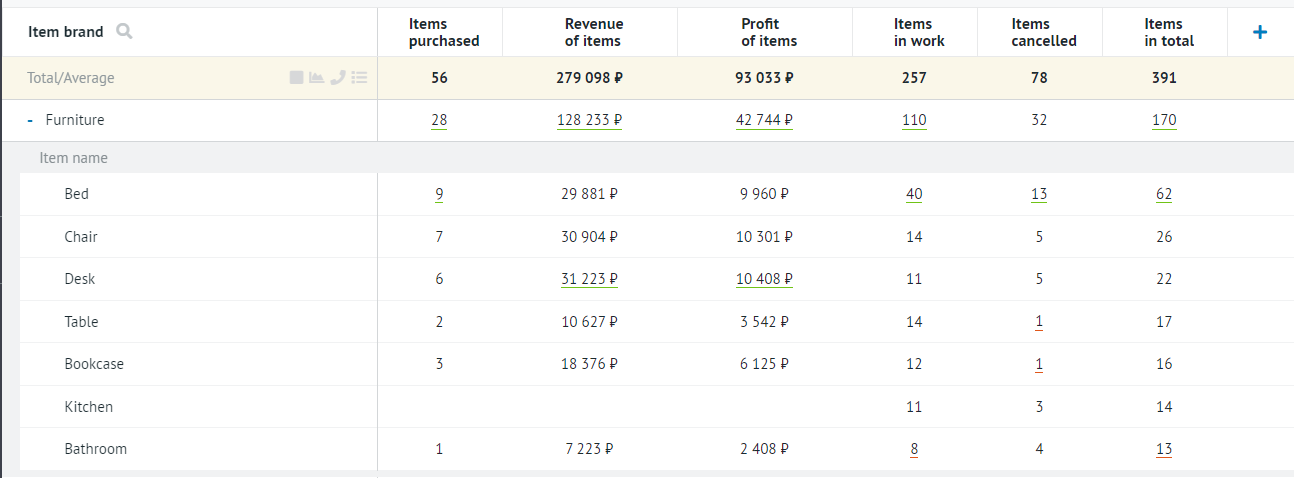
After the next import of deals from CRM, product information will be displayed in the Analytics → Reports section. If the products are categorized, the report will display subcategories.
Also, detailed information about the product is displayed in the deal card and in the lead card:
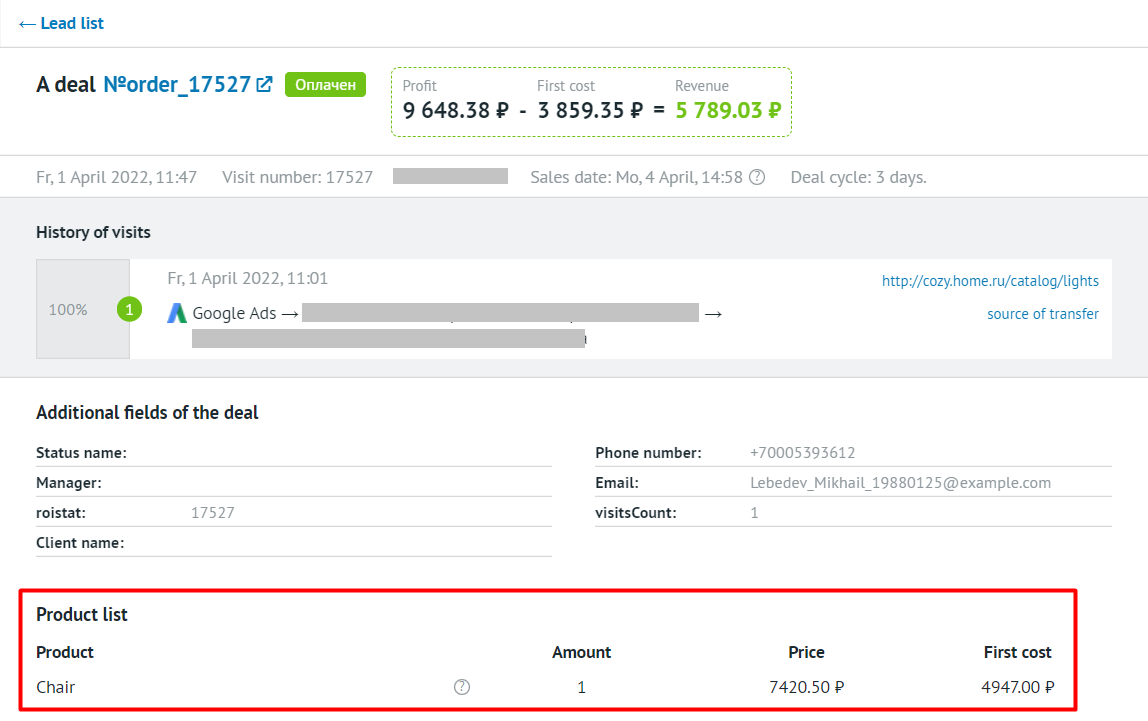
Product analytics works both for new deals and for deals that were uploaded to the project before Product analytics was enabled. To update data on deals created before Product Analytics was enabled, please contact Roistat Support.
Verifying the Integration
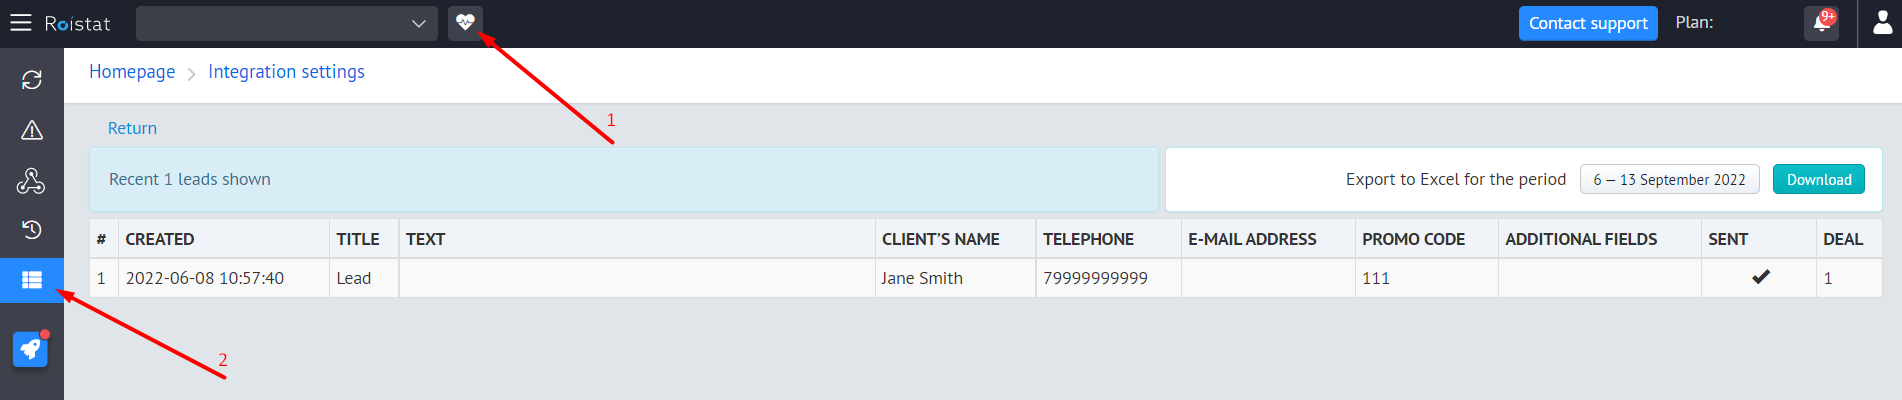
When a client leaves a request on the site, a new deal must be created in Bitrix24 with the roistat field filled in. Deals are also displayed in Roistat:
-
In the Project diagnostics → List of submitted leads section:
-
In the Analytics section in the list of deals:
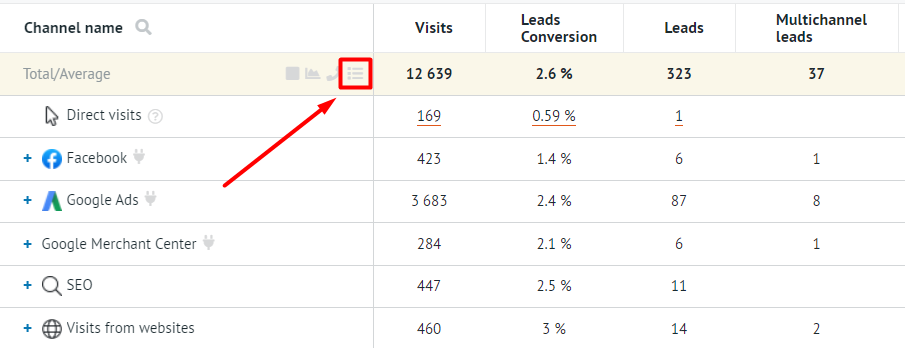
After setting up the integration, we recommend using the following Roistat tools:
* Facebook is owned by Meta Platforms, banned in the Russian Federation and recognized as extremist by a court.