Setting Up Events
In this article, you will learn how to set up and track Events:
To learn what Events are and why you should track them, read the introductory article about Events.
Setting Up an Event
On a Website
Please note:
To set up events on your website, first install the Roistat tracking code.
-
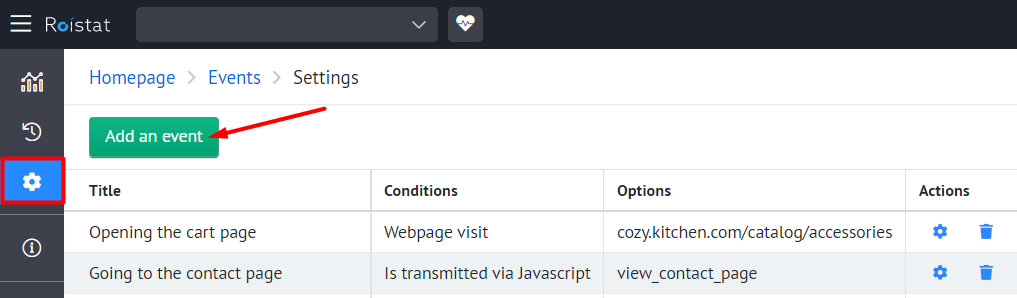
In the Roistat project, open the Events section, go to the Settings tab, and click on the Add an event button:
-
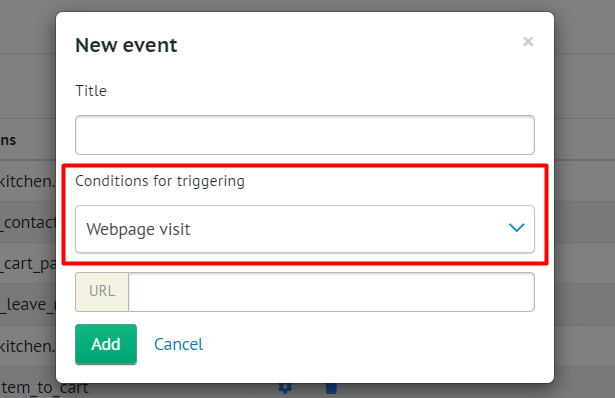
In the window that opens, enter the name of the event.
-
Select one of the conditions for triggering: Web page visit or Is transmitted via JavaScript.
Web page visit:
When this condition is selected, a click on the specified link is considered an event. To set up an event, add the desired link to the URL field. You can use regular expressions.
Click Add to save the event. After that, clicks on the specified link will be automatically tracked.
Each event firing is displayed on the Events history tab with the date and time when the user clicked on the link.
Is transmitted via JavaScript:
JavaScript can be used for other types of tracking. For example, you can track the following activities:
- The user clicked on the button;
- The user added the product to the cart;
- The user spent a certain number of seconds on the website.
Come up with an ID for the event and enter it in the appropriate field. The event ID must match the ID you specify later in the website code.

Click Add to save the event.
In the JavaScript code on the website page, insert the line with a code like roistat.event.send('cart_view', data), where cart_view is the previously specified event ID, data is optional argument in the key: value format with any additional parameters.
For example:
    roistat.event.send('cart_view')
    roistat.event.send('register', {'name':'product'})
Event tracking will begin immediately after adding the code to the website.
You can also send events using the Roistat API.
-
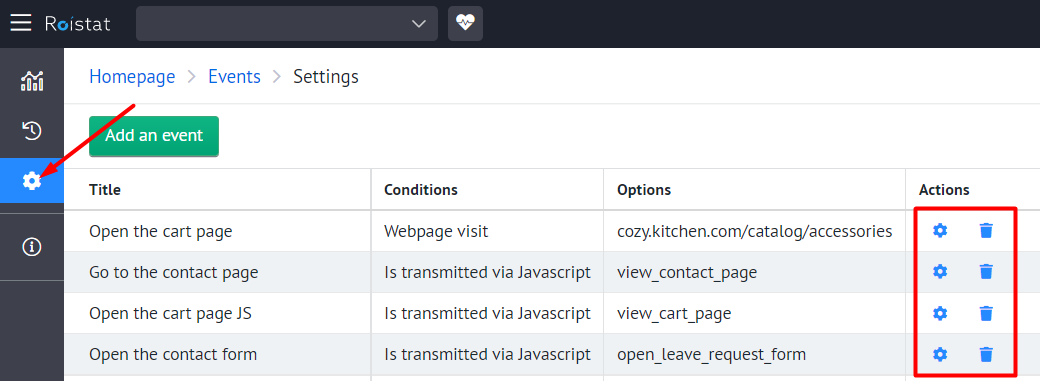
Configured events can be edited or deleted on the settings page:
-
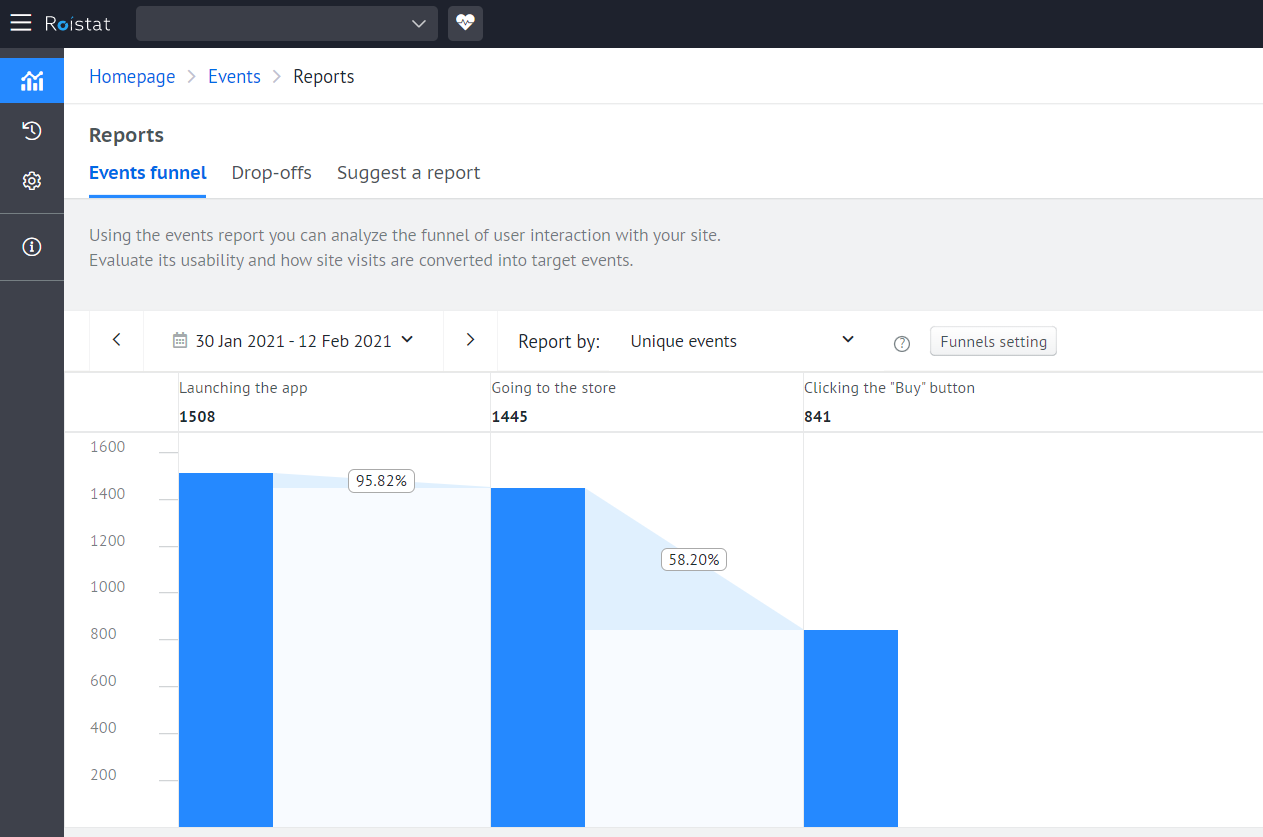
If necessary, you can create the event funnel report.
In a Mobile App
-
In the Roistat project, open the Events section, go to the Settings tab, and click on the Add an event button:
-
In the window that opens, enter the name of the event.
-
Select Is transmitted via JavaScript as the condition for triggering and set any ID for the event:
-
In the app code, configure the event to be sent via the Roistat API using the /project/events/send method. The request must be sent from the app at the moment the target action is performed (for example, when a button is clicked).
Once the request is added to the app code, event tracking will begin. Each event firing will be displayed in the Events history.
-
Configured events can be edited or deleted on the settings page:
-
If necessary, you can create the event funnel report for your app:
In an Email Newsletter (Email Opens)
-
In the Roistat project, open the Events section, go to the Settings tab, and click on the Add an event button:
-
In the window that opens, enter the name of the event.
-
Select Is transmitted via JavaScript as the condition for triggering and set any ID for the event:
-
To track email opens, add an invisible pixel to its HTML code that sends a POST request to the Roistat server. For example, this can be done like this:
-
Upload a 1x1 image to your server.
-
On the same server, add a PHP script to upload the image and send a POST request to the Roistat server. To send event data, use the /project/events/send method. An example of a simple script to load the tracking.gif image:
<?php //Script to load the image header('Content-Type: image/gif'); readfile('tracking.gif'); //Script to send a POST request file_get_contents( 'https://cloud.roistat.com/api/v1/project/events/send?key={API_KEY}&project={PROJECT_ID}', false, stream_context_create([ 'http' => [ 'method' => 'POST', 'header' => 'Content-Type: application/json', 'content' => json_encode([ 'name' => 'Opening an email', 'visit' => '100001', 'data' => [ 'region' => 'Berlin', ], ]), ], ]) ); ?> -
Add a pixel to the email's HTML code:
<img src='.../tracking.php?tracking.gif' width=1 height=1>
Now, each time a client opens an email, a new event firing will appear in the Events history.
-
-
Configured events can be edited or deleted on the settings page:
In the CRM
-
In the Roistat project, open the Events section, go to the Settings tab, and click on the Add an event button:
-
In the window that opens, enter the name of the event.
-
Select Is transmitted via JavaScript as the condition for triggering and set any ID for the event:
-
Set up sending a POST request to Roistat when performing an action with a deal in CRM using the /project/events/send method. In different CRMs, setting up events for deals can be different.
-
Configured events can be edited or deleted on the settings page:
Sending an Event Using API
If necessary, you can send events using the Roistat API:
-
Create an event with any condition for triggering. For example, you can select Is transmitted via JavaScript, and this does not necessarily mean that you need to set up sending events using JavaScript. In this case, you only need to create an event with a unique name which will be used in the request body later.
-
Set up sending a POST request when a target action is performed. To do this, use the /project/events/send method.
The /project/events/send method allows you to pass the static source instead of the visit number in the visit parameter. In this case, there will be no visit number in the Events history, but the specified source will be displayed in the event report.
How to Analyze Events
Using built-in event reports, you can analyze user interaction with the website to improve its usability.
The following reports are available:
- Events funnel
- Drop-offs
You can also view event statistics in Analytics reports. The following metrics are available:
-
<Event title> – shows how many times the event fired (including repeated actions performed by the same user).
-
<Event title> (users) – the number of unique users that triggered the event.
Example for the Button Click event: Client 1 clicked the button three times, and Client 2 clicked once. In this case, Button Click will be 4, and Button Click (users) will be 2 (number of unique users).
-
Conversion to <Event title> – the share of fired events in the total number of visits. Calculated using the following formula: <Event title> / Visits × 100%
-
<Event title> Value – cost of a triggered event. Calculated using the following formula: Cost / <Event title>
-
Total Events – the total number of events fired in the project.
-
Total Unique Events – the total number of events with a unique visitor fired in the project.
If grouping by event date is selected in the report, the event firing date will be taken into account (regardless of when the page was visited).
If grouping by visit date is selected, event metrics will be marked (by event date). The date of the visit associated with the event will be taken into account (even if the event fired later than the visit date). If there is no visit associated with the event, the event firing date will be taken into account.
How to View the Events History
The history of event firing is displayed on the Events History tab:
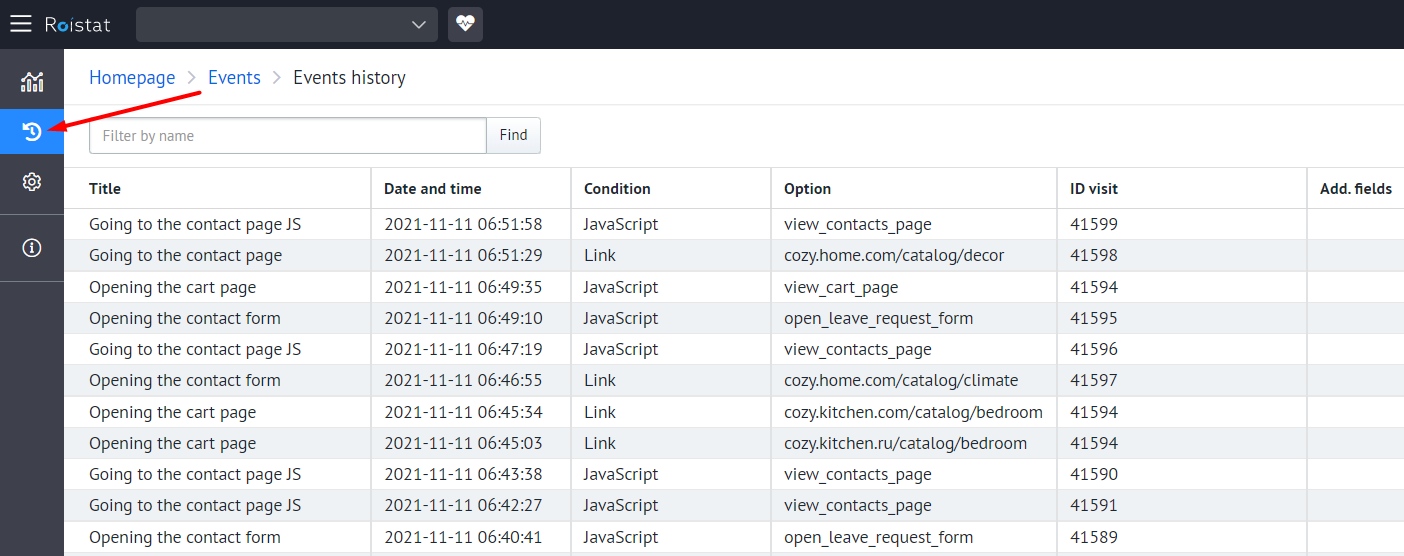
For each event firing, the following information is displayed:
- Title – unique title of the event in the Roistat system;
- Date and time – date and time of the event firing;
- Condition – method of sending event data;
- Option – event ID or regular expression;
- Visit ID – visit number on the website (from the roistat_visit cookie);
- Add. fields – additional data on the event: URL or value of the data parameter. For example, http://example.com, product.
You can quickly copy the contents of a cell by clicking on the text in it.