Setting Up Email Tracking
How Email Tracking Works
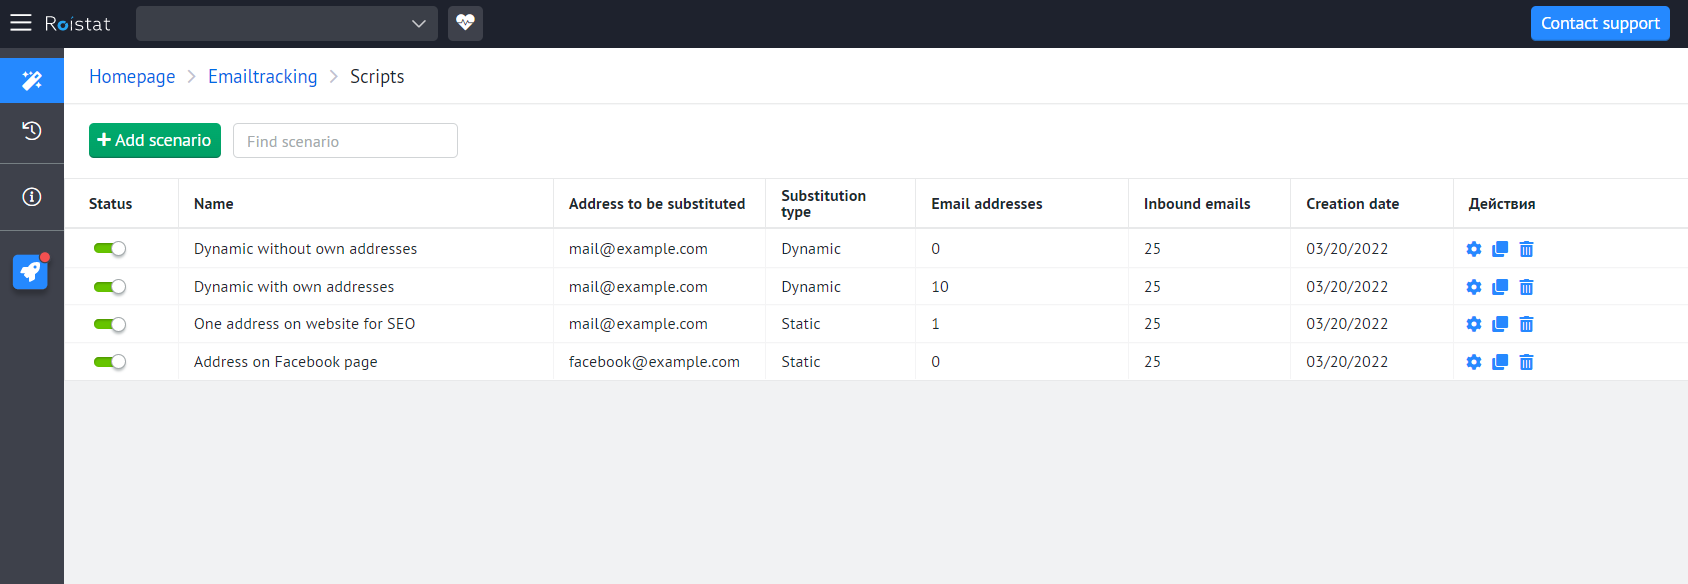
On the Email Tracking scripts page, you can:
- Create a new script;
- Change current scripts;
- Copy one of the current scripts to make it easier to customize;
- Delete script.
Once the script is running:
-
A client visits your site and sees a substitution email address that is assigned to a specific advertising source.
-
When a client sends a request on this email address, the request is redirected to the real address you specified in email tracking settings. You will receive a lead and find out which source brought the client. Duplicate leads will be filtered out after checking for duplicates.
-
The client's email will be uploaded to the Roistat project in the History section. Roistat uploads new emails every 3-15 minutes. After that, emails are sent to CRM, Google Analytics and webhook if the corresponding options are enabled.
If the user sends an email with an attached file, the file is stored on the Roistat server, and a link to this file is sent to the deal in CRM.
Creating an Email Tracking Script
In the Email Tracking script, you can configure processing of emails from different substitution email addresses. Users write to a specific substitution address, and the email is processed depending on this address.
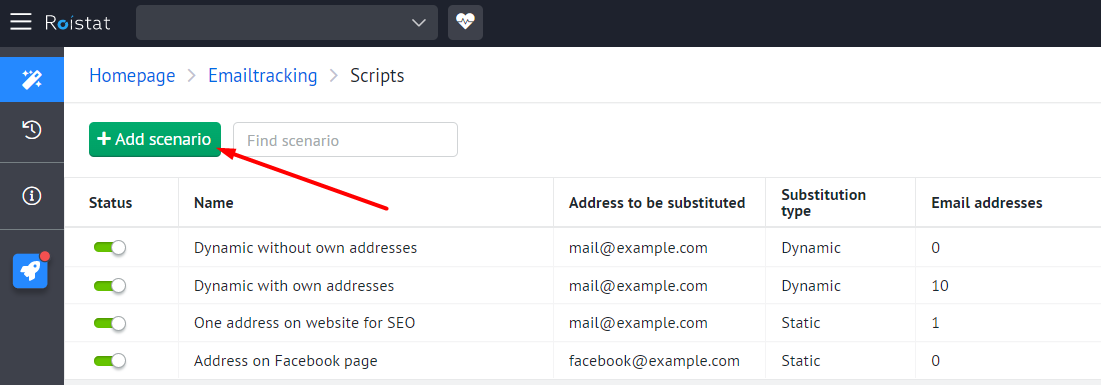
To create a new script click Add scenario on the Scripts tab:
Setting up an email tracking script consists of several steps:
Step 1. Choose where the email will be placed
On your website - for all users
In this case, email tracking will allow you to track user requests down to the keyword. Each new visitor to the site is given a new substitution Email tracking address that can be used for sending a request.
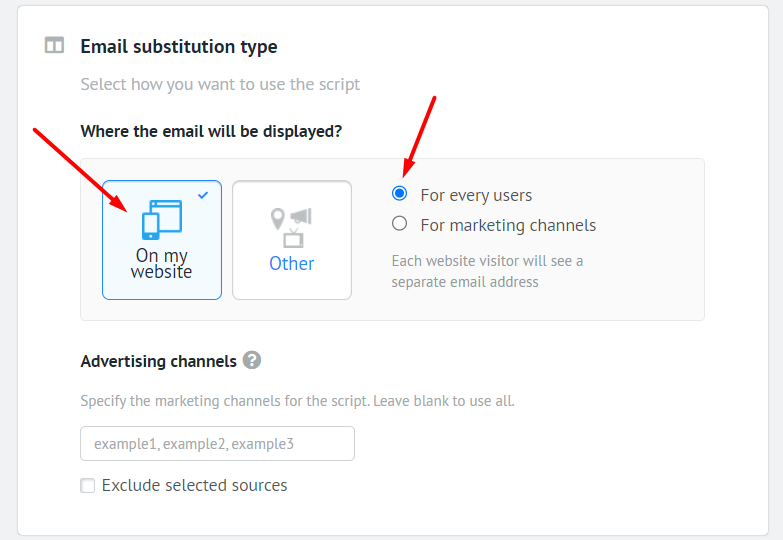
When setting up dynamic email tracking, you can specify the details for some advertising sources, such as Google Ads.
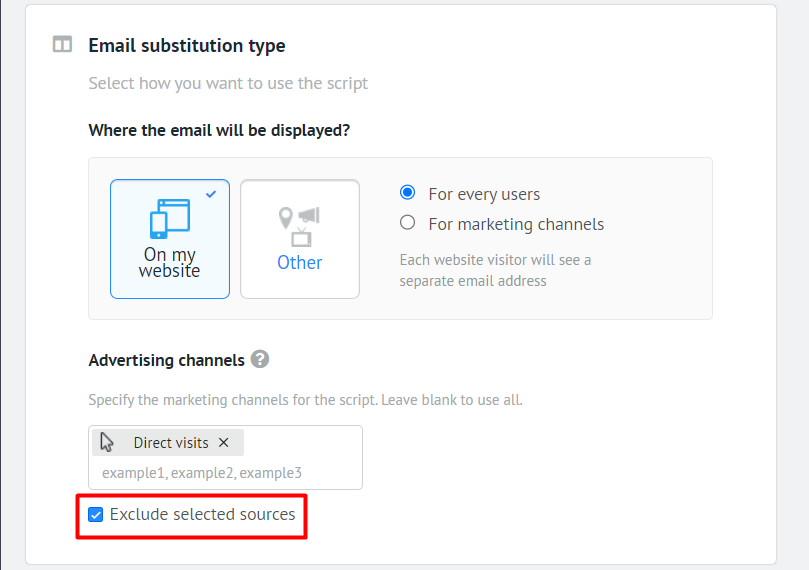
In order not to overload the script with a large number of advertising sources, you can exclude sources that you do not need to track: select these sources and check the Exclude selected sources box.
Please note:
Roistat creates a deal according to the script, even if the address is in the Bcc of an email.
Setting up addresses
In the Swap address section, specify the address that will be substituted on the site:
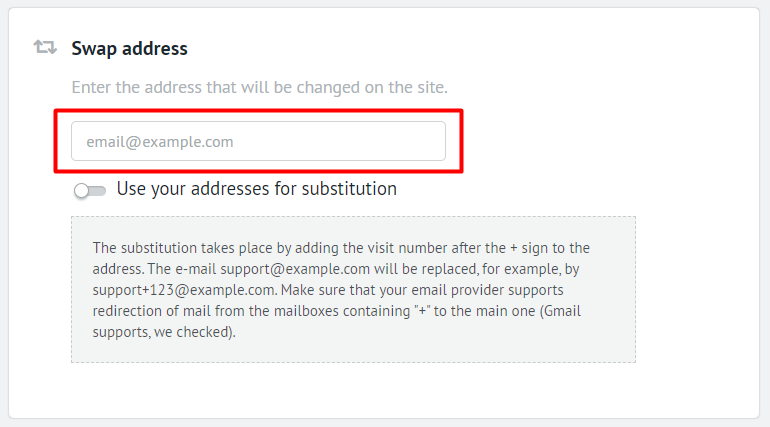
If the Use your addresses for substitution option is disabled, email tracking works according to the following logic: a client visits your site and sees a substitution email address that is associated with their visit.
- The client with visit number 112 will see the email address example+112@mail.com.
- The next client with visit number 113 will see a substitution address example+113@mail.com.
- A client with visit number 114 will see a substitution address example+114@mail.com.
If the Use your addresses for substitution option is enabled, you must specify your own substitution addresses. These addresses will be shown to your site visitors in the specified order.
The substitution address is assigned to the visitor:
- While the visitor is on the site;
- Within 15 minutes after the visitor left the site.
The recommended number of addresses is calculated based on the number of site visitors per day. We recommend using 1 address per 100 visitors.
Set up forwarding to the mail server address (for example, demo@roistat.com) from all substitution addresses. Emails from this address will be uploaded based on this script.
If you do not have enough substitution addresses, the Email tracking logic can be reconfigured. In this case, email tracking will work according to one of the following scripts:
- New visitors will see the substitution email address: example@mail.com
- New visitors will see the substitution email address with the addition of the visit number: example+112@mail.com
If there is a "+" symbol in the substitution address
Forwarding from addresses containing the "+" symbol (for example, example+112@mail.com) is possible without additional settings if you use Gmail. If you have a different email system, make sure that it supports forwarding emails from addresses with a "+" symbol to your main email address.
How to check that your mail system supports forwarding emails from addresses with a "+" symbol:
- Write a test email to your address, adding +123 before the @ sign. For example, if your address is example@mail.com, the email should be sent to example+123@mail.com.
- Check that you have received the email.
- If you did not receive the email, contact your mail service support to check the possibility of forwarding from addresses containing the "+" symbol.
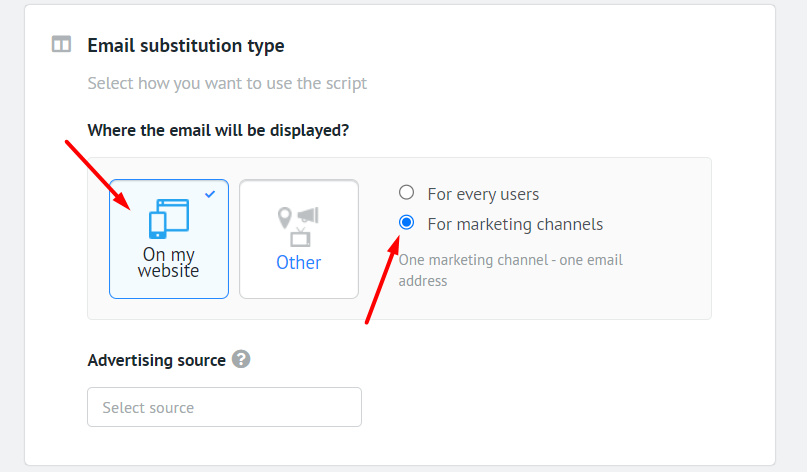
On your website - for marketing channels
In this case, each substitution address is assigned to a specific advertising source.
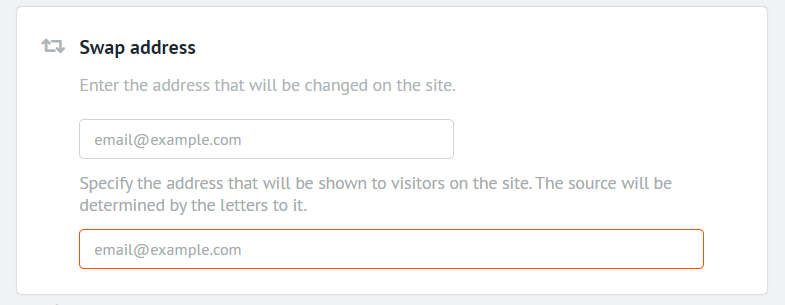
Setting up addresses
In the Swap address section, specify the address that will be substituted on the site and the address that will be shown to visitors on the site. The source of the emails will be determined by the second address.
Set up forwarding to the mail server address (for example, demo@roistat.com) from all substitution addresses. Emails from this address will be uploaded based on this script.
Other
Use this setting if you plan to place an email address on business cards, billboards, or third-party resources.
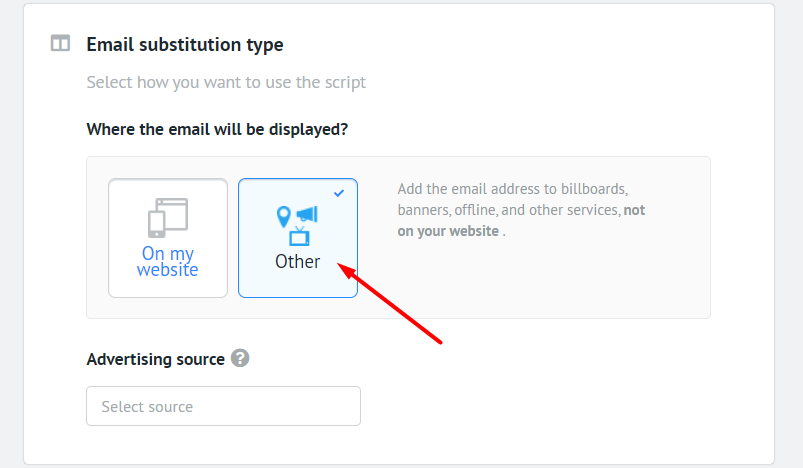
Specify the Script address to which users will write, and Advertising source, which should be determined from these emails:
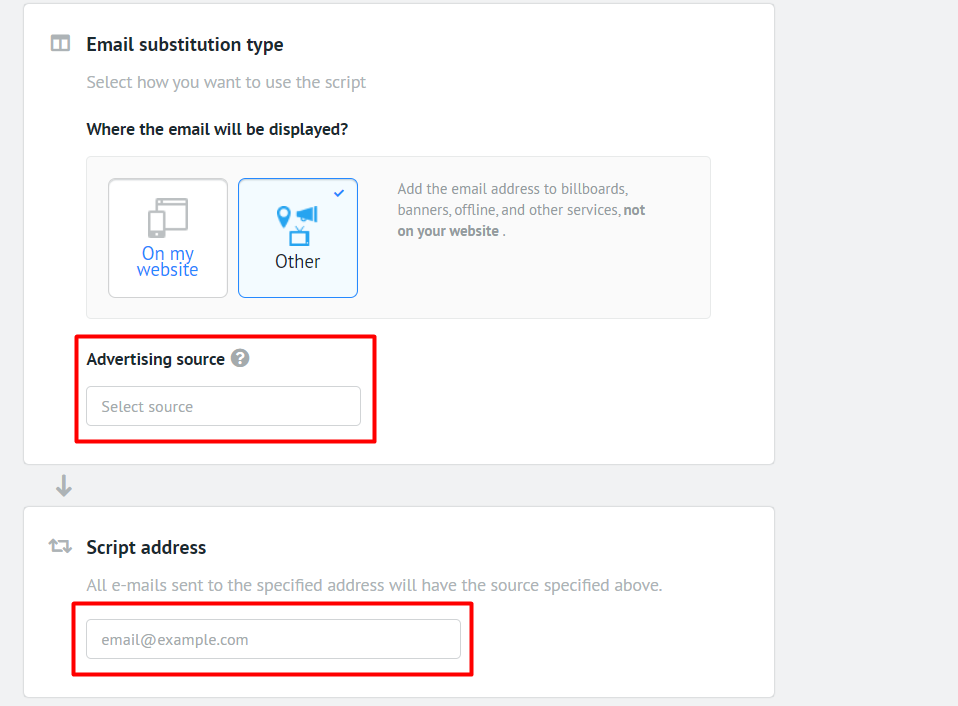
With these script settings, there is no need to use your address for substitution. If it is nevertheless specified, the source will be determined by the emails to it.
Step 2. Set up a mail server (IMAP)
At this step, you need to configure the mail server from which emails will be uploaded as part of the script. All script settings will be applied to these emails.
Set up forwarding to the mail server address (for example, demo@roistat.com) from all substitution addresses:
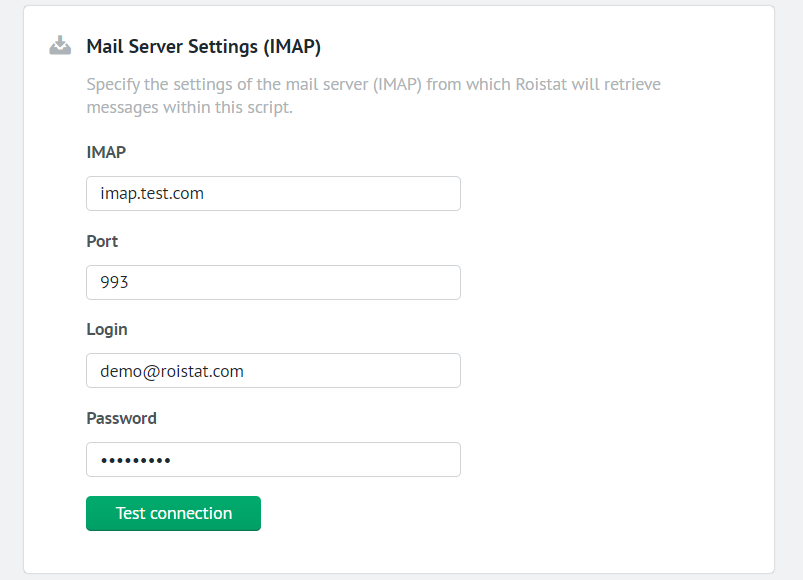
- Login – email address from which emails will be uploaded to Roistat
- Password – password for this email account
Please note:
-
Roistat only uploads emails from the Inbox folder. Emails are not marked as read after they are sent to Roistat.
-
If you can't connect to your Gmail account with your master password (the app is flagged as insecure) or you're using two-factor authentication, create an app password for Gmail. When creating a password in Gmail, select Mail from the Application drop-down list. After creating an application password, enter it in the mail server settings.
-
If you're using Microsoft Exchange as your mail server and you're having trouble testing connections/downloading emails, check and reinstall your TLS 1.2 certificate.
Step 3. Set up integrations
If a site visitor sent an email that meets the conditions of the script (came to the specified mail, received through the specified advertising channels, etc.), then this email can be sent to CRM, Google Analytics or webhook.
To CRM
Enable the Send to CRM option:
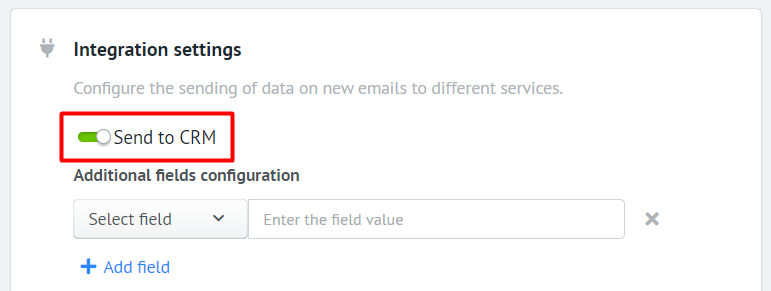
Specify the additional fields which should be sent in the lead, including the responsible manager.
Please note:
-
Only one responsible manager can be specified for each script. If you need to distribute leads in turn, do not add the Manager field to the script settings. The standard distribution of responsible managers will be used, which is specified in the CRM integration settings.
-
Attachments can be hundreds of megabytes in size. If you would like to add multi-gigabyte files, please contact support. Email attachments are stored indefinitely.
To Google Analytics
Specify the ID of your resource where the goals will be tracked:

Each script allows you to send a goal to one Google Analytics counter.
To further customize the goal, click Show event settings and change the standard additional parameters:
- Event category
- Event action
- Event label
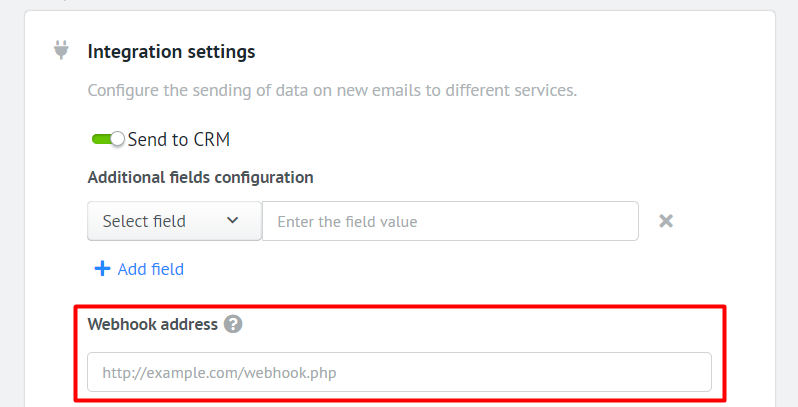
To webhook address
Specify the address to receive new incoming email notifications. Using webhook notifications, you can set up your own logic for processing and sending information about a new email to third-party systems.
A POST request will be sent to the webhook address containing a JSON object that passes the following information about the lead:
{
  "id": "111",// unique email ID in Roistat
  "email_id": "222", // unique email ID in your mailing service
  "visit_id": "123456", // visit number
  "subject": "Re: Test", // email subject
  "text": "Тестовое письмо", // email text
  "email_from": "email_1@mail.com", // email address from which the email was sent
  "email_to": "email+123456@mail.com", // email address to which the email was sent
  "attachments": [], // attachments
  "referrer": "vk.com", // referrer page
  "marker": "vk_new", // visit source
  "city": "Москва", // city
  "country": "Россия", // country
  "ip": "100.100.1.1", // IP address
  "first_visit": "1001", // first visit
  "domain": "test.com", // domain
  "landing_page": "test.com/new", // landing page
  "utm_source": null,
  "utm_medium": null,
  "utm_campaign": null,
  "utm_term": null,
  "utm_content": null,
  "roistat_param_1": null,
  "roistat_param_2": null,
  "roistat_param_3": null,
  "roistat_param_4": null,
  "roistat_param_5": null,
  "google_client_id": null,
  "metrika_client_id": null,
  "source_level_1": "vk",
  "source_level_2": "new"
}
An example of a handler that complements the log:
<?php
$data = json_decode(trim(file_get_contents('php://input')), true);
file_put_contents('webhook-log.html', serialize($data) . '<br />', FILE_APPEND); // $data will contain an array key => value with information about the email described above
You can also pass additional information for each lead along with the data that is sent to the webhook by default. To do this, click Add field and set the correspondence between additional fields and their values that will be sent to the specified address:

Step 4. Set trigger conditions
To make scripts work more accurately, you can set the conditions under which they will work on specific sites and pages.
Enter the sites where you want the scripts to run. The address must be specified without http or https. If you enter example.com, the script will work on all pages of the site (example.com/promo, example.com/contacts, etc.).
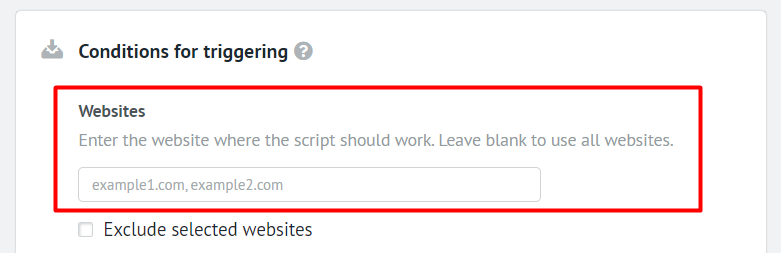
If you are working with multiple websites, you can choose to exclude certain websites from the script. To do this, add them to the field and check the Exclude selected websites box.
You can also set up the user's geolocation for which the script will be triggered. The following filters are available:
- Country
- Region
- City
You can specify one or more values.
You can also exclude certain countries, regions, or cities from the script. To do this, specify them and check the Exclude selected countries/regions/cities) box.
Once the script is set up, click the Enable script button or save the script without enabling it.