Calltracking: Scripts
To start using Calltracking, you need to set up scripts for number replacement.
Roistat call tracking script is a set of rules and settings that regulate the process of number replacement. Scripts can also be used to track the effectiveness of offline advertising (static call tracking).
You can create multiple scripts for the same site. For example, if you want to set up the replacement of two numbers from different regions on one page, set up a separate script for each region.
Please note:
-
If you add numbers, but do not activate the script, the external number service charge will still apply.
-
If the Calltracking account balance approaches zero, Roistat sends a notification letter to the email address specified in your account.
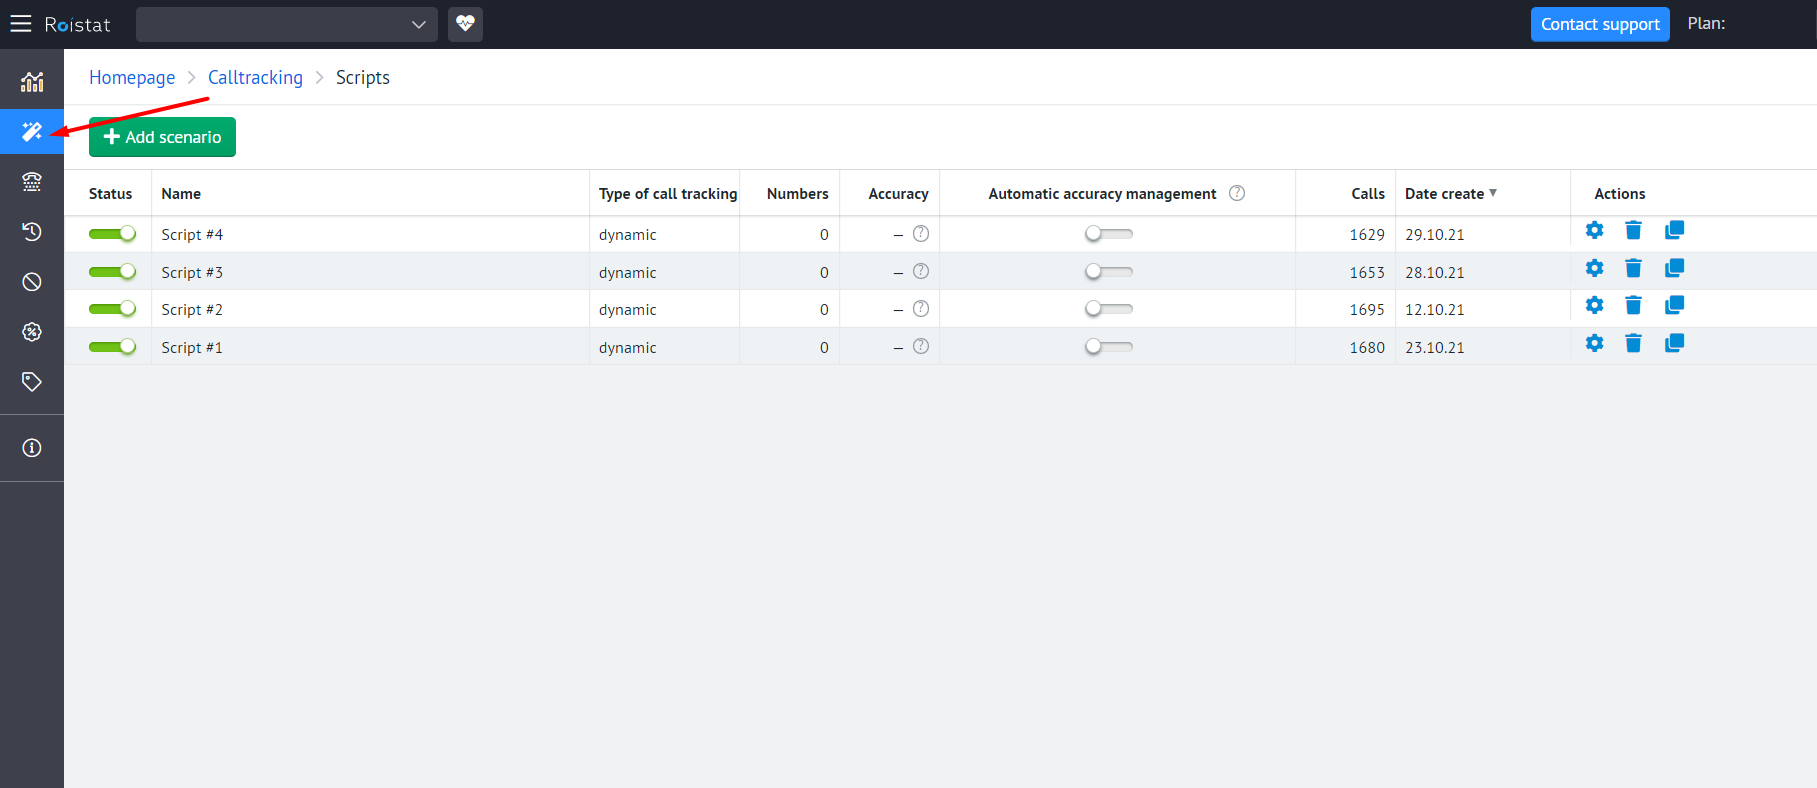
To view and configure scripts, expand the Roistat menu in the upper left corner and go to the Calltracking section on the Scripts tab:
Creating a Script
To create a script, click the Add scenario button. The settings window will open:
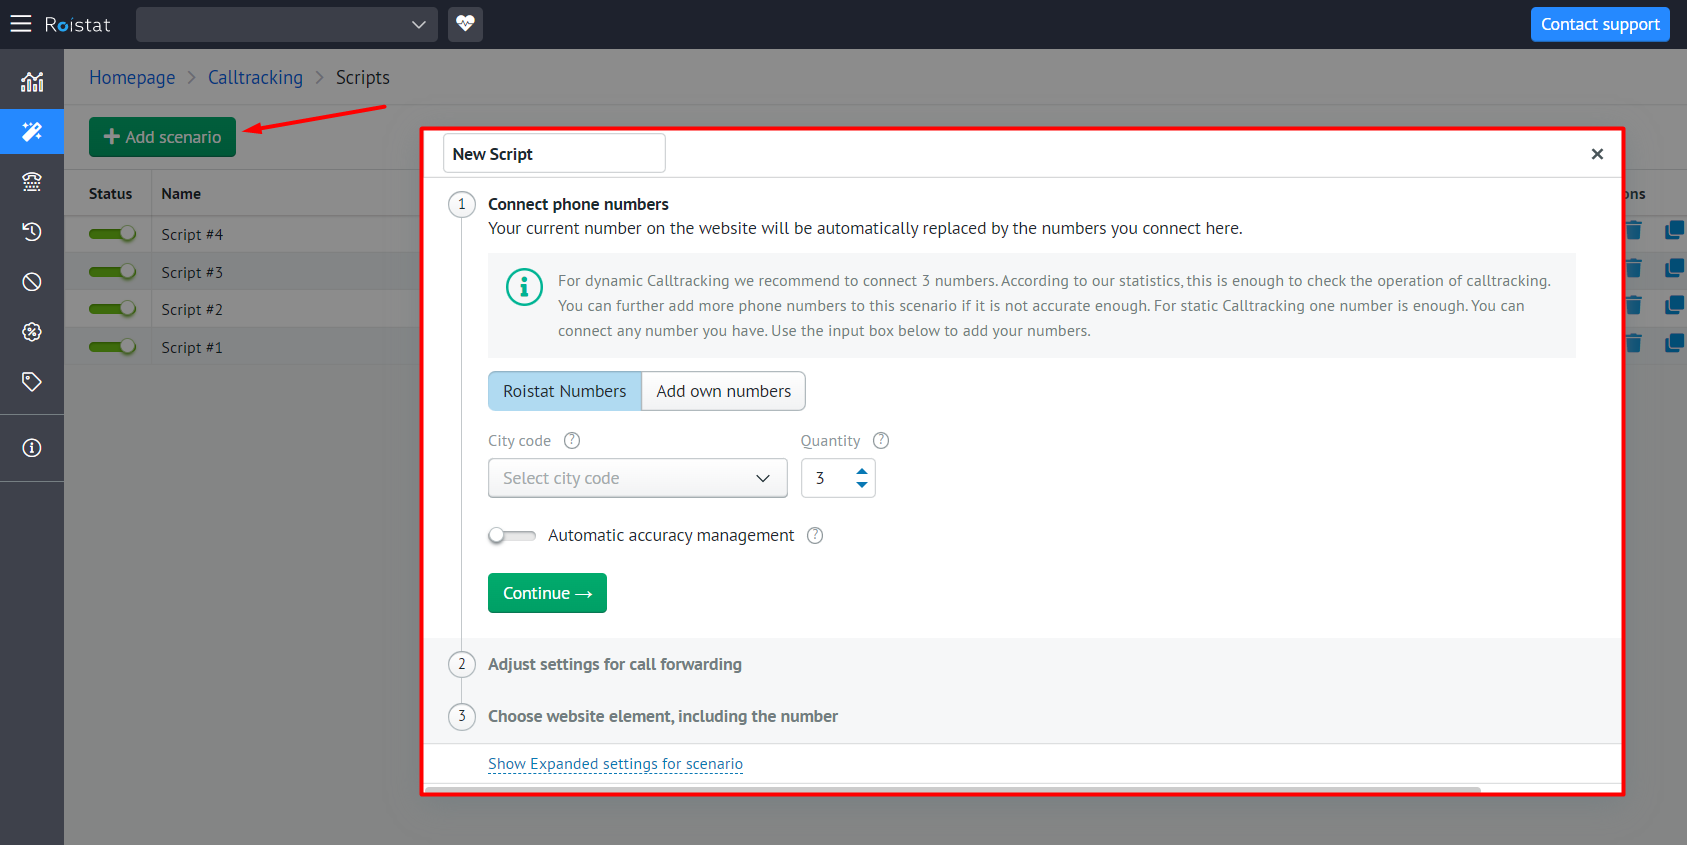
Script setup consists of several steps. To proceed to the next step, click the Continue button. To return to the previous step, click on the section with the desired step.
Give the script a name to distinguish it from other scripts. The field for entering the name is located at the top of the settings window, above all the steps:
Calltracking settings are divided into basic and advanced. Calltracking will not work without basic settings. Advanced settings can be used if needed.
Basic Settings
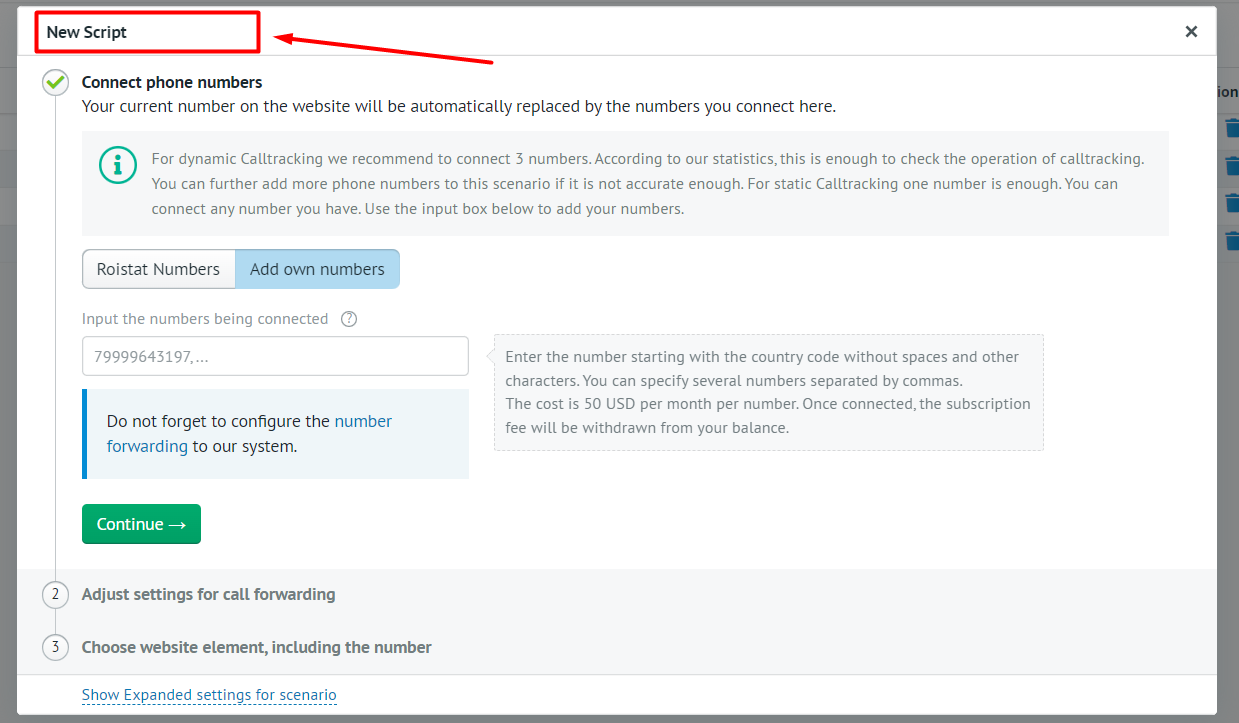
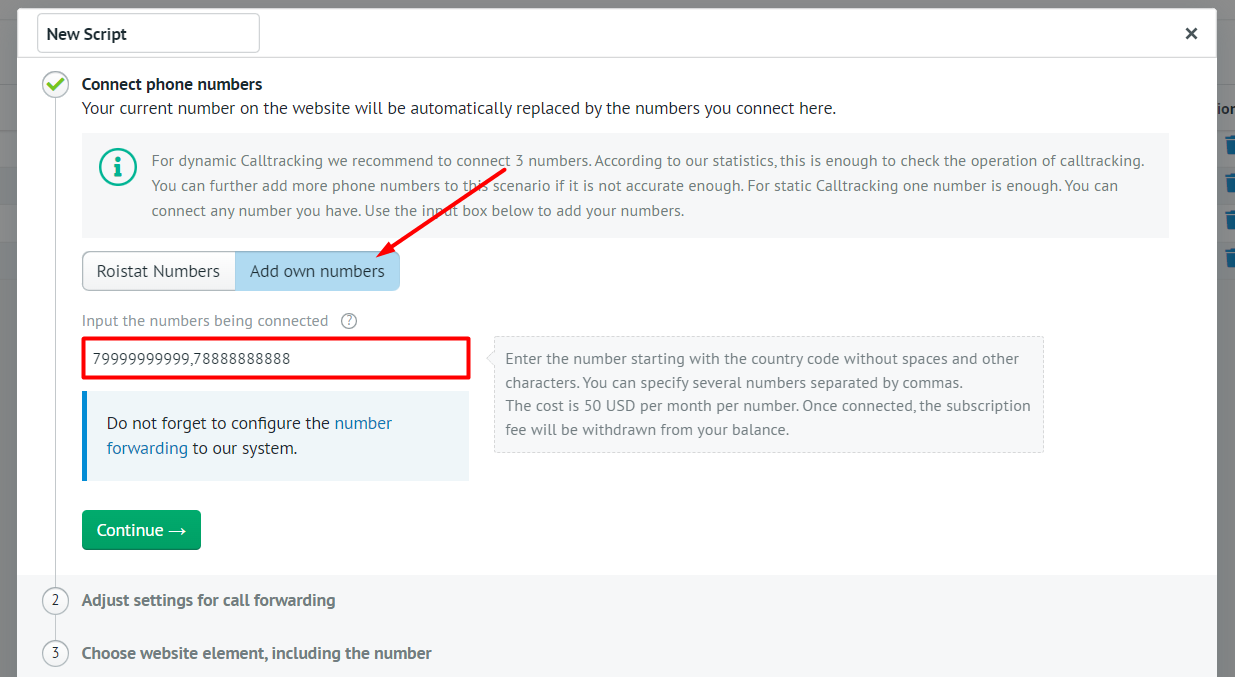
Step 1. Connect phone numbers
First of all, you need to connect virtual phone numbers that customers should call. These numbers will be replaced on the site.
-
Click on the Add own numbers tab.
-
In the input field, specify one or more of your numbers separated by commas (without symbols and spaces). Read more about connecting your own numbers here.
Step 2. Adjust settings for call forwarding
Go to the Adjust settings for call forwarding step.
If you use number replacement, calls from site visitors should be forwarded to real numbers answered by your managers, call center operators, etc.
Forwarding can be configured to a regular phone number or to a SIP account. Read more call forwarding here.
Step 3. Mark up the number on the site that should be replaced and set up its display format
-
On the Choose website element step, specify the number to be replaced on the website, or add the CSS selector of the element containing the number. If you specify both a number and a CSS selector, the replacement by a CSS selector will work. However, if the specified number is located outside the element for which you have specified the CSS selector, this number will also be replaced according to the configured script. Read more about marking numbers here.
-
Select a number format. By default, the replacement number is displayed on the site in the following format:
8 (XXX) XXX-XX-XX. You can change the number display format as you wish.
You can start call tracking right after the basic setup by clicking Save and enable. To further configure the call tracking script, go to advanced settings.
By default, the dynamic type of call tracking is set, which means that different replacement numbers will be shown to different users. In the advanced settings, you can select a static type of call tracking, when one replacement number is assigned to a certain advertising source.
Please note:
Deals created from calls are not assigned by default to the manager who receives the call. Deals are assigned to a manager only if it is specified in one of the following ways:
- In the advanced settings of the script – in an additional field for assigning a manager responsible for the lead (for more details, read Sending information about the call to CRM);
- In the CRM integration settings – in the additional field for assigning a manager responsible for the lead.
Advanced Settings
Step 4. Select the type of call tracking and specify advertising sources
For different advertising sources, you can set different types of call tracking: static or dynamic.
By default, the dynamic type of call tracking is set, and each of the replacement numbers is assigned to all advertising sources.
Pay special attention to this step if you are running multiple call tracking scripts at the same time.
When the user visits the website, they receive the visit number and Roistat Calltracking provides the replacement number. If the script triggering conditions are not configured and your website does not have scripts that limit the call tracking script activities, the visitor receives replacement numbers from each script. After this, numbers are replaced on the website according to the selectors (classes and IDs) used on the website and specified in scripts. If selectors in several scripts are the same, visitors of different landing pages may receive the same number. As a result, both visitors will have have the same visit number in the call tracking report. To solve this problem, exclude individual landing pages by configuring the script triggering condtions.
Please note:
If there was a call from number "A" to number "B", then on the next call from number "A" to number "B" Roistat will use the advertising source from the first call. Due to this, the source of repeated calls of the same client is correctly transmitted (for example, when the client wrote down the number and called it after a while). This logic will not change even if the number "B" is moved to another script (for example, to a static one).
Step 5. Set up integration with various services and systems
-
Sending leads to CRM. You can set up the creation of leads in CRM when calling numbers from a script. For more details, read Sending information about the call to CRM.
-
Webhook for sending the data about calls. You can configure the sending of call parameters using Webhook. For more details, read Sending information about the call using Webhook.
-
Sending the "Call" goal to Google Analytics. If you have a Google Analytics account, you can configure the sending of the "Call" goal with the type "Event" from Roistat to Google Analytics. For more details, read Sending the "Call" goal to Google Analytics.
-
Sending events to the Facebook pixel. You can set up an event to be sent to the Facebook pixel at the start of a call.
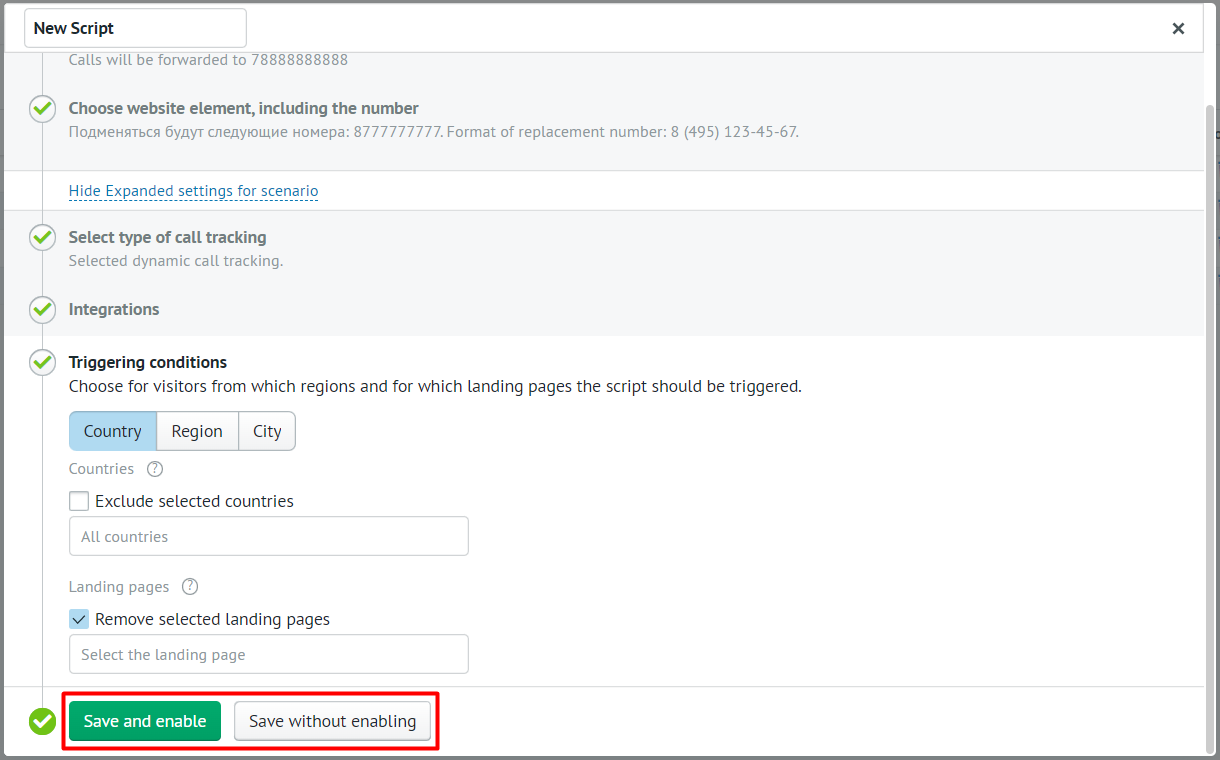
Step 6. Set up the script triggering conditions
You can specify the countries and landing pages for which the script should work, or exclude them from the script. Use this feature if:
- You need to to replace two numbers from different countries on the same page;
- CSS selectors for elements containing numbers are the same in several scripts.
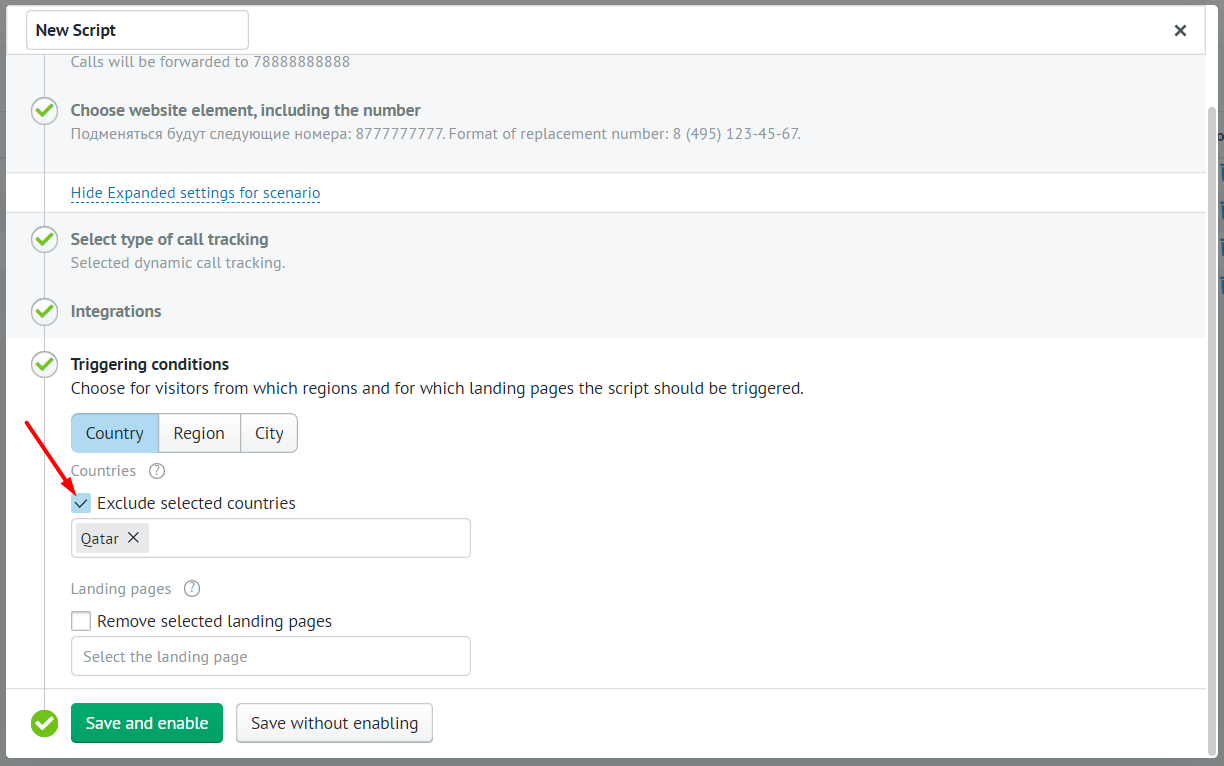
Specify the countries for which the script should work:
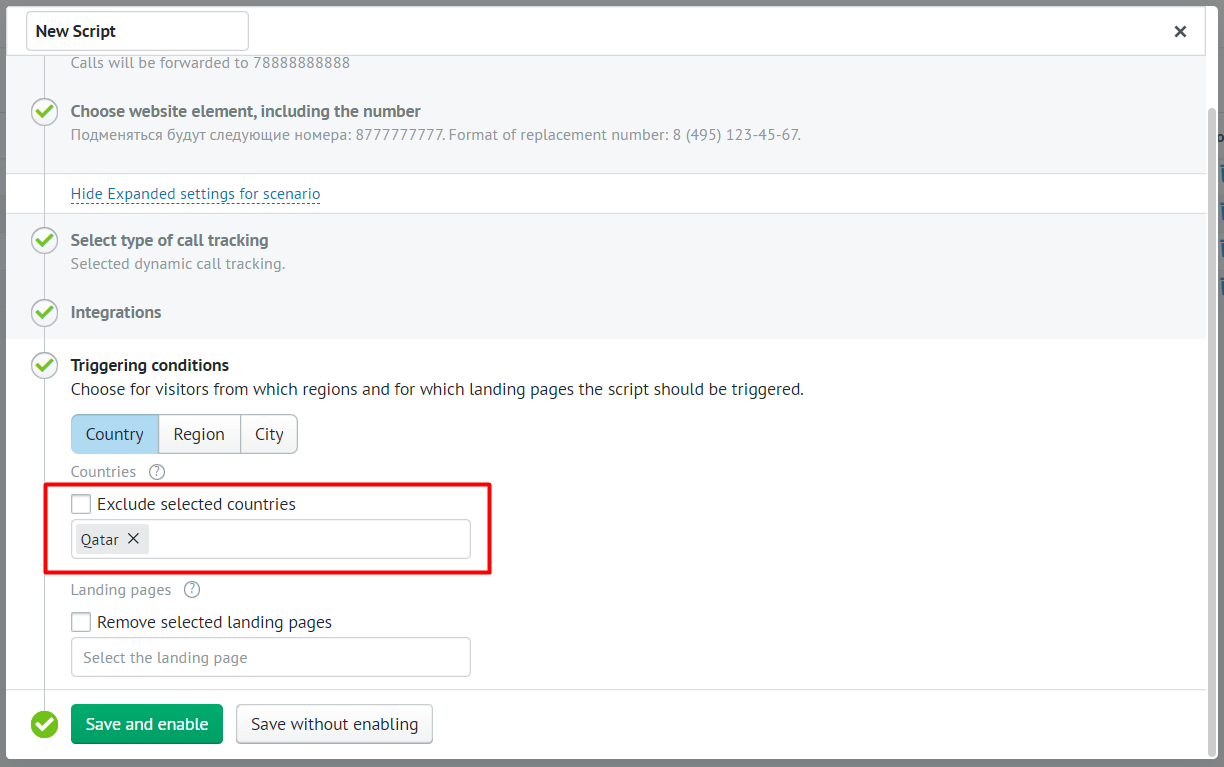
Activate the Exclude selected countries/regions/cities check box to exclude calls from the specified countries:
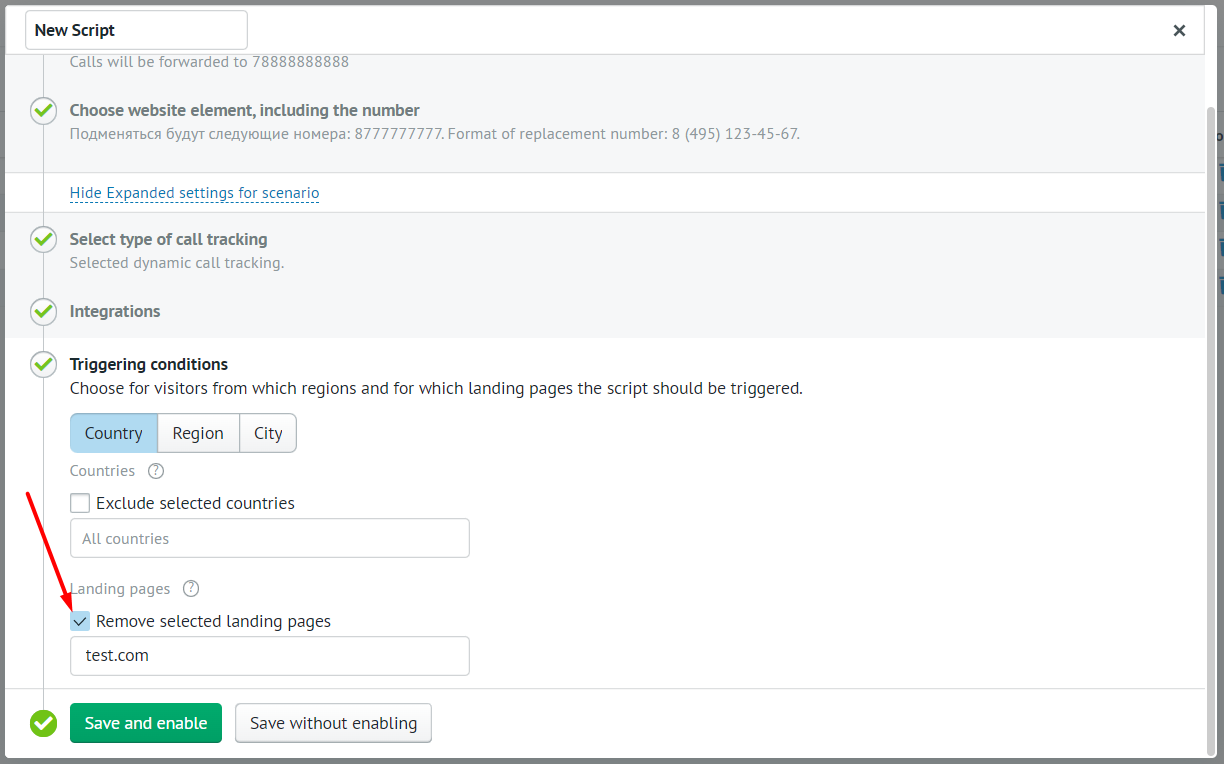
Specify the landing for which the script should work:
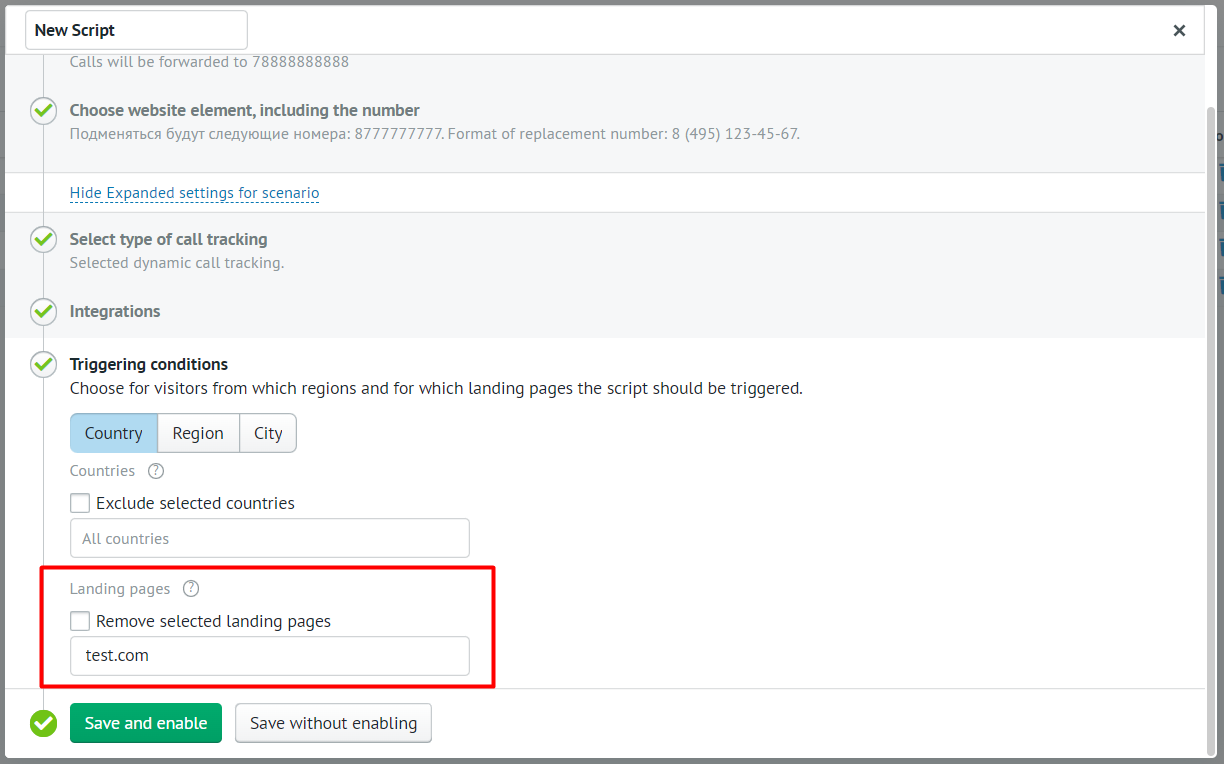
Activate the Remove selected landing pages check box to exclude calls from the specified landing pages from the script:
Please note:
If you use multiple script-site bundles, we recommend configuring this field to prevent the reduction of calltracking accuracy.
Saving and Enabling the Script
After completing all the steps, you can immediately enable the script or save it without enabling. In order for the numbers to start automatically being replaced, and for Roistat to start tracking call sources, the script must be enabled:
After clicking the Save and enable button, you will see a window where you need to confirm the purchase of configured numbers by clicking the Connect button:

Please note:
If you don't have enough funds to pay for the connected services, Roistat will notify you about it.
To save the script without enabling it, click Save without enabling.
Managing the Script
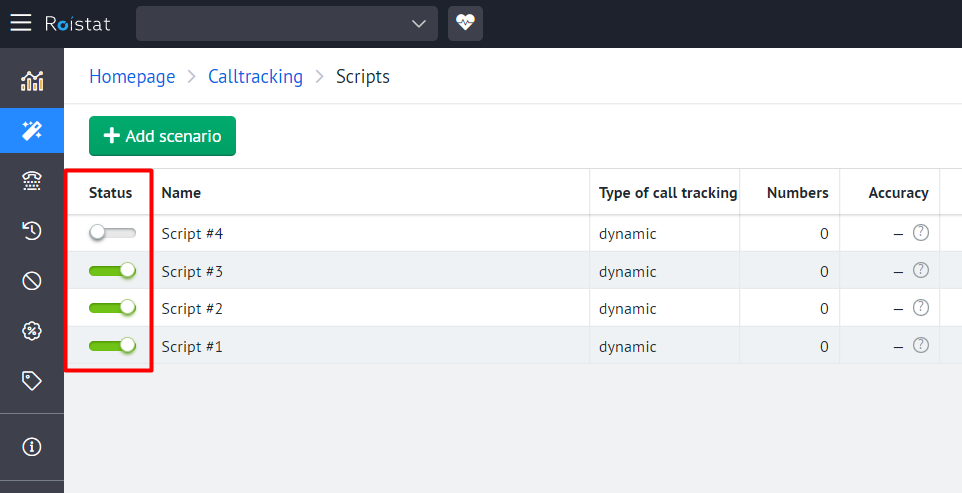
Enabling / Disabling
Enable the script to start automatic number replacement and call source tracking. To do this, click Enable in the script settings window or go to the Scripts tab and turn on the switch in the Status column. The script will be disabled if the switch is turned off.
You can activate the scenario only if you have enough funds on the balance.
Please note:
If you did not enable the script but already configured the replacement numbers, the subscription fee will be charged anyway.
Editing
To edit the script settings, click on the cogwheel icon in the Actions column.
To save changes, click the Save button.
Deleting
To delete the script, click on the trash icon in the Actions column.
If you want to stop the script, disable it in the Status column, but do not delete it.
Viewing the Script Table
Your scripts are saved in the Scripts tab as a table. For each script, the following information is displayed:
- Status – script status (enabled or disabled);
- Name – script name;
- Type of call tracking – call tracking type (static or dynamic);
- Numbers – the quantity of phone numbers in the script. By clicking the digit, you will see the list of phone numbers;
- Accuracy – call tracking accuracy (in percentage). It is displayed after the number is shown the first time;
- Calls – the number of calls in the script;
- Date of creation – script creation date;
- Actions – action buttons:
- open the scenario settings;
- delete the scenario;
- copy the script.