A/B Tests
Overview
A/B testing (or split testing) is a method of website interface testing, in order to find out which website version achieves the largest profit.
Website interface is a visual outer form of a website displayed on a screen of a computer, laptop, tablet, etc. Moreover, website interface it's not only graphic design but also operations that a user perform while interacting with a website.
The concept of A/B testing
You can create multiple versions of page elements or even entire website themes and test them against each other, in order to find out their effectiveness. When testing, different users are shown different versions of a web page.
When a user takes a desired action on a test web page, the information about this test page transfers to the test result table.
Roistat solution of A/B testing
A/B testing is usually based on conversion rate. This tactics may mislead you to wrong conclusions and poor decisions.
Most services offer the A/B testing concept based on conversion rate. However, we want to remind you that the number of leads is not equal to the number of sales.
Therefore, we offer A/B testing based on profit. It will help you draw the right conclusions and make the best decisions.
Setting Up
Step 1. Choose the testing method
Roistat offers 2 split testing methods:
- within Roistat interface with the help of CSS – style tests;
- server-side tests based on PHP – programmable tests.
With style tests, you can change only visual effects. Style tests are functionally limited but easy to set up.
Programmable tests have more functionality because much more types of changes can be produced by the code. Moreover, programmable tests are more reliable as they run on the server.
Use style tests to experiment with simple visual changes.
If you wish to test visual effects and some actions the users can complete on a website, for example, etc., you should run programmable tests.
Step 2. Configure tests
Style tests
-
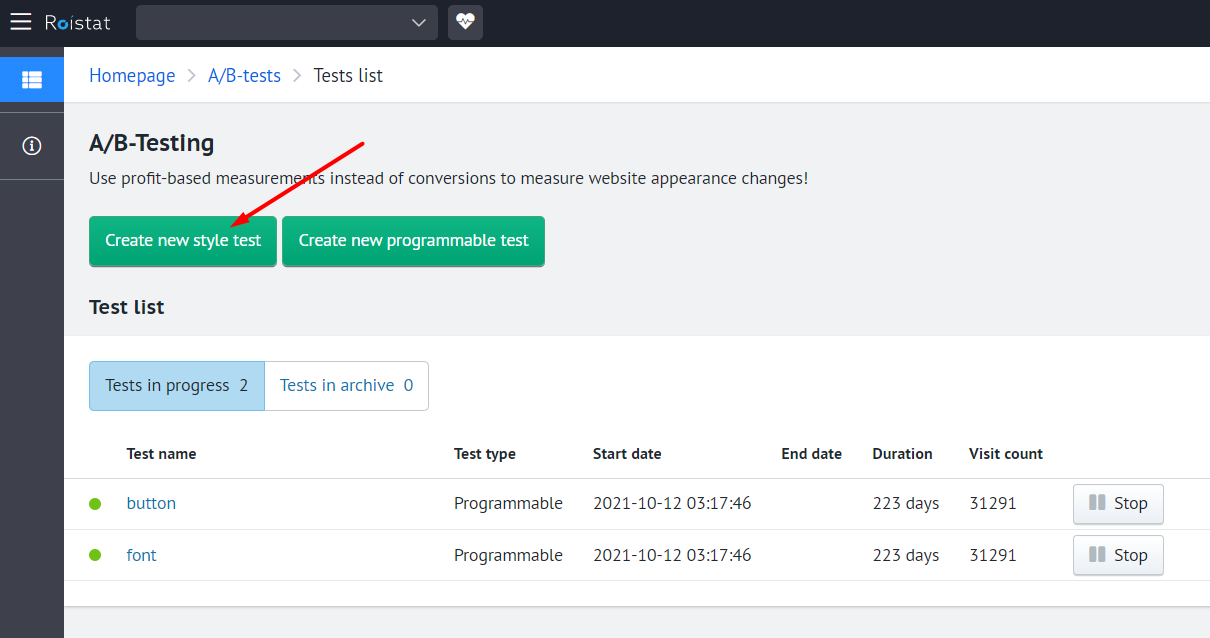
To create a style test, open the A/B-tests page and click the Create new style test button:
-
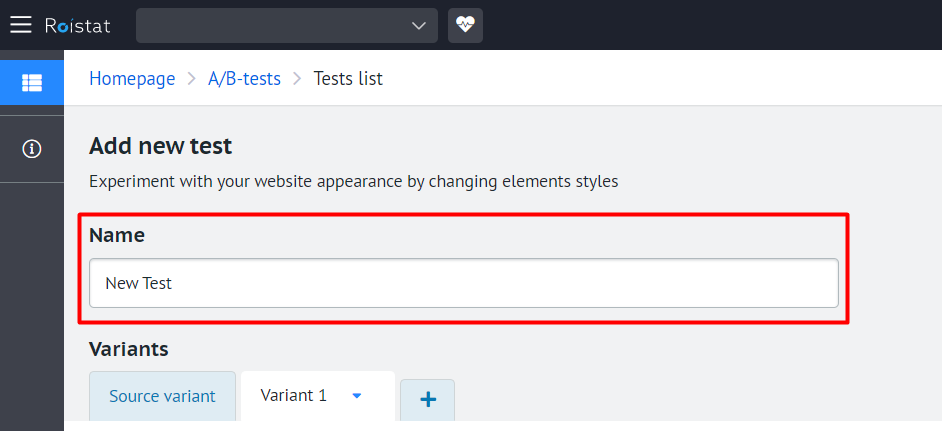
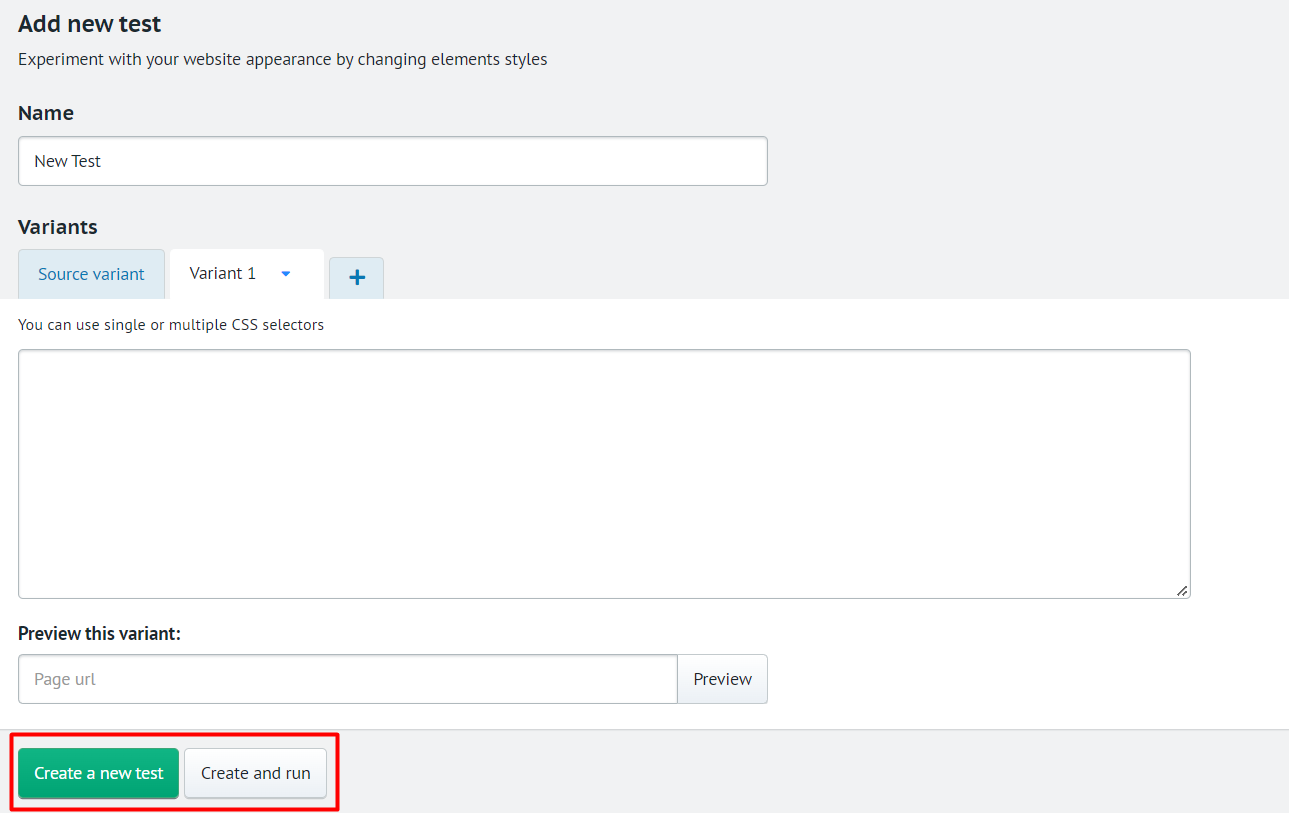
Type the name of a test in the Name field:
-
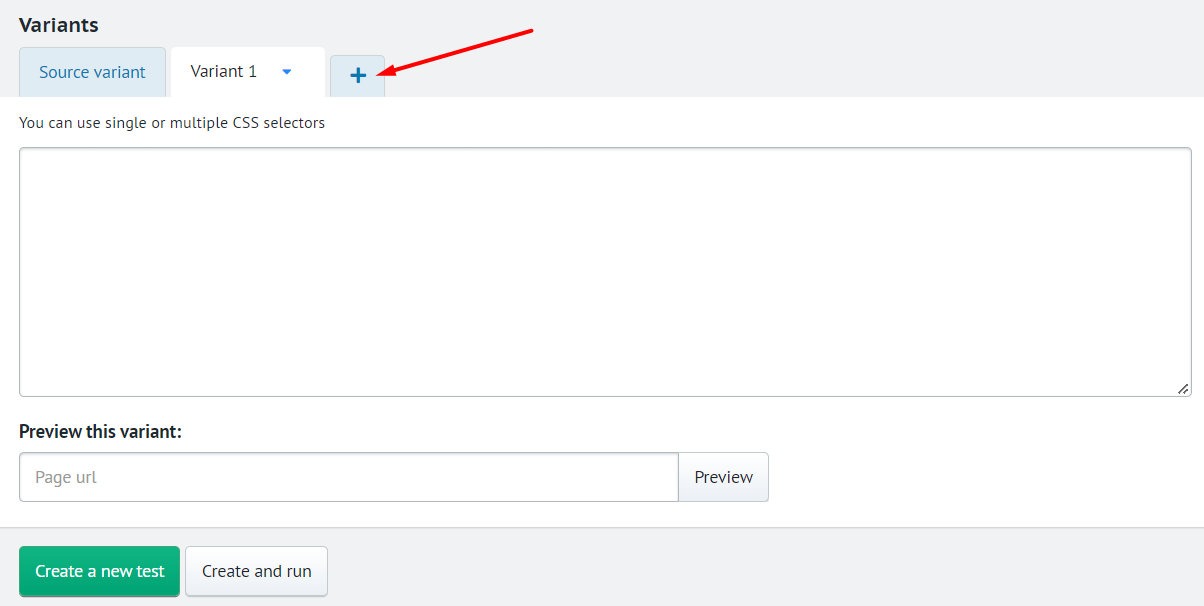
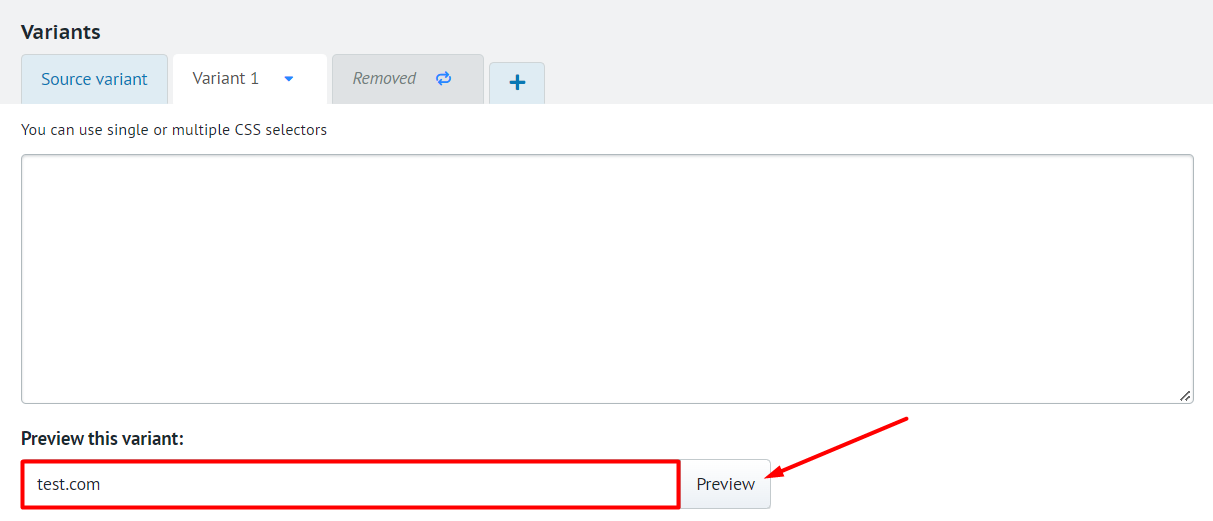
Add at least one test variant in the Variant section. To do this, type a CSS code in the input field on the Variant 1 tab. When you place the cursor into the field, a CSS hint shows up.
The original variant corresponds to the Source variant page. You cannot edit or remove it.
To add more test variants, click on the plus icon:
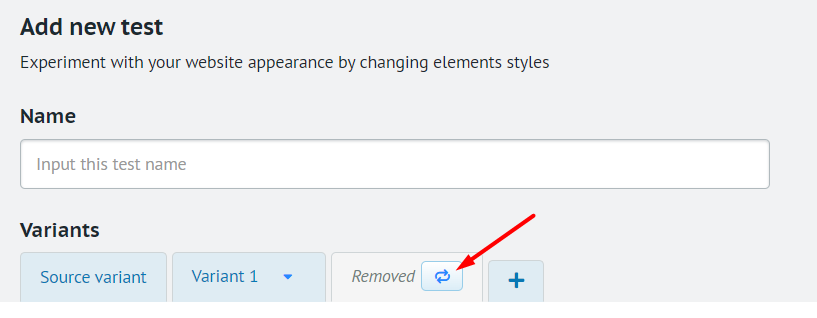
To change the test name or remove it, click on the the arrow icon and select the corresponding option from the drop-down list:
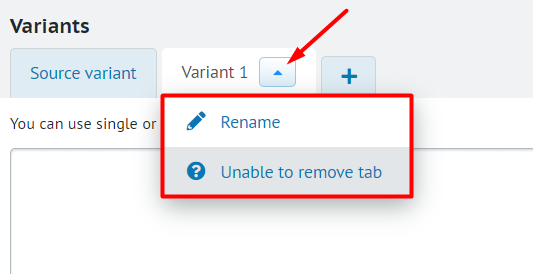
You can restore the tab that you removed:
To enlarge the input field, click on its lower right corner and drag.
-
You can preview web pages with test variants. To get a preview, click on the name of the variant you want to preview, enter the web page URL in the Preview this variant field and click the Preview button:
-
After setting up the test, you can save it for later use by clicking Create a new test, or save and launch it immediately by clicking Create and run:
Programmable tests
To create programmable tests, follow this instruction.
Step 3. Managing the tests
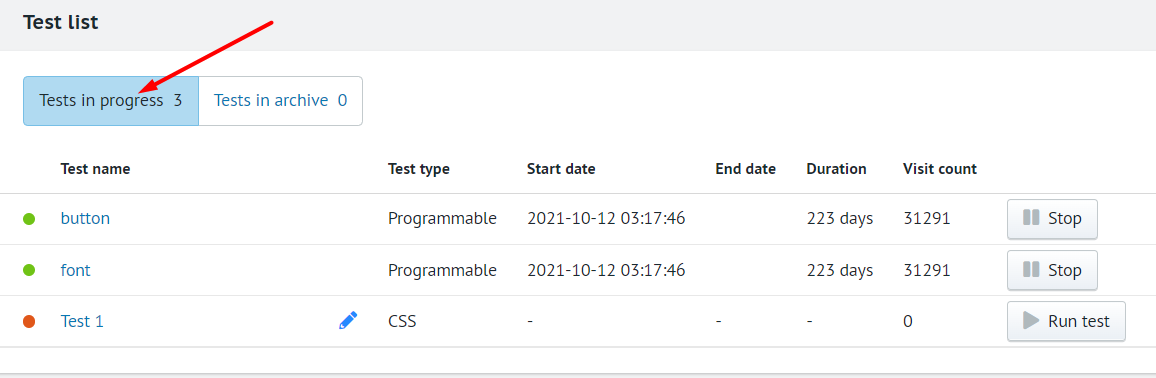
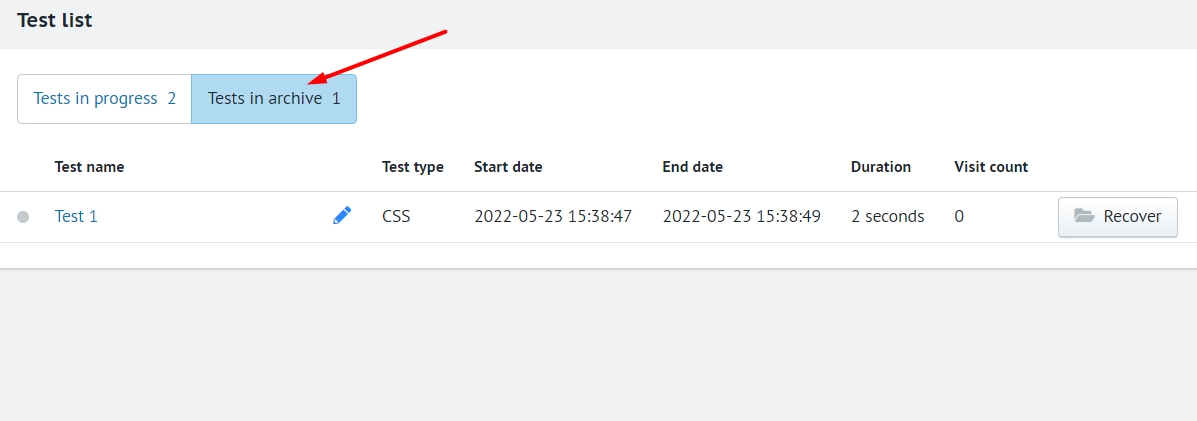
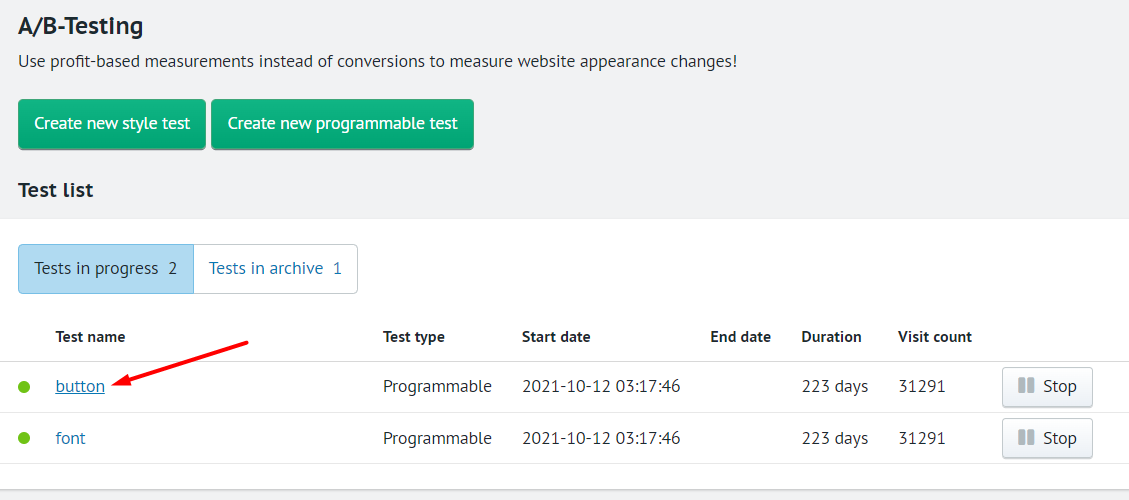
On the A/B-tests page, you can see the list of tests.
The tests are grouped in two categories according to their statuses:
- Tests in progress
- Tests in archive
The number of tests in a category is displayed next to its name.
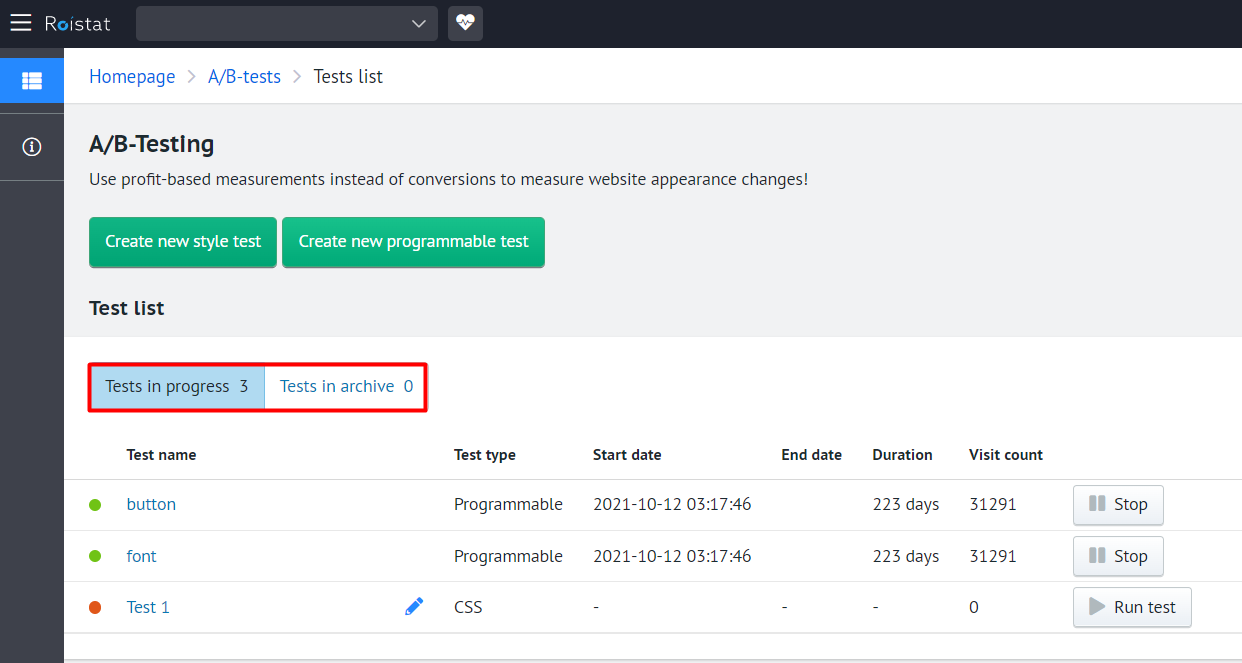
Each test is listed in a separate table row.
The table shows the following data:
- Test name – the title of a test;
- Test type – one of 2 test types: CSS or Programmable;
- Start date – the start date and time accurate within a second;
- End date – the date and time when the test stopped or paused, accurate within a second;
- Duration – the duration of a test (in seconds, minutes, days, etc.);
- Visit count – the number of visits for a test page/website.
On the Tests in progress tab you can manage your tests. Here you can:
- launch, if it's a CSS test, by clicking Run test;
- stop by clicking Stop;
- resume by clicking Continue;
- archive a running test by clicking Archive;
- edit a CSS test by clicking the pencil icon.
On the Tests in archive tab you can manage your tests. Here you can:
- restore by clicking Recover – the test will appear on the Tests in progress tab after clicking on the tab's name;
- edit a CSS test by clicking the pencil icon.
Step 4. Viewing and evaluating the results
Click the test name to view the report on the test:
You will see a detailed report for each test variant:
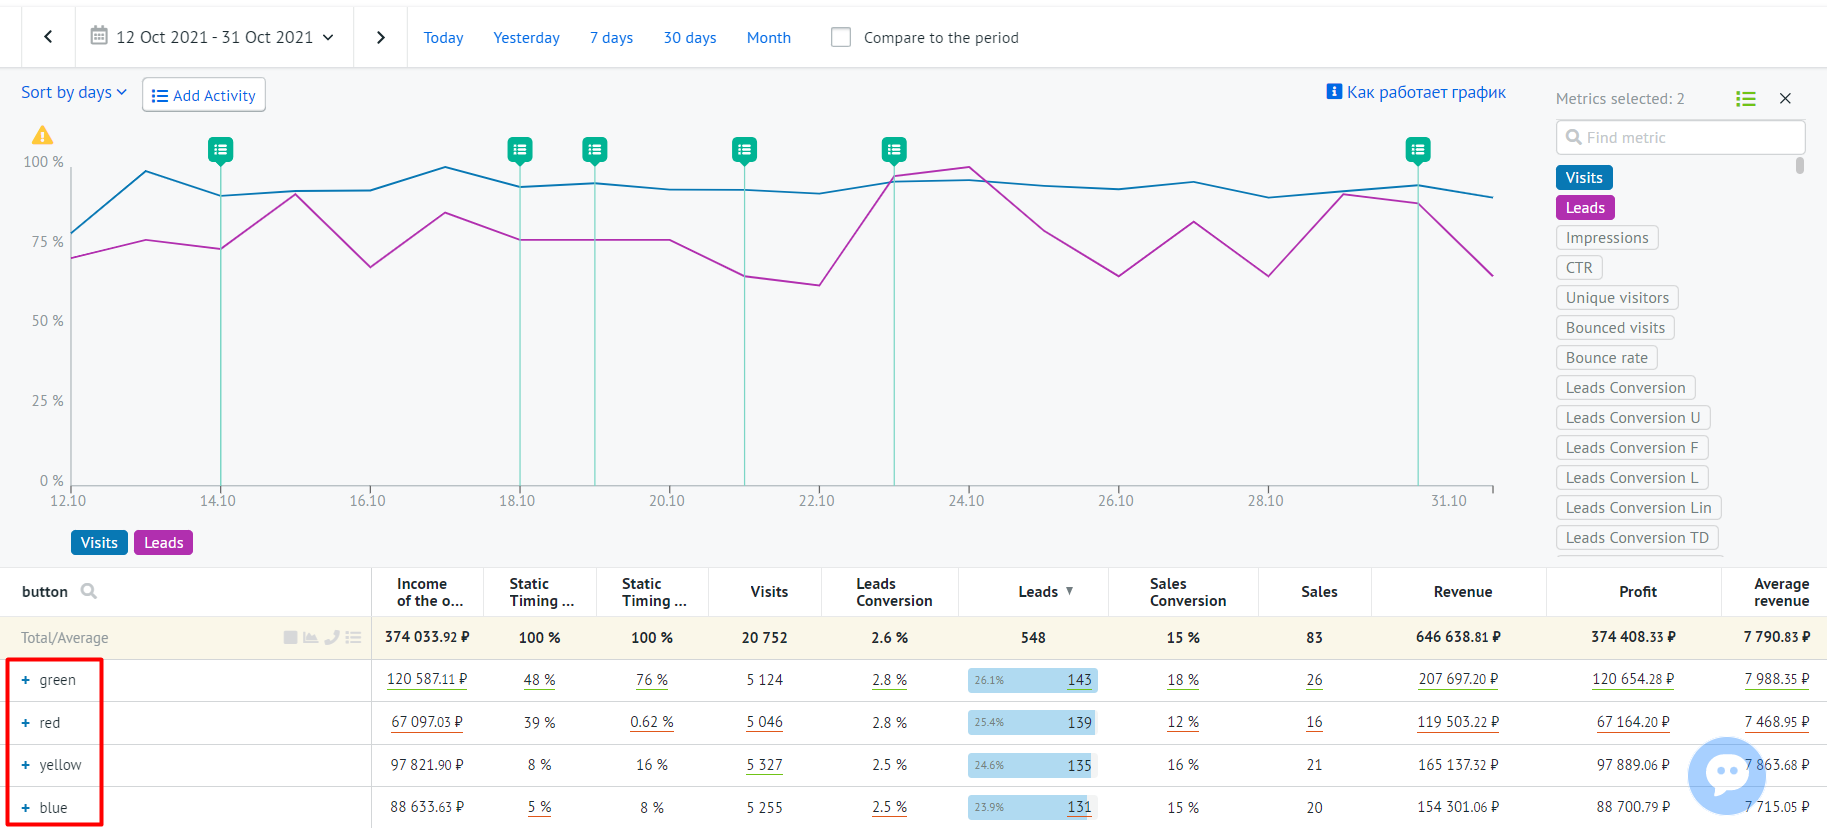
To view the deals list, expand all the sections and press the corresponding keyword set:
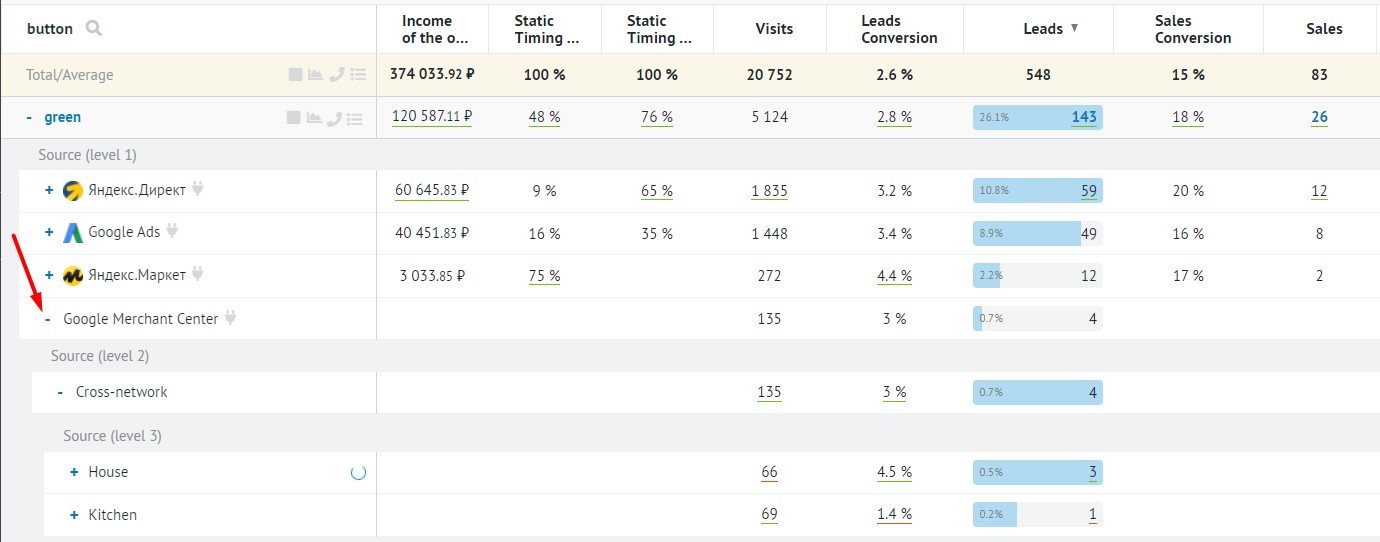
The table contains data for the following metrics:
- Income of the Option
- Static Timing Analysis
- Visits
- Leads Conversion
- Leads
- Sales Conversion
- Sales
- Revenue
- Profit
- Average Revenue
- Cost
- CPO
- ROI
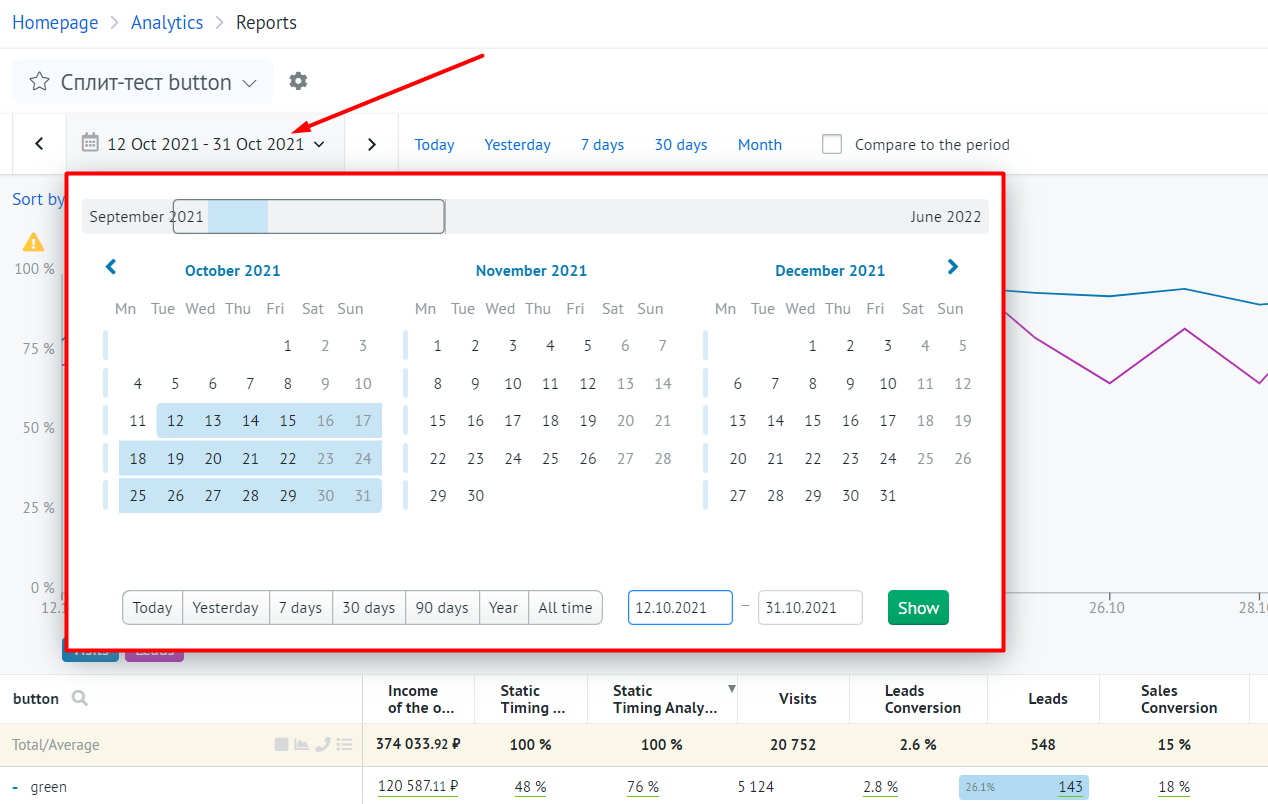
You can manage the report data range by clicking on the date in the upper left corner of the report page:
There are two key metrics that measure the probability of one variant to outperform the others. They are:
- CBA is the probability based on visit-to-lead conversion. It's used if the sales cycles are long, e.g., the sale occurs in several months since the first visit;
- CBA+ is the probability based on profit. It's used in most cases, as this metric is based on profit and reflects the test variants profitability.
If there is one variant that is clearly outperforming the others and the gap is huge, it means that the test reached its confidence interval and the current winner can hardly lose. This is a signal for you to stop the test: you've got the variant that will definitely win and bring you much more profit.